

Display Options for Reports
There are several options you can use in reports:
Display Certain Table/Fields
If your database has a lot of tables and fields, you may have a long list to choose from in step 2 of the report wizards, making it difficult to know which fields to select. To make things easier, run the Analyze Reports function in the Tools menu. This function goes through all reports and marks each table and field used as a "favorite" This may take some time to run, depending on how many reports you have.
After you've run this function, step 2 in the report wizards displays a  button beside Table. If you turn this on, the table and field lists show only those tables and fields marked as "favorites." Turn it off again to display all tables and fields.
Display Image for a Record
Student Manager Reports can display images stored in a database in a report. Do the following:
Create a Quick Report as you normally would.
Turn on the Advanced layout setting in Step 5 of the Quick Report Wizard, then click the Edit button to bring up the Advanced Report Designer.
Add a picture object to the report.
Choose Expression or variable name for the image source type and enter the "real" table and field name (for example, "CUSTOMER.IMAGE") for the Image source. Alternatively, you can bring up the Expression Builder and select the desired field there.
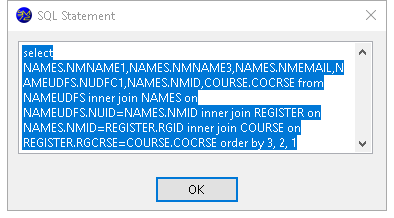
Display SQL Statement for Report
Student Manager Reports uses the SQL language to query a database. If you want to see the SQL statement generated for a report, right-click the report in the Reports Explorer and choose Show SQL Statement from the shortcut menu. The SQL statement is displayed in a dialog.
Note
You cannot edit the SQL statement for the report in this dialog; you may do so in the Customize Wizard if you are Advanced user.
Display Most Recent Record
Sometimes you want to see only the most recent record, such as the latest activity for a customer or the most recent invoice from a supplier.
To do that, in step 2 of the Quick Report Wizard, group on the field you want records ordered by, such as customer or supplier name, and in the Grouping page of the Field Properties dialog, turn off Retrieve all records and set Number of records per group to 1.
Then in step 4, sort on an applicable date field, such as activity date or invoice date, and choose descending order.
Because Number of records per group is 1, only one activity or invoice record is retrieved for each customer or supplier, and since the activities or invoices are in descending order by date, the most recent one is displayed.