

 TRAINING GUIDE
To print this training manual, choose the Print option in your browser.
Training Sections
- Getting Started
- Courses
- Names
- Registrations
- Payments
- Running Reports
Terms of Use
By accessing, reading, or using this guide, you agree to be bound by the terms and conditions outlined in this agreement.
This guide is provided solely for the internal training and professional development of authorized employees, students, or participants. You may view and print individual pages for personal, non-commercial use related exclusively to your training.
All content within this guide, including text, graphics, logos, layouts, and software, is the exclusive property of ACEware Systems, Inc. and is protected by applicable copyright and intellectual property laws.
You may not, without the prior written consent of ACEware Systems, Inc.:
- Distribute, sell, lease, or license this material to any third party.
- Modify, translate, or create derivative works based on this content.
- Upload the guide to any public server, network, or file-sharing website.
 800-925-2493 ● info@aceware.com ● support@aceware.com
Website: www.aceware.com ● Help Center: help.aceware.com
Getting Started
Topics covered in this section:
- Launching Student Manager
- Quick Launch Settings
- Screen Options
- Quick Launch
- Adding Records
- Entering Data
- Saving Changes
- Finding Records
- Exiting Student Manager
Launching Student Manager
Double-click the icon on the computer's desktop (or wherever your system administrator placed the shortcut) to start Student Manager.
The Login screen opens. Enter the login information.
See the Remember Me on this Computer topic for information on the feature.
Microsoft Entra Sign On
If your organization has set up Microsoft Entra Sign On, Student Manager will launch the Entra login process instead of the standard Login screen. Contact your ACEware Systems technician to set this up.
- Click the Login button, or press the ENTER key.
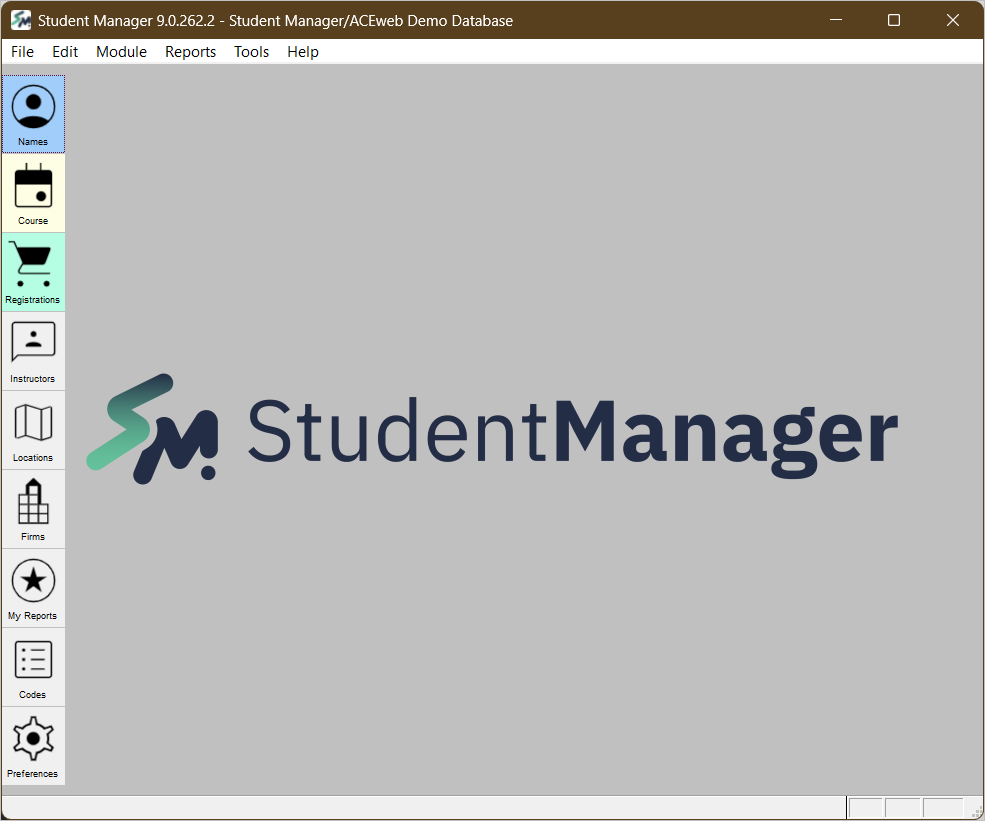
You’ll now be at the main Student Manager screen.
Remember Me on This Computer
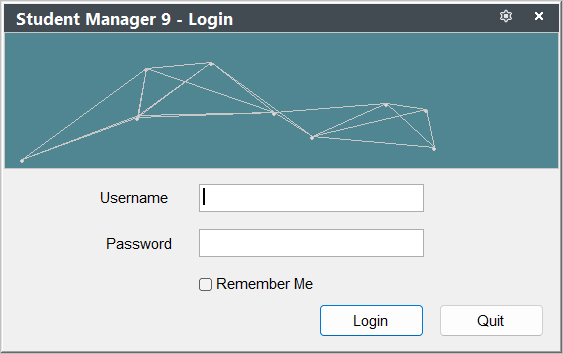
Student Manager offers a "Remember Me" option to remember your user credentials. Checking the Remember Me on This Computer box during the log in process will remember your credentials so you won't need to enter them every time your start Student Manager.
Remember Me
To remember your logon credentials:
- Enter the User ID.
- Enter your Password.
- Check the Remember Me box.
- Click the Login button, or press the Enter key.
Forget Me
To forget your user credentials on this computer, select .
Quick Launch Settings
Set your Quick Launch settings on .
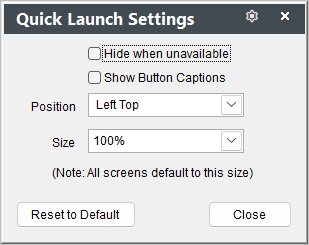
- Hide when Unavailable - if enabled, the Quick Launch toolbar will be hidden when you open screens. For example, if you click Preferences, the toolbar is hidden until you close the Preferences screen.
- Show Button Captions - if enabled the icon captions show under the icons (e.g. Names, Course, Registrations, etc.)
- Position - where the Quick Launch toolbar is located on the Student Manager screen (e.g. Left Top, Left Center, Right Top, etc.).
- Size - set the scale size of the toolbar.
Default Size (Scale)
Student Manager uses your Windows Display Scale setting as the default Size. To check or change this, go to .
The size you select here applies to all Student Manager screens — both the screen layout and text. You can adjust a specific screen with the Screen Settings.
Student Manager Screen Options
By default, the size and text size of Student Manager screens such as search windows, Names screen, Course screen, etc. will use the Size you set on the Quick Launch Settings.
You can adjust the size on individual screens by selecting the icon in the screen header then selecting a size option.
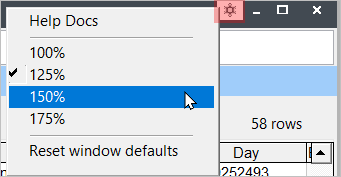
- Help Docs - open the Help Docs page for the selected screen in your browser (e.g. Names Help Docs page if you have the Names screen selected).
- Size - select a different size (screen and text) for the open screen. With 9.0.264.0 and later, Student Manager will remember the scale size you select the next time you open the screen. For example, if you set the course screen to 150%, the next time you open the course screen, it remembers that size option.
- Reset window defaults - reset screen position, size, scale, and text size to the defaults.
Quick Launch
Access popular routines from the Quick Launch toolbar.

Set your Quick Launch settings from .
Right-Click Menus
Some Quick Launch icons have menus of additional options you can access by right-clicking the icon.
Icons that offer right-click menus:
Names - options to view names, add a name, or import names.
Course - options to view or add courses.
Registrations - options to view registrations, add a registration, or import registrations.
Registrations - options to run My Favorites or Global Favorites.
Preferences - options to view Preferences and Quick Launch Settings.
Student Manager administrators can also access Email Settings, Auto Tasks, and Password Maintenance.
Add Records
There are several ways to add records to a table:
File > New Menu
Select an option from the File > New menu to create a new record in the selected table. For example, to create a new Name record, select .
Module Menu
Select Module > appropriate module > Add to create a new record. For example, to create a new Course record, select .
Quick Launch Menus
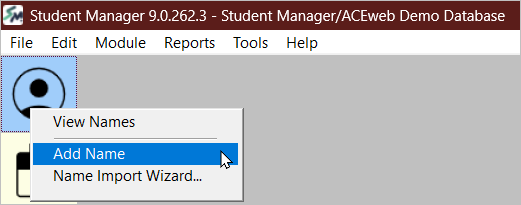
Some Quick Launch icons provide a right-click menu that includes an Add option. This is the Names icon example:
Explorer Window
You can add records from the Explorer Window by clicking the Add button.
Shortcut Key
Use the appropriate shortcut key from the Main Student Manager screen to create a new record. For example, to create a new Name record, press ALT+A.
Entering Data
Here are some hints to help you easily enter data in records:
Move to Next Tab
Most screens have data organized into Tabs. YOu can move to the next tab by using the Ctrl+Tab keyboard shortcut.
Field Capitalization
Many field entries are automatically capitalized (e.g. First and Last Name). For this reason, we strongly discourage using the using the CAPSLOCK key when entering data.
Move to Next Field
Press the TAB key to move to the next field. All screens have a tab order set that is natural to the way you would enter data into the record. For example on a new Name record, tabbing will move you from First Name to Middle Initial to Last Name.
Move to Previous Field
Press SHIFT+TAB to move to a previous field. For example, if you are in the Last Name field and realize that you misspelled the First Name, press Shift+Tab twice to move back to the First Name field.
Fields with Drop Down Lists
When you tab into a field with a drop drown list, the list will automatically open for you to make a selection. Scroll down the list to the value you want to select, or type in the value--the cursor moves down the list as you type. Once you the value highlighted, press the ENTER key to enter the value in the field and move to the next field.
Removing a Value from a Validated Field
To remove a value from a field with a drop down list, click into the field then press the DELETE key. The value is removed from the field.
Fields with Search Icons
In these fields, you enter the value then press the TAB key. If the entry is found, the associated fields will be auto-entered for you. For example, enter a zip code into a Name record then tab out. If the zip code is a valid code (there is a zip code record in the Zip Code table), the system looks up the zip code record then enters the associated city, state, county, country and area codes into the appropriate fields for you.
Checkboxes
You can check/uncheck a box on a screen by clicking the box with your mouse. You may also check/uncheck a box by pressing the SPACE BAR when you tab to the checkbox. Note: a highlighted checkbox’s label is surrounded by a dotted line.
Save Changes to Records
To save changes to the open record:
- click the Save Changes button in the screen footer.
- click the OK/Close button in the screen footer.
Finding Records
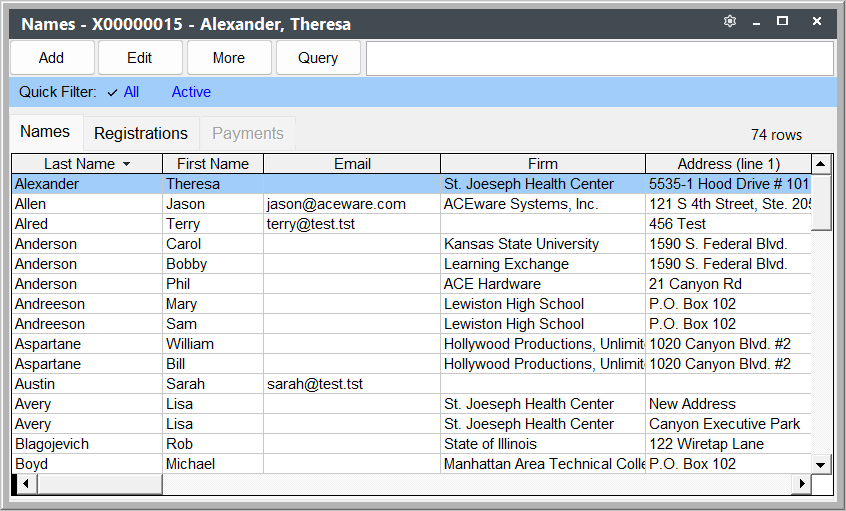
When you select a find routine (e.g. icon on Quick Launch Toolbar or look up option in Main Menu, the Explorer window opens with the list of records in that table so you can search for the record you want to open.
Searching for a Record
- Type a search term and the system will return records containing your search term
Disable 1st Word Auto Search
By default, the Explorer searches as you type. If the Disable 1st Word Auto Search system preference is enabled, the search will wait until you finish the first word — either by typing a space to start a second word or pressing ENTER — before it searches.
Name Search: Student Manager supports partial name searches. You can enter 2 or 3 characters of the last name, a space, then 2 or 3 characters of the first name (e.g. hav ch).
Date Search: enter the date in mm/dd/yy format. You can also enter a partial date, e.g. 06/02 (June 2nd).
Quick Filter
The Explorer window offers quick filters you can choose.
For example, on the Course Explorer, you can filter All courses, Active courses, courses you have bookmarked, or courses matching your query.
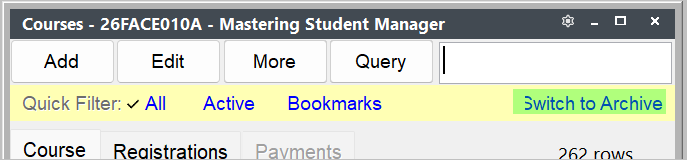
You can also click the Switch to Archive link to switch to Archived courses (highlighted in green):
Inactive Courses
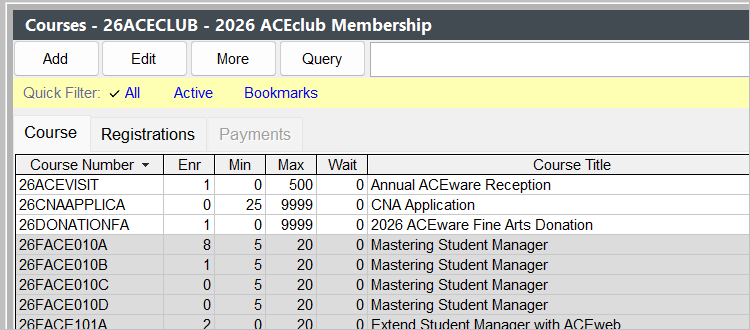
If you have the All quick filter selected in courses, inactive courses will be grey:
Search Keys
You will have several search keys depending on what Explorer you are accessing. For instance, in the Names Explorer, you can search for records by Name, ID, Firm, Zip Code, Day Phone, Evening Phone, Email, Birthdate.
The Explorer will return records that have your search value in any of the searchable fields.
Queries
If you need to search for records that are not in the Search keys, you can use the Query option. See the Search Queries topic for more information.
Adding Columns
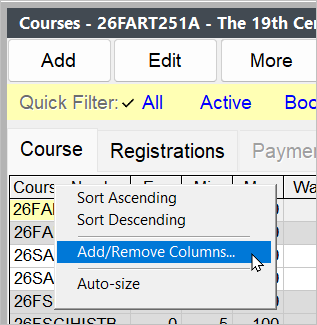
Each Explorer window has a default set of columns it displays. You can add columns by right-clicking a column header (e.g. on the Course Explorer, right-click the Course Number header) then selecting Add/Remove Columns.
On the Add/Remove Columns window, click the Add or Remove buttons to add or remove columns from the Selected Columns list.
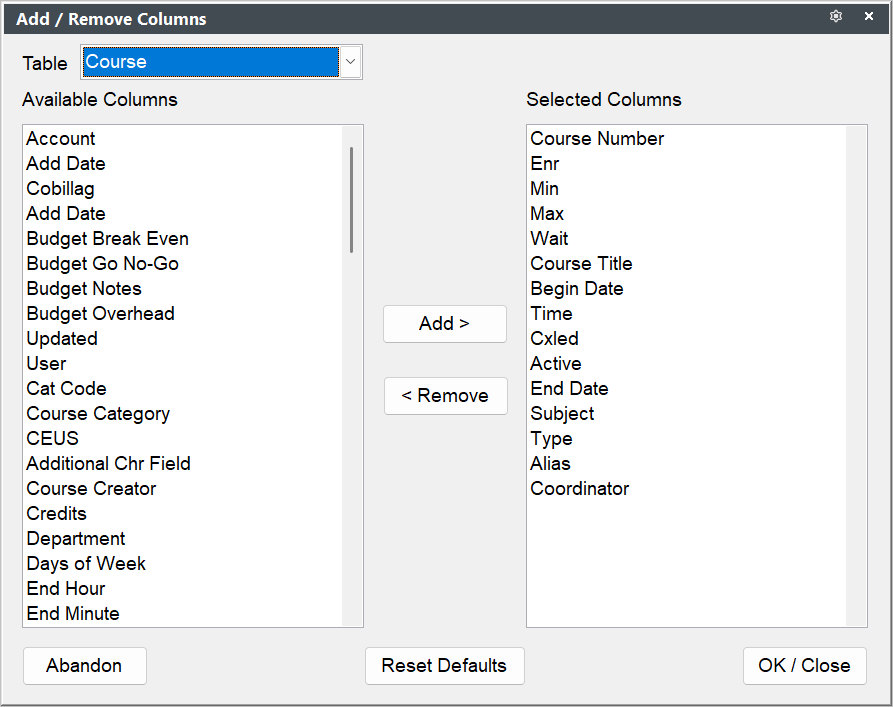
Student Manager will remember your column selection.
Adding UDFs
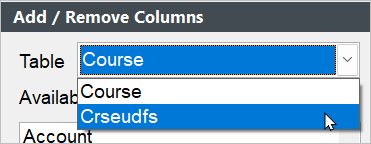
You can also add UDF columns by selecting the UDF option from the Table drop down. For example, select Crseudfs for course UDFs.
Column Sorting
If you have a set of records showing and you want to sort that list, click on the column Header (e.g. Firm, Begin Date) to order the list by the column you clicked.
Clicking it again will reverse the search (e.g. A-Z, Z-A, oldest to newest dates or newest to oldest dates).
Rearranging Columns
You can also rearrange columns by dragging each column to where you want it to display. For example, in this screenshot, the Email field is moved from after the Evening Phone column to after the First Name column:
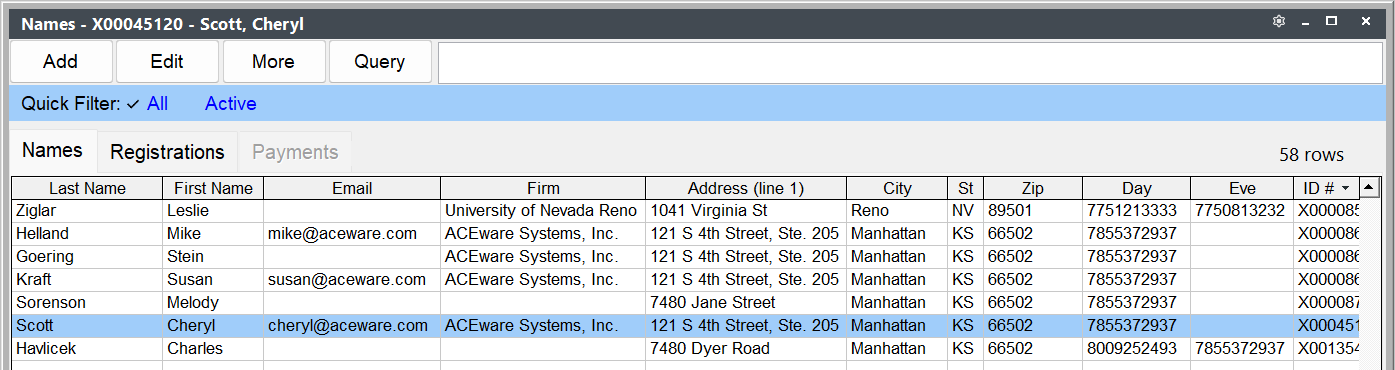
Student Manager will remember you column placement.
Resizing the Explorer Window
You can resize the Explorer window to your desired preferences. Just drag the margins to where you want. Student Manager will remember your customized window width.
Open Record
- Press the TAB or ENTER key to move from the Search field to the list of records.
- If more than 1 record meets your search term, scroll to the record then press the ENTER key, or click the Edit button to open the record.
Viewing Child Records
Names, Course, and Registration Explorers include the ability to view child records of the table.
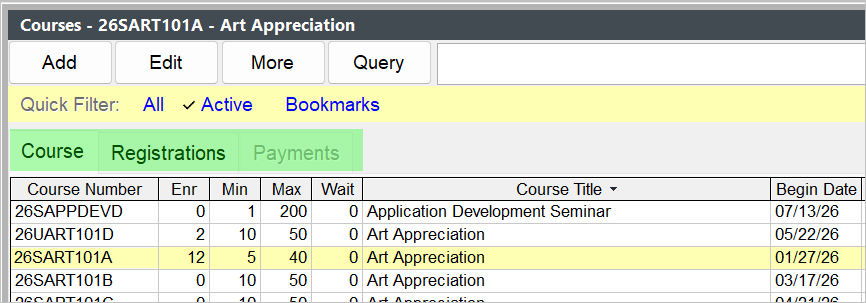
For example, if you click a course record in the Course Explorer, you can see registrations and payments for that course:
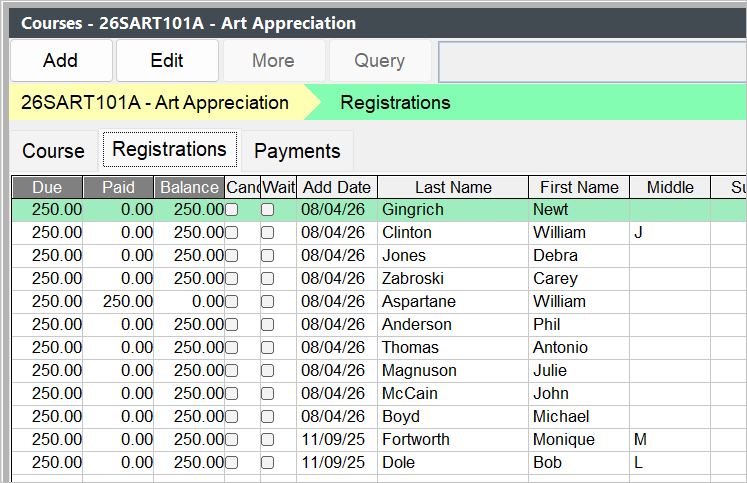
To see registrations, select the Registrations tab:
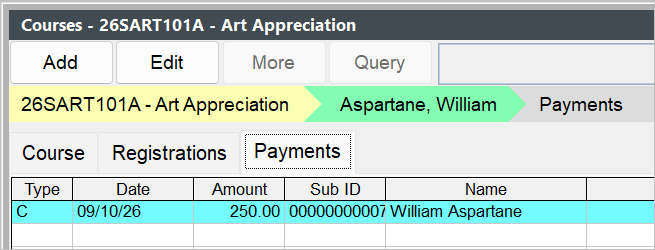
Select a registration then the Payments tab to see payments for the selected registration:
Add Record
You can click the Add button to add a new record to the table (e.g. if in the Course Explorer, click it to add a new course record).
More Menu
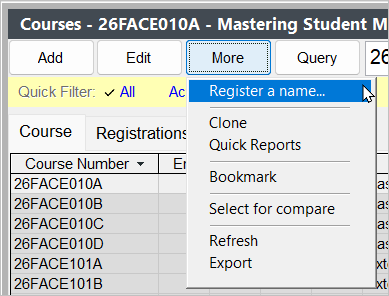
Click the More button to see the menu of additional options for the selected table. For example, in the Course Explorer:
Right-Click to Access Menu
You can also access this menu by right-clicking the Explorer window.
Exit Student Manager
Before exiting Student Manager, you must close all module screens and/or reports. Once you close the module screens, you have 3 ways to exit Student Manager:
- – select to exit Student Manager.
- – press ALT+Q to exit Student Manager.
- - click the X button in the top right of the Student Manager screen.
Courses
Topics covered in this section:
- Add Course Record
- Main Course Fees
- Other Fees
- Assigning Instructors to Course
- Course Documents
- Cloning Courses
- Room Use Records
- Course Status
- F2 Quick List-Enrollment Report
- Mass Change/Update/Delete/Archive (Courses)
- Course Reports
Add Course Record
To add a new course record:
You can add a new course record in the following ways:
- Select or
- Use the Alt+C keyboard shortcut
- Right-click the Courses icon on the Quick Launch toolbar and choose Add Course
Enter the course information.
WARNING
The Save Changes button is not available until you enter a course code value.
- Click the Save Changes button to save your new course record.
Course Code Behavior
By default, the status of new courses is set to Active. You can change that behavior by unchecking the Set ACTIVE field Default to True box on Course Preferences.
The default course type is Open. You can change that in the Default Course Type drop down on Course Preferences.
The course Subject code will be assessed to the student's Interest code list, unless it's already on their list. In that case, the Interest Add Date is updated when the student is enrolled in the course.
Grouping codes can be assigned to courses to categorize courses for ACEweb display and for Certificate programs. You can assign multiple grouping codes to a course.
Main Course Fees
Main Fees are the rate an individual pays when enrolling in a course.
- A course can have an unlimited amount of Main fees (e.g. default rate, senior citizens rate, early enrollment rate, etc.).
- Only one Main fee can be assessed to a registration.
Main Fees are added on the course Fees tab.
Add Main Fee
- Select the Fees tab.
- Click the Add Main Fee button.
- Select the appropriate fee name from the Fee Description list.
Adding Fee Description
If the Fee Description you want to add does not exist, you may add it to the Main Fee Code list by clicking the + button (to the left of the Add Main Fee button).
- Enter the amount in the Amount field.
- If you want to hide this fee from the Web, click the Hide from Web field to turn the button to Yes.
- The Order should be automatically set. The only reason you would change the order is if you're adding an Early Bird fee to the course after you've already entered other fees.
- If you are using the Membership feature, you may need to enter when the membership expires (on membership type courses) or the correct membership code if the rate is for Members.
- Click the Save Changes button to save your Main fee.
Early Bird Fees
You can set up an Early Bird fee to expire on a certain date. It will be the default fee for new registrations until it expires, then the regular fee becomes the default fee.
IMPORTANT
- To use the Early Bird fee feature, you must first enable the Auto Expire Early Bird fees option on Course Preferences.
- You may set a default Expire Day number for Early Bird Registration Fees on the Codes screen.
- The date you enter in step 3 is the date the fee will expire. E.g. if you enter 8/15/2024, the fee will be disabled on that date (i.e. moved to the bottom of the fees list and Hide from Web set).
To set up an Early Bird fee for a course:
- Complete step 1-5 in Adding Main Fees section above. In step 3, select Early Bird Fee.
- If you're adding an Early Bird fee to the course after you've set up other Main fees, set the Order to 1 (the Early Bird fee must be the first fee in the list to work properly). Then set your regular fee to 2.
- Enter the date the fee should expire in the Fee Expires field.
- Click the Save Changes button to save the new fee. If you adjusted the order of fees, they will be reordered when you save the changes.
Fee Expiration Date
While this option is most commonly used with Early Bird fees, you can set other fees to expire too. For example, expire the regular registration rate 7 days before the course starts. After that, registrants are assessed the Late Registration rate.
The fee will be disabled on the Expirate Date you enter (i.e. moved to the bottom of the fees list and Hide from Web set).
Fee Limits
Enter a number in the Max field when setting up course Main Fees to limit how many registrants can receive that fee.
If the limit has been met, the registrant is assessed the next fee in the list. E.g. if you only allow 5 Early Bird fees, the 6th person to register will be assessed the next fee set up in your Main fees list.
ACEweb also supports Fee Limits.
Active Fees
Set a date that the fee is active in the Active column. The fee will not be assessed to registrations until the Active date. ACEweb registrants will not be able to select the fee until it is active.

Hybrid Type
If this is a Hybrid type course, you must set the Hybrid type (Physical or Virtual) for each fee. The system will warn you if you don't have the Hybrid type set on Main fees when you save the course record.
Delete Fees
See the Delete Course Fees topic for instructions on deleting fees set up for the course.
Other Fees
Other Fees are fees/discounts that can be added to the registration. Registrants can be assessed an unlimited amount of Other fees.
There are 3 types of Other fees:
- Optional Fees - additional charges the registrant can be assessed. E.g. supplies package, guest banquet ticket, etc.
Mandatory Fees: you can set an optional fee as Mandatory. E.g. the course requires they pay a Lab fee in addition to the Main fee. Mandatory fees are automatically assessed to the registration when an individual enrolls in a course.
- Inventory Items - inventory items are optional fees for which you are keeping inventory. For instance, you set up the course book as an inventory item. Every time the book is assessed to a registration, the inventory number is decremented. When the Number on Hand reaches the Order Point, you'll be notified it's time to reorder the item.
Note: Inventory items must be set up in the code list before they can be set up in a Course record.
- Coupon Discounts - discounts given to registrants--IF--they have the coupon code associated with the coupon discount (e.g. coupon discont code from a course flyer).
Other Fees are added on the course Fees tab.
Add Other Fee
To add an Other fee to a course:
- Select the Fees tab.
- Click the Add Other Fee button.
- Select the appropriate fee name from the Fee Description list.
Adding Fee Description
If the Fee Description you want to add does not exist, you may add it to the Other Fee Code list by clicking the + button (to the left of the Add Other Fee button).
- Enter the amount in the Amount field.
- Select the Fee type from the Type list (Optional, Coupon, or Inventory).
- If this is an optional fee that should be automatically assessed to registrants, click the Mandatory field to turn the button to Yes.
- Coupon/Inv. Code Entry:
- If this is a Coupon Discount, enter the Coupon code in the Coupon/Inv. Code field.
- If this is an Inventory Item, enter the Inventory code in the Coupon/Inv. Code field.
- If this is an Coupon Use Limit, enter the Coupon Use Limit code in the Coupon/Inv. Code field.
- If you want to hide this fee from the Web, click the Hide from Web field to turn the button to Yes.
- If you want this fee to expire, enter the appropriate value in the Fee Expires field. The default behavior is to enter the date the fee expires. However, if you have the Use Number of Days for Fees Expires course preference enabled, enter the number of days before the course begins.
- If you don't want the fee to be available on ACEweb until a specified date, enter the date into the Active field. The option will not be available until the Active date.
- Click the Save Changes button to save your fees.
Delete Fees
See the Delete Course Fees topic for instructions on deleting fees set up for the course.
Assigning Instructors to Course
Some things to note before assigning instructors to a course:
- Faculty records must be exist before you can assign the instructor to a course.
- Only Active Instructors are listed in the Search window (i.e. the Active box must be checked on the Faculty record).
- If you hit the ESC key to close the Search window, the Faculty record will open in Add mode, for you to add a new faculty record if desired. Click the Abandon button if you don't want to add a new faculty record and you will be returned to the Course Instructor tab.
- The Pay Date will default to the Course End Date. The Account and Sessions will default to the Course Account and # of Sessions. Any of this information can be changed after assigning the instructor.
- If you set the default Expense Class for Teacher Pay on Faculty Preferences, the default Expense Classification will be entered for you. This can be changed after assigning the instructor.
Assign Instructor
- Select the Instructors tab.
- Click the Add Instructor button.
- Select the appropriate instructor from the list.
- You'll be returned to the Instructors tab and the Instructor's name will appear in the Current Instructor field.
- Enter/edit the desired Instructor Pay information (e.g. pay type, amount, pay date, etc.).
- The Presentation Information will default to corresponding course entries. You can edit this information if desired.
- You can create an instructor pay record in Pocket Ledger by clicking the Post to Ledger button after pay details are entered.
- Click the Save Changes button.
Assign Additional Instructor
To assign another instructor to the course, click the Add Additional Instructor button then complete steps 3-8 above.
Each instructor will have his/her own payment/presentation record. To view a specific instructor’s information, select the appropriate instructor from the Current Instructor list.
Scoping Instructor List
You can scope your list of instructors by Subject. If you have this feature enabled, only instructors who have a Subject Code that matches the Subject Code entered on the course record will appear in the Select Instructor window. For example, instructors with a subject code of MATH will appear in the Select Instructor window for courses whose subject code is also MATH, but not in courses whose subject code is ENGLISH.
To enable Subject Scoping, open the Course Preferences screen and check the Subject Scoping (Viewing Instructors) option.
Check Schedule Conflicts
If you have the Check Instructor Schedule Conflict preference enabled on Faculty Preferences, the system will check for instructor scheduling conflicts after you select the instructor (step 3 of the Assign Instructor section above).
- You will be notified if it finds a conflict.
- You will be notified if the instructor is not available on the day(s) the course meets, as set on their Faculty record.
- If the course has multiple instructors with conflicts, you will see the name of instructors who have a conflict.
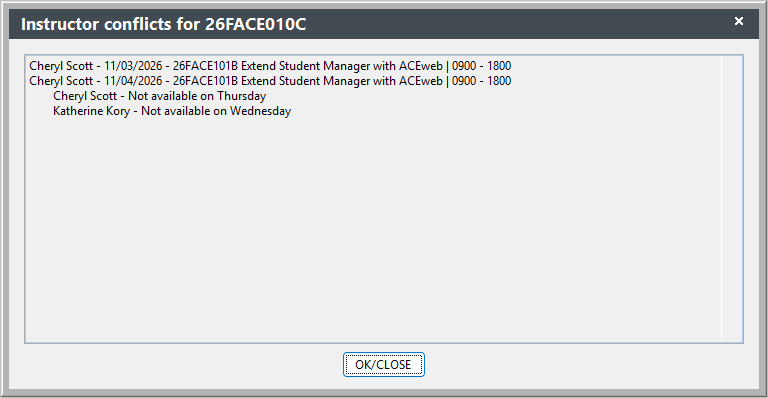
Click the OK/Close button to close the Instructor Conflict window. You'll be returned to the Instructors tab and the Instructor's name will appear in the Current Instructor. You can then remove the instructor if desired.
View Faculty Manager Record
You can view the instructor's Faculty record by selecting the appropriate instructor in the Current Instructor list, then clicking the Edit Instructor Record button. This button opens the Faculty screen to the selected instructor's record.
Remove Instructor
To remove an instructor from a course, select the appropriate instructor from the Current Instructor list, then click the Remove Instructor button. You'll be asked to confirm the removal. Click the Yes button.
The instructor will be removed from the course. Note: this does not remove the instructor's Pocket Ledger record. You must delete it manually.
Register Instructor in Course
If you also need to register the instructor in the course:
- Click the Reg Inst in this Course button.
- A Name record must be created for the instructor, if they don't already have one. Choose the appropriate option:
- Make new student record - a new Name record is created for the instructor and the registration process begins.
- Link to existing student record - the Name Lookup window opens for you to select the Name record. After selecting the Name record, the registration process begins.
Course Documents
You can view and validate documents that have been uploaded for the specific course by clicking the Course Documents button on the Course screen.
Click the document to open it in the correct program (e.g. if a .doc type, will open in Microsoft Word).
If the uploaded document is the correct one, change the Valid value to T:

Click the Save & Close button to save your changes.
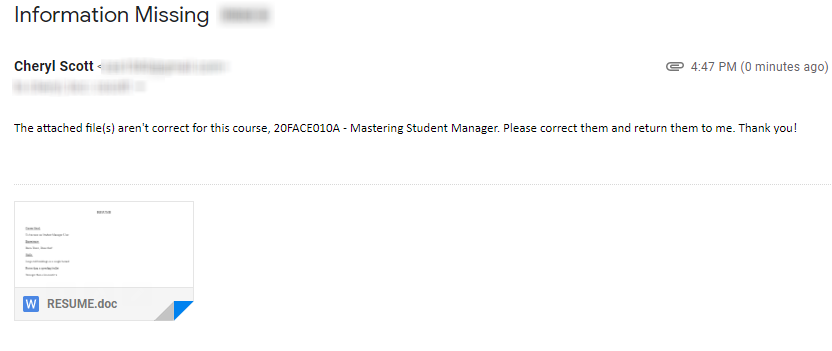
If you have invalid documents, you can click the Email Invalids button to send an email to the students that they have uploaded the wrong document:

The ##cocrse## and ##cocrsenm## will evaluate the course ID and Title when the email is sent. You can also add additional text to the email message.
Click the Done button to send the emails.
Cloning Courses
Cloning a course allows you to copy the selected Course record information into a new Course record (including fees, location, instructor, and notes). All you'll need to do is change the course code (e.g. change the semester or section characters) and enter the dates of the new course.
This is a great help when scheduling multi-sections of a course in a given semester, or when scheduling the course in future semesters.
Cloning Single Course
To clone a single course:
- Open the course record you want to clone.
- Click the Clone Course button.
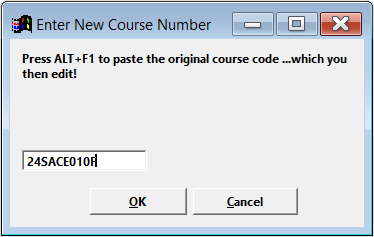
- Enter the course number that will be assigned to the new course record then click the OK button.
- If the existing course record has associated Budget, Pocket Ledger, or Workshops records, you'll be asked if you also want to clone those records. Select the appropriate option.
- A new course record is created with the course number you entered, and the information from the original record is copied into it (except for the Course dates).
- Enter the Course Begin Date and make any necessary changes to the new course record (e.g. course code, location, days meeting, times, etc.).
- Click the Save Changes button to save the new course record.
Cloning Multiple Courses
To clone multiple courses:
- Select .
- Enter the Replacement String. For example, if 25S if you want to replace the first 3 characters of the course code with 24S.
- Choose which field to place the cursor in.
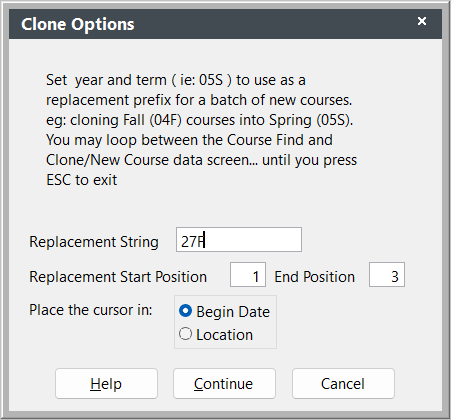
- Click the Continue to start selecting courses to clone.
- The Search window opens for you to select a course to clone. Select the course.
- The new course record opens with the course code string replaced wit the string you entered in step 2 and the cursor in the field you selected in step 3.
- Enter the course information then click the OK/Close button to close the new course record.
- The system returns you to the Search window for you to select the next course to clone. Repeats steps 5-7 until you have all the courses cloned.
Close the Search window when you have finished cloning courses and it will close you out of the Cloning routine.
Mass Cloning Courses
You may clone a batch of courses (i.e. all courses for a semester) with the Mass Cloning feature. This feature allows you to set the semester designation and determine what part of the course code to replace. The selected options will be applied to all the courses you select for cloning during this session.
- Select to open the Mass Clone of Courses screen.
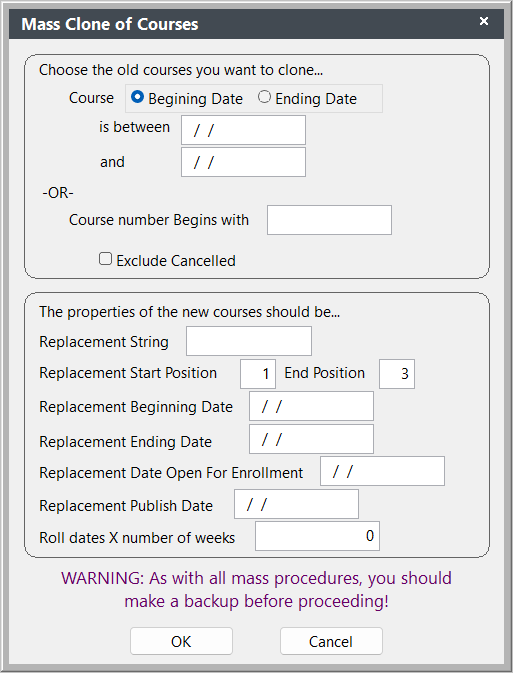
- Choose the old courses you want to clone. E.g. courses beginning with 24S or courses between 2 dates.
- Enter the Replacement String (i.e. if you are cloning courses for the Spring 2024 semester, you would enter 24S). Check Exclude canceled if you don't want to clone canceled courses.
- Enter the Start and End Position of course code that should be replaced. E.g. start position=1 and end position=3 if replacing 24S with 25S.
- Choose the Date option: if you want all courses to begin and end on the same dates, enter Replacement Beginning/Ending Dates, etc.; if you want to start so many weeks after the original course records, enter the number of weeks to roll dates.
- Click the OK button.
- The Mass Clone list opens with the courses the system will clone. Uncheck any you don't want to clone then click the Done button.
- The system will ask if you want to clone Budget, Pocket Ledger, or Workshops records for the courses. Select the appropriate option.
- The system will notify you of how many new course records were created.
Room Use Records
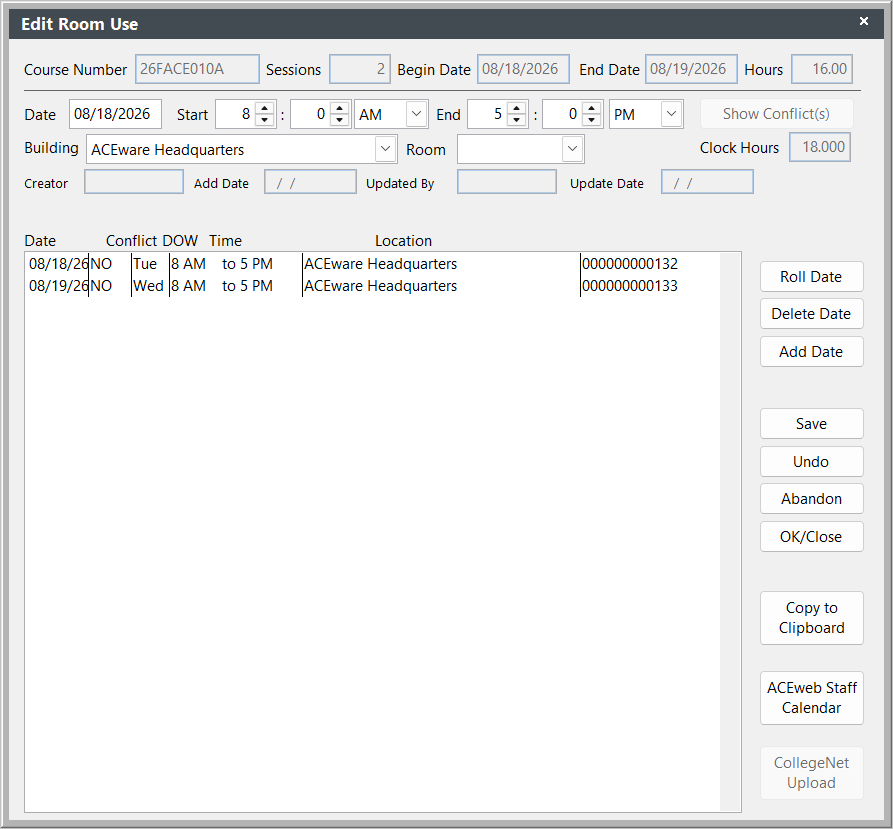
After you set the course date, time, and location information, the system creates a list of session records. To view the session list, click the Room Use button.
Room Conflicts
When you save the course record, the system *checks to see if you have any other courses scheduled at the particular location during the date/time you specified. If there is a conflict, the system shows you a list of courses that conflict.
Click the OK/Close button to close the notice, then make any necessary changes to the course schedule to clear the Room Conflict.
You can also see room conflicts by clicking the Room Use button to open the Edit Room Use screen.
If there is a conflict, the word 'YES' will appear in the Conflict column.
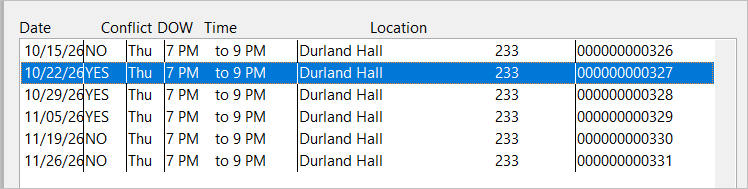
Highlight the session then click the Show Conflict(s) button to see the room conflicts.
*You can disable this option on Course Preferences by unchecking the Enable Room Conflict Checking box.
Customize Room Use Records
Course Room Use records are customizable. You may change the Session Date, Start Hour, Start Min, End Hour, End Min, and Location of each session. For instance, you may need to schedule one session at a different location, or change the meeting time of a session.
To customize the Room Use records:
- Open the course record.
- Click the Room Use button to open the Edit Room Use screen.
- Highlight the record you want to change.
- Make the necessary changes in the Date, Start, End, Building, and Room fields (e.g. change the End hour on a session).
- Click the Save button to save your changes. T
- Click the OK/Close button to close the Edit Room Use screen.
You can also delete a session, add a new session or roll a session date to the next available date (as per days meeting set on the course Main tab).
Rolling a date will also adjust any sessions after the date rolled.
Reset Room Use Records
If you have customized Room Use records and want to reset the records to their original values:
- Click into the # of Sessions field (to the right of the Course Begin Date field) on the course record then Tab out of the field.
- You’ll be notified that if you reset the records, any custom room use records will be deleted. Click the Yes button to reset the Room Use records.
Clone Room Use Records
Create another set of course Room Use records for a course at a different location. E.g. one set at ACEware Headquaters, and another set at Holiday Inn.
To run this tool:
- Select .
- Enter the Course Number.
- Select the New (additional) Room to assign.
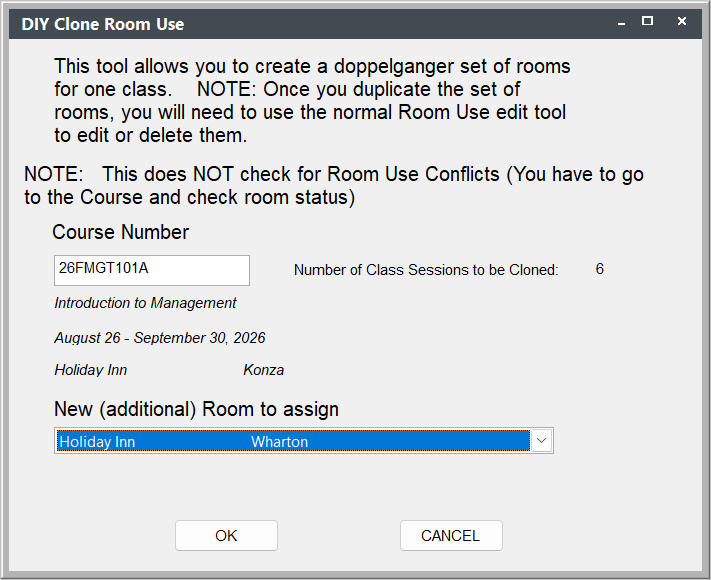
- Click the OK button.
- Confirm the Room Use clone procedure.
- You will be notified how many records were cloned.
You can now open the course record and click the Room Use button to modify the room use records, if necessary.
Course Status
When you create a course record, it’s Active by default (Active box is checked)--IF--you have the Default Value for Active Field option enabled on Course Preferences.

Active courses show in Add Registration routines, and they show in ACEweb Course Listing (if the course meets the other ACEweb course listing criteria).
Other Course Status Options
These are the other status options and how they impact course behavior:
Inactive Course (Active box not checked)
Inactive courses do not show in the available courses listings when you register an individual from the Names screen --AND-- when you register an individual from . In addition, inactive courses do not appear in ACEweb course listings.
Deactivating a course (unchecking the Active box) will not impact your reports (unless you run a query that specifically excludes deactivated courses). And if you find you need to add a registration after deactivating it, you may still do so from the course explorer's Registrations tab (Add button), or from .
To deactivate a single course, un-check the Active field. To deactivate a series of courses, run the Mass Change/Update/Delete/Archive procedure.
Cancel Course (Cancel box checked)
Canceling a course removes it from all Registration routines. In addition, canceled courses will not be included in most reports unless you specifically request to include canceled records in the report. To cancel a course without registrations, check the Cancel box. To cancel a course with registrations, run the Cancel Course Wizard.
Locked Course (Locked box checked)
Locking a course restricts all users from making any changes to the course record, registrations, or payments (useful for accounting purposes to lock records after a course has finished).
To lock a single course, check the Locked field. To lock a series of courses, run the Mass Change/Update/Delete/Archive procedure.
F2 Quick List-Enrollment Report
Search for courses, and view or print enrollment counts.
To run the Quick Counts report:
- Press the F2 key anywhere in Student Manager except the Reporting Menu (i.e. from the Main screen, when you have the Course screen open, etc.).
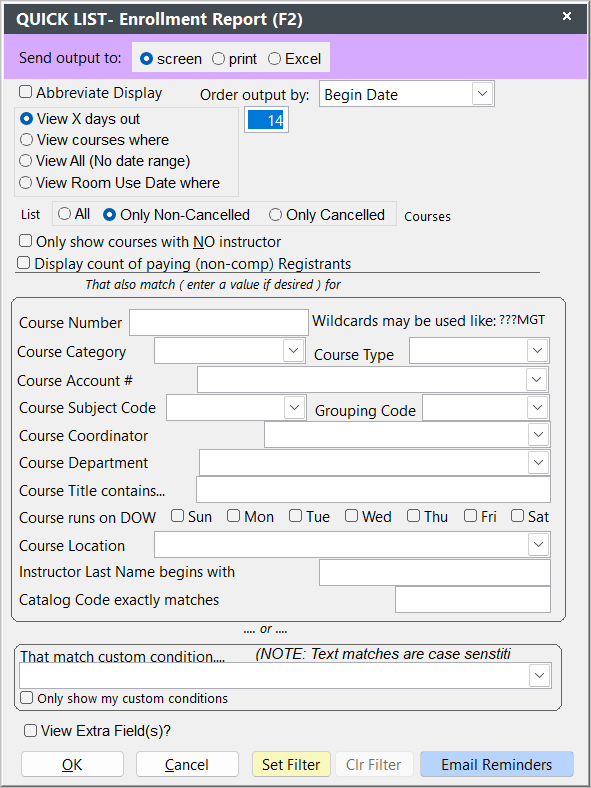
- Select the Report options.
- Click the OK button.
- The Quick Counts list will now open, showing the course #, name, location, beginning dates, days and times course meets, and enrollment counts including wait-listed count. To close the list, press the ESC key.
- If you selected the Print Output option, you'll be asked if you want to print the report. Click the OK button to print the report.
Custom Conditions
You can search for courses based on a specific Course field with the Custom Condition option, e.g. cocategory="Conference".

Setting Filters
You can set a filter to a subset of courses using the selected criteria, so that only those courses show when using the active course lookup, or when adding a registration from a name screen.
To set a filter, enter your course criteria on the F2 Quick List screen, then click the Set Filter button.
When a filter is set, it will be indicated on the course lookup screen with red text:
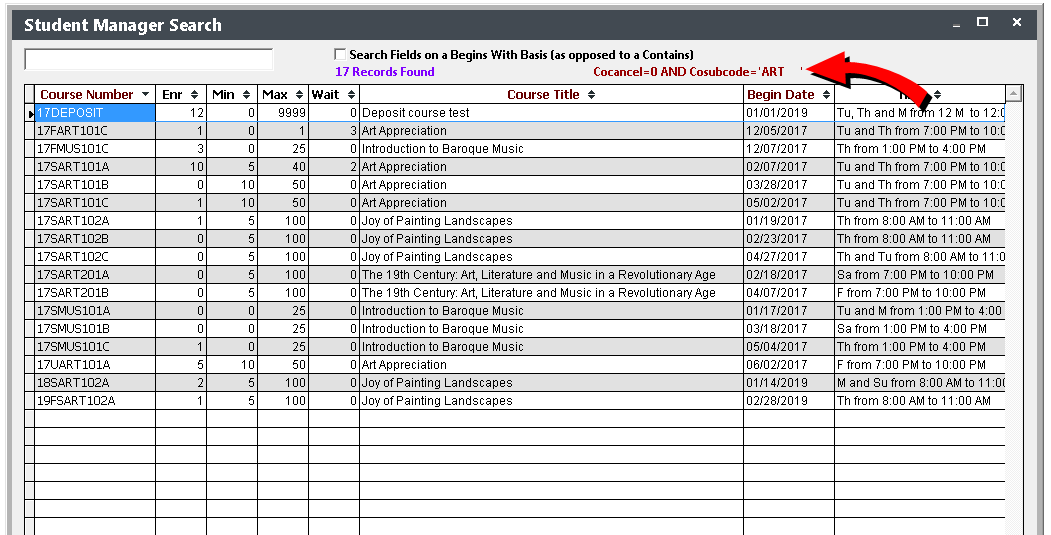
To clear a previously set filter, click the Clr Filter button on the F2 Quick List screen.
Notes:
- Filters are user specific, so it will not impact other staff members using Student Manager.
- Filters do NOT apply or override reporting queries, they are only for the course lookup and registration add screens.
- You can still use the F2 Quick List tool to perform other course searches, the filter will stay until you clear it.
- Setting a new filter will clear any previous filter that was set.
Save/Show Custom Conditions
After your custom conditions runs, you'll be asked if you want to save it:
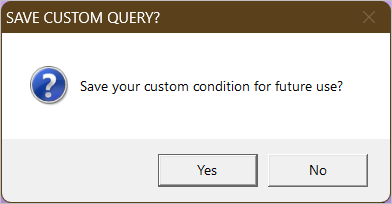
If you save it, the next time you run the Search Tool, you can click the drop down to see saved custom conditions.
Only Show My Custom Conditions - if you check this box, when you click the drop down you will only see the custom conditions you have created.
Mass Change/Update/Delete/Archive (Courses)
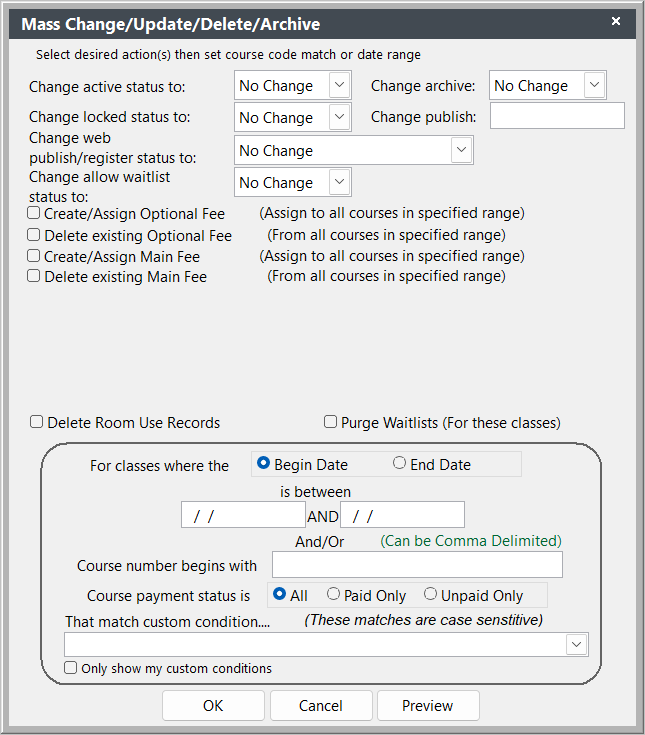
The Mass Change/Update/Delete/Archive tool allows you to perform various actions for a series of courses.
To run Mass Change/Update:
- Select
- Press ALT+1
Activate/Deactivate Courses
- Select the appropriate item from the Change Active Status to list (e.g. Active to set selected courses to Active status).
- Enter the course criteria. You can select courses based on:
- Beginning or Ending date.
- Course number. You can use wild cards with the course number criteria, e.g. ??F would perform the action on all courses which have an 'F' as the third character of the course code. You can also enter a comma-separated list of course beginning values, e.g. 26S,26F,26U.
- Once you enter your criteria, the Preview button becomes available. Click it to view the courses which will be changed.
- After previewing the course changes, click the OK button to make the changes.
Lock/Unlock Courses
- Select the appropriate item from the Change Locked Status to list (e.g. Locked to set selected courses to Locked status).
- Enter the course criteria. You can select courses based on:
- Beginning or Ending date.
- Course number. You can use wild cards with the course number criteria, e.g. ??F would perform the action on all courses which have an 'F' as the third character of the course code. You can also enter a comma-separated list of course beginning values, e.g. 26S,26F,26U.
- Once you enter your criteria, the Preview button becomes available. Click it to view the courses which will be changed.
- After previewing the course changes, click the OK button to make the changes.
Change Web Publish Property
- Select the appropriate item from the Change Web Publish/Register Status to list.
- Enter the course criteria. You can select courses based on:
- Beginning or Ending date.
- Course number. You can use wild cards with the course number criteria, e.g. ??F would perform the action on all courses which have an 'F' as the third character of the course code. You can also enter a comma-separated list of course beginning values, e.g. 26S,26F,26U.
- Once you enter your criteria, the Preview button becomes available. Click it to view the courses which will be changed.
- After previewing the course changes, click the OK button to make the changes.
Change Allow Waitlist
- Select the appropriate item from the Change allow waitlist status to list.
- Enter the course criteria. You can select courses based on:
- Beginning or Ending date.
- Course number. You can use wild cards with the course number criteria, e.g. ??F would perform the action on all courses which have an 'F' as the third character of the course code. You can also enter a comma-separated list of course beginning values, e.g. 26S,26F,26U.
- Once you enter your criteria, the Preview button becomes available. Click it to view the courses which will be changed.
- After previewing the course changes, click the OK button to make the changes.
Change Publish Date
- Enter the date into Change Publish field.
- Enter the course criteria. You can select courses based on:
- Beginning or Ending date.
- Course number. You can use wild cards with the course number criteria, e.g. ??F would perform the action on all courses which have an 'F' as the third character of the course code. You can also enter a comma-separated list of course beginning values, e.g. 26S,26F,26U.
- Once you enter your criteria, the Preview button becomes available. Click it to view the courses which will be changed.
- After previewing the course changes, click the OK button to make the changes.
Delete Old Room Use Records
- Check the Delete Room Use Records box.
- The system will warn you that Room Use records are not removed from the database until you run the Pack procedure. Click OK to continue.
- Enter the course criteria. You can select courses based on:
- Beginning or Ending date.
- Course number. You can use wild cards with the course number criteria, e.g. ??F would perform the action on all courses which have an 'F' as the third character of the course code. You can also enter a comma-separated list of course beginning values, e.g. 26S,26F,26U.
- Once you enter your criteria, the Preview button becomes available. Click it to view the courses which will be changed.
- After previewing the course changes, click the OK button to make the changes.
Purge Waitlists
- Check the Purge Waitlists box.
- Enter the course criteria. You can select courses based on:
- Beginning or Ending date.
- Course number. You can use wild cards with the course number criteria, e.g. ??F would perform the action on all courses which have an 'F' as the third character of the course code. You can also enter a comma-separated list of course beginning values, e.g. 26S,26F,26U.
- Once you enter your criteria, the Preview button becomes available. Click it to view the courses which will be changed.
- After previewing the course changes, click the OK button to make the changes.
Mass Assign Main Fees
- Check the Create/Assign Main Fee box.
- Enter the information:
- You must select a Fee Description and enter an amount.
- If you want this fee hidden from the Web, enter Y in the Web Hide field.
- If this is a Membership fee, enter the appropriate Member Code and the date or number of days that the Membership should expire in the Days or Date field.
- If this is an Early Bird fee, enter the date the fee will expire in the Fee Exp field.
Note: if you have the Use Number of Days for Fee Expires (Early Bird) option enabled on Course Preferences, the Fee Exp field is a numeric field instead of a date field. You enter the number of days before the course begins that the fee will expire.
- Enter the course criteria. You can select courses based on:
- Beginning or Ending date.
- Course number. You can use wild cards with the course number criteria, e.g. ??F would perform the action on all courses which have an 'F' as the third character of the course code. You can also enter a comma-separated list of course beginning values, e.g. 26S,26F,26U.
- Click the Preview button to view the course list (if the Preview button is not highlighted, tab out of the course criteria field). If you want to remove a course, uncheck the appropriate box. Click the Done button to close the Preview window and continue.
- Click the OK button to assign the fee to the selected courses.
Mass Delete Main Fees
- Check the Delete existing Main Fee box.
- Select the fee description.
- Enter the course criteria. You can select courses based on:
- Beginning or Ending date.
- Course number. You can use wild cards with the course number criteria, e.g. ??F would perform the action on all courses which have an 'F' as the third character of the course code. You can also enter a comma-separated list of course beginning values, e.g. 26S,26F,26U.
- Click the Preview button to view the course list (if the Preview button is not highlighted, tab out of the course criteria field). If you want to remove a course, uncheck the appropriate box. Click the Done button to close the Preview window and continue.
- Click the OK button to delete the fee from the selected courses.
Mass Assign Optional Fee
- Check the Create/Assign Optional Fee box.
- Enter the information:
- You must select a Fee Description and enter an amount.
- If you want this fee hidden from the Web, enter Y in the Web Hide field.
- If this is a coupon code, enter the coupon code the user must enter to receive the discount.
- If this fee will expire, enter the number of days before the course starts that it will expire in the Fee Exp field.
- Select the fee type (i.e. optional, coupon, or inventory).
- Enter the course criteria. You can select courses based on:
- Beginning or Ending date.
- Course number. You can use wild cards with the course number criteria, e.g. ??F would perform the action on all courses which have an 'F' as the third character of the course code. You can also enter a comma-separated list of course beginning values, e.g. 26S,26F,26U.
- Click the Preview button to view the course list (if the Preview button is not highlighted, tab out of the course criteria field). If you want to remove a course, uncheck the appropriate box. Click the Done button to close the Preview window and continue.
- Click the OK button to assign the fee to the selected courses.
Delete Optional Fees
- Check the Delete existing Optional Fee box.
- Select the fee description and enter the Coupon Code if this is a coupon type fee.
- Enter the course criteria. You can select courses based on:
- Beginning or Ending date.
- Course number. You can use wild cards with the course number criteria, e.g. ??F would perform the action on all courses which have an 'F' as the third character of the course code. You can also enter a comma-separated list of course beginning values, e.g. 26S,26F,26U.
- Click the Preview button to view the course list (if the Preview button is not highlighted, tab out of the course criteria field). If you want to remove a course, uncheck the appropriate box. Click the Done button to close the Preview window and continue.
- Click the OK button to delete the fee from the selected courses.
Course Reports
Course reports can be accessed in these reporting areas.
Course Quick Reports
Print a roster, nametags, certificates, etc. for a specific course by clicking the Quick Reports button on the course screen.
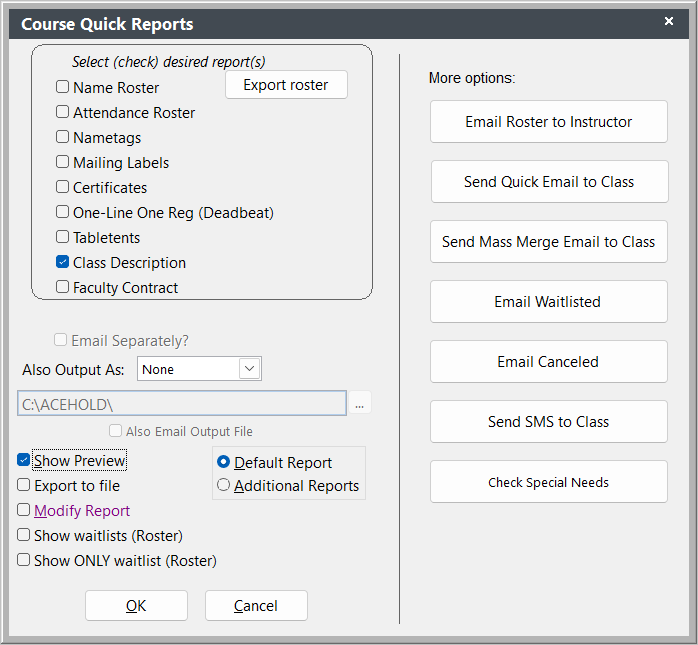
Check the box of each report you want to run for the course. The system will run them one by one.
Rosters: you can also choose whether to include waitlisted registrations on the report, or only show waitlisted registrations (using the additional report called Waitlisted Students).
Nametags: to also print an instructor nametag when printing namestags for registrants, check the Instructor Nametag box. You can also set the Starting Label position by checking the Set Starting Label box.
Emailing: if you have Email set up, you can send a quick email to the registrants in the course, email waitlisted, email canceled, and email the course roster to the instructor(s).
Emailing Certificates and Faculty Contracts: you can email (with Email Separately option) PDF certificates to registrants, and PDF faculty contracts to instructors.
Send Mass Merge Email to class: you can also send an email to registrants using one of the Email templates (e.g. send a course reminder, or location confirmation).
Send SMS to Class: Twilio SMS users can send an text message to all registrants who have a cell phone AND have opted into receiving SMS messages.
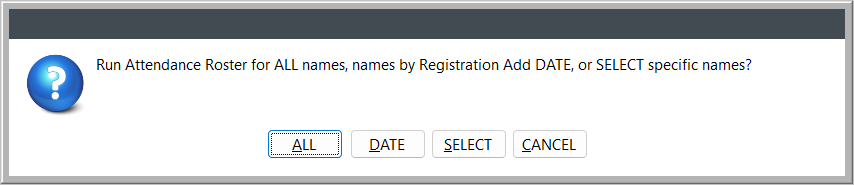
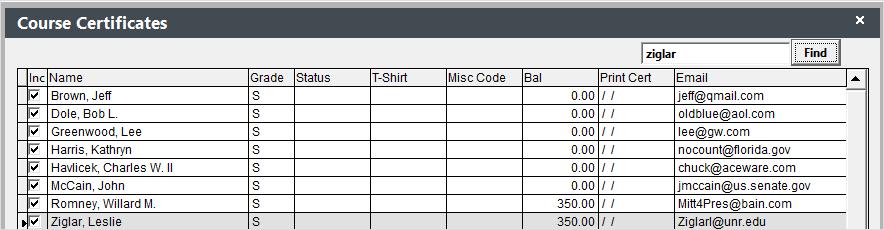
Select Registrants: some report areas--Attendance Roster, Nametags, Mailing Labels, Certificates, Table Tents-- allow you to select what registrations will be included in the report.
If you choose the Select option, you can select or deselect registrants. You can also search for registrants. Entering a name then clicking the Find button will highlight the 1st registrant it finds. Click the Find again to find other registrants with the entered Name.
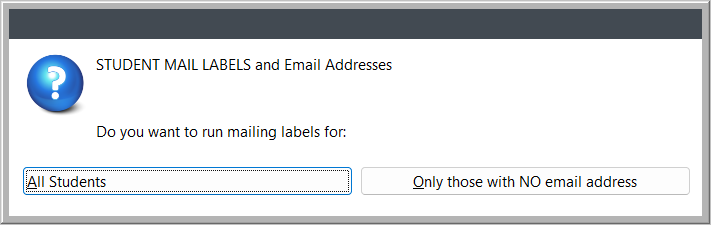
- Printing Mailing Labels: you can print labels for all registrants, or only those without an email address (e.g. if emailing a note to registrants but some don't have email addresses; this option allows you to email the registrants who do have email addresses and mail the registrants who don't):
- Check Special Needs: if you check this box, the list of registrants with Special Needs (as entered in the Special Needs field on Name Comments tab) will pop up for you to review.

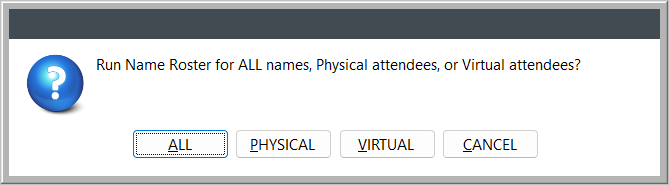
- Hybrid Courses - if the course is a Hybrid type, some quick reports will give you the option to only show physical, virtual, or all registrants.
Main Course Reports
Quick Reports are individualized reports. To run reports on groups of courses (e.g. all courses given between two dates), select one of these reports from the Main reporting area:
Reports > Accounting > Daily Income X Source by Course
Report payments made to courses. You can also print 1098-T forms from this area (additional report).
Reports > Courses
CEU Reporting (by course)
- Data: Course information, Course UDFs, Location information
- Query Tables: Course, Grouping, Pay, Course UDFs
Course Details (w/fees)
- Data: Course information, Fee information, Location, Course UDFs
- Query Tables: Course, Instructor, Location, Grouping, Fees, Course UDFs
Room Use List
- Data: Course information, Location and Room information, Instructor
- Query Tables: Course, Instructor, Location, Grouping, Crseroom
Income Summary
- Data: Course information, Due, Paid, Balance, Expenses, Income
- Query Tables: Course, Instructor, Pay, Grouping
Generate Catalog
- Data: Catalog information, Course information, Location, Instructor
- Query Tables: Catalog, Course, Grouping, Instructor, Location, Course UDFs
Statistics > Courses
Note: most of the above reports will only report course information. To print information about registrants in series of courses--for example, print rosters for all courses starting next week--go to the Reports > Registrations area.
Names
Topics covered in this section:
- Search Names Tool
- Add a Name Record
- Name Flag Fields
- Name Interest Codes
- Call Back System
- Keeping a Contact Log
- Name Additional Documents
- Assign Firm to Name Record
- Clone Name Record
- Name Grouping
- Name Reports
Search Names Tool
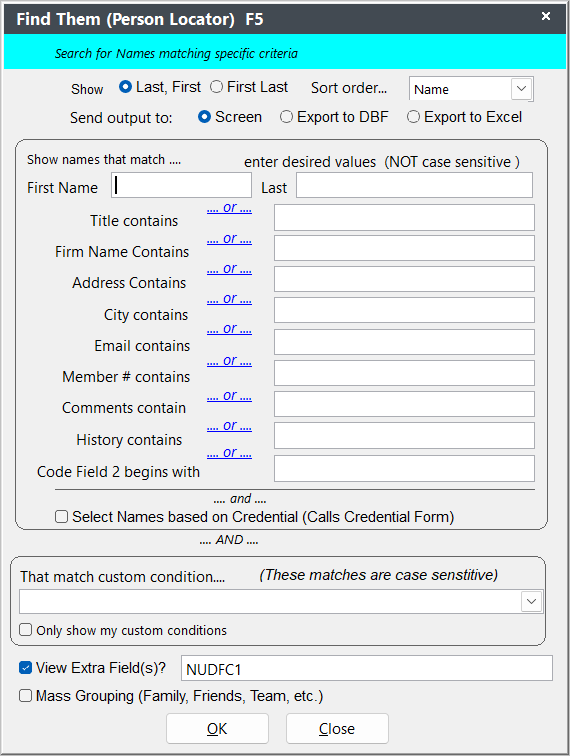
With the Search Names tool, you can search for Name records that match your search criteria.
Searching for Name Records
To open the Search Names tool, press the F5 key.
And/Or Toggle
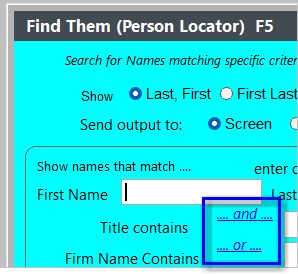
Click the ... or ... link to switch to ... and ...
Search Results
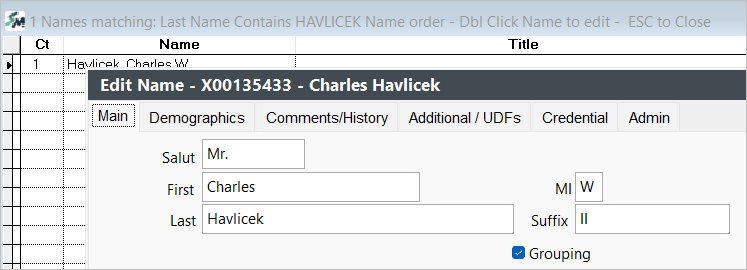
After entering your search criteria and clicking the OK button, the list of names meeting your criteria will open. You can double-click the name to open that person's name record for viewing/editing purposes.
Searching for Credentials
Check the Select Names based on Credential box to search for Name Credentials. This will open a separate criteria window for you to select your Credential search parameters.
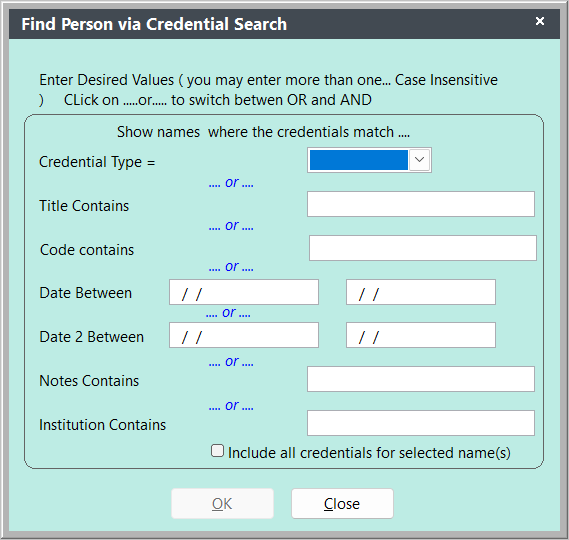
Select your search criteria then click the OK button to return to the F5 screen. If desired, select other Name criteria (name contains, etc.). Your search will return credential records meeting the entered criteria.
Custom Conditions
You can search for names based on a Name UDFs or Interest Code values with the Custom Condition option. The field must be entered in the table.fieldname format. E.g. Nameudfs.nudfc1="646549756D".

Saving/Showing Custom Conditions
After your custom conditions runs, you'll be asked if you want to save it. If you save it, the next time you run the Search Tool, you can click the drop down to see saved custom conditions.
Only Show My Custom Conditions - if you check this box, when you click the drop down you will only see the custom conditions you have created.
Viewing Extra Fields - If you are using the Custom Condition to search for a value in a field that is not displayed in the Names list, you can display it by clicking the View Extra Field(s)? box then entering the field name:

The field is placed at the beginning of the field list.
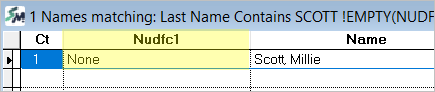
You only need to list the field name in the View Extra Fields box (not table.fieldname).
Add a Name Record
You can add a new Name record in the following ways:
- Select or
- Use the Alt+A keyboard shortcut
- Right-click the Names icon on the Quick Launch toolbar and choose Add Name
- If you have the Names Explorer open, click the Add button
Enter the name information in the appropriate fields.
Click the Save Changes button to save your new name record.
Duplicate Name Check
When adding a new Name record, the system will check for and display any possible duplicate records. The system will consider a record a possible duplicate if:
- the Last Name entered on the new record matches any existing records;
AND
- the number of characters set in the First Name Match setting on Name Preferences matches any existing records.
If it finds a duplicate, you have 2 options:
- If a record for the person already exists, you can select it from the list. The new record you started will not be saved when you select an existing record.
- If there is no match for the new person, you can press the ESC key to close the Find window. You'll be returned to the new name record so you can continue with the adding record process.
Entering Special Characters
By using the Windows Character Map tool, you can copy a special character then paste it into your field.
NOTE: Names which contain these letters are sorted AFTER the standard alphabet (e.g. Ranáe would be sorted after Ranae).
Last Name Starts with Lowercase Letter
When in the last name field, press the spacebar BEFORE typing the name (e.g.: leMoine), then move the cursor in front of the beginning letter and backspace once to remove the space. This fools the auto-upper case routine, and the first letter will be saved in lower case.
NOTE: when the record is accessed, the first letter appears to be uppercase but it is not!
Zip Code Entry
When you enter the person's address then press the TAB key, the cursor will skip the City and State fields and move directly into the Zip Code field.
Enter the zip code (or select it if the Zip Code list pops up) then press the TAB key to move out of the Zip Code field. The system will automatically enter the City, State, and Area Codes. If you have county and country data entered in the zip code record, it will also complete those fields.
Note: if you don't enter the phone number in a phone field, the system will delete the area code from the field when you save the name record.
Duplicate Zip Code Records
If you have a zip code that spans two cities, counties, or area codes, when you enter that zip code in the Name record, the Search list will pop up with all the matching zip codes for you to select the correct zip code record.
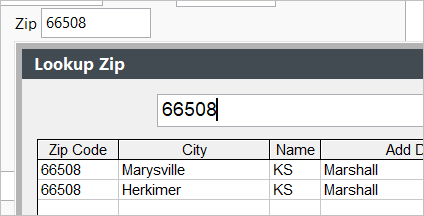
Editing City and State
The default behavior for Student Manager is for you to only enter the zip code and the system will enter the city, state, county and area code for that zip. The system does not allow you to enter the city or state and, normally, this is fine. However, if occasionally you have a person with a foreign address (i.e. you need to enter 02145 Paris in the City field), you have the ability to override this behavior by pressing Alt+0. Student Manager will now allow you to edit the City and State fields.
Name Flag Fields
The Names screen contains the following flag fields to help with your mass mailing, emailing, and reporting needs:
Don't Mail Flag
The Don't Mail Flag is on Names Main tab.
Check this box to identify individuals who don't want to receive mailings (Exclude "Don't Mail" names when printing Mailing Labels).
Exclude Flag
The Exclude Flag is on Names Main tab.
Check this box to identify individuals who don't want to receive mass emailings (using the Mass Mail Wizard or Merge Mail Wizard).
Label Flag
The Label Flag is on Names Demographic tab.
Check this box when you want to include the individual in one-time mailing lists or generate mailing labels for an eclectic (non-permanently defined) group. You can also check this flag when setting a filter.
The Print Label Info field located just under the Label Flag field, is used to identify the type of mailing that should be sent to the individual (e.g. brochure, catalog, flyer). You also have the option of validating these entries for use with the Custom Inquiry Letter feature.
Report Flag
The Report Flag is on Names Demographic tab.
Check this box to include individuals in subsets of records for special reporting purposes. You can also check this flag when setting a filter.
You can use these fields when setting filters, printing mailing labels, in queries and reports.
Name Interest Codes
Identify students by Category/Interests/Subject/Marketing Group with Interest Codes.
You can add an unlimited number of Interest codes to a Name record. Those codes can be used in queries to help with generating Mailing lists, determining future course offerings, etc.
Adding Interest Codes
To add an Interest Codes to a Name record:
- Open the Name record, then click the Add Interest button to open the Select Interest Codes window.
- Click on the code you want to add to the record. To select more than one, press and hold the CTRL key while clicking on the Interest codes.
- Click the OK button. You'll be returned to the Name record and the code will be added to the Interest Code window.
- Click the Save Changes button on the Name record to save your changes.
Call Back System
The Callback System is a feature that will remind users to call individuals on a specific date. If enabled, the system will check for callbacks during startup and display the callback list for that date. Scope the callbacks by user and the system will only list the callbacks for the particular user.
To enter a call back:
- Open the individual's Name record.
- Select the Demographics tab.
- Select the Student Manager user who should call back the individual.
- Enter the call back date in the Date field.
- Click the Save Changes button.
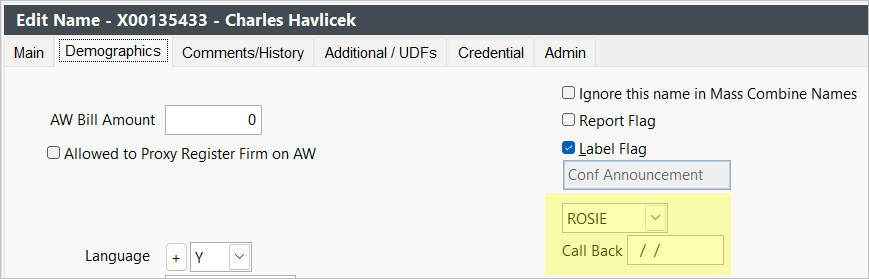
When the user logs in on the Call Back date, the Call Back window will open showing the Call Back information:

You can make changes to the following fields in the Callback window:
- Change the Calldate.
- Add Comments by double-clicking the individual's Callnote memo.
- Clear the Call Back by changing the N in the Clear field to a Y.
- Open the individual's Name Record by double clicking on the Who_to_Call field.
Manual Callback Checking
You can manually check for callbacks anytime you are in Student Manager by:
- Selecting
- Using the shortcut key CTRL+B
Keeping a Contact Log
Keep a log of contacts with the individual with the Contact History tool. The tool inserts a new line at the top of the Contact History on the Name Comments/History tab and stamps the current date and user at the beginning of the line. Simply add your comments, then save the Name record. Every time you need to log another contact, just repeat the process.
To create a log entry:
- Click the Contact History button.
- The Comments/History tab opens and the User and Date is added to the top of the Contact History field.

- Add your comment, then click the Save Changes button to save the comment.
TIP
You may also keep a contact log using the optional CRM module, which provides more advanced logging options and a reporting system.
Name Additional Documents
You can attach documents to a name record, for example a resume, photo release, etc.
ACEweb users can also upload documents to their Namer record.
Adding A Document
- Open the Name record and select the Additional Info tab.
- Click the Additional Documents button.
- Click the + button.
- Select the document.
- Enter a comment about the document, if desired, then click the OK button.
- If desired, click Yes to associate the document with a course, then select the course.
Changing Course Association
You can change the course a document is associated with, or assign it to a course if it has not been assigned to one yet.
- Highlight the document in the list by clicking it once.
- Click the Change Course Association button.
- Select the course then press the ENTER key.
Deleting A Document
To delete a document, double-click it.
Assign Firm to Name Record
To add a firm to a Name record:
- Click into the firm field and type the Firm name. Note: if you have enabled the pop up list feature for the Firm field (on Name Preferences), the Firm list will open for you to select the appropriate firm.
- If you have enabled the Also Save as Home Address option (on Name Preferences), when you tab out of the firm field (or select it from the list), the system will auto-enter the firm's address and contact information into the appropriate fields. Any of the fields can be edited after the system enters the information (e.g. you can change the address, a phone number, etc.). Note: the edited information is saved in the Name record--you will not be affecting the Firm record.
Note
The Name record is linked to the associated Firm record for reporting purposes, so the Firm Name and Firm ID # are stored in the Name record in the nmfirm and nmfmid fields. If no firm is entered, the nmfirm field will be blank and the Firm ID # of the default firm record (i.e. ID # 999999999999) is stored in the nmfmid field. If the Firm ID is broken (i.e. the system can't find a firm record with the Firm ID #), the Name may not show on reports.
Change Individual's Firm
To change an individual's firm:
- Clear the Firm field entry.
- Enter the new Firm in the field then tab out of the Firm field. Or click the icon to find a new firm.
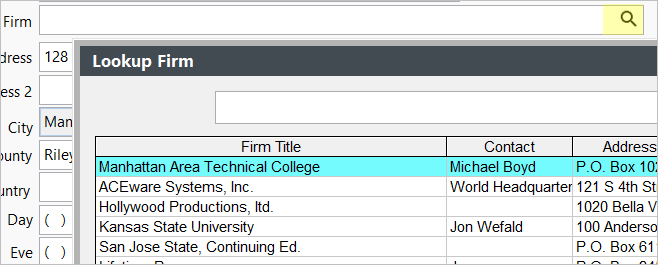
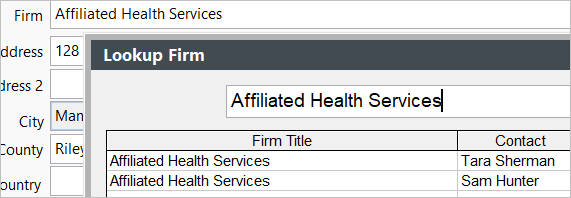
- If there are multiple firm record with the firm name you entered, the Search window opens for you to select the appropriate firm record.
- If you are using the Also Save as Home Address preference (on Name Preferences):
- If the Address, Day Phone and/or Fax Phone MATCHES the old Firm entries those fields will be updated when changes are made to the Firm.
- If the Address, Day Phone and/or Fax Phone are DIFFERENT, they will NOT be updated.
- If only the Day Phone is different, you will be given the option to replace the phone number with the firm's Phone number.
- If any of the fields are blank (e.g. there is no Fax Phone on the Name record), they will be entered into the Name record.
- Click the Save Changes button on the Name record to save your Firm changes.
Viewing Firm
If you want to view the individual's associated Firm record, open the Name record then double-click the Firm entry to open the Firm screen to that firm's record.
Clone Name Record
Cloning a Name record is the quick and easy way to copy information from one record and paste it into a different one. It's useful when adding family member records or updating addresses.
Clone/Create Name
To clone a Name record and paste the information into a new Name record:
- Open the Name Explorer.
- Highlight the name you want to clone in the list.
- Right-click on the name and choose Clone Name.
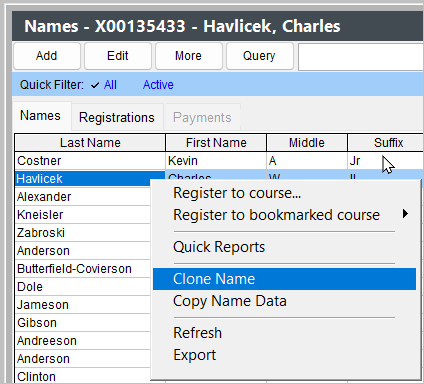
- A new name record opens with the cloned information. Edit the information then click the Save Changes button to save the new record.
Paste Address into Existing Name Record
You can paste the address from a cloned record into a an existing record:
- Clone a Name record.
- Find and open the Name record that needs the cloned address.
- Click the Paste Name Info button.
- Confirm that you want to overwrite the existing information with the information from the cloned record by clicking Yes on the Overwrite Current Address window.
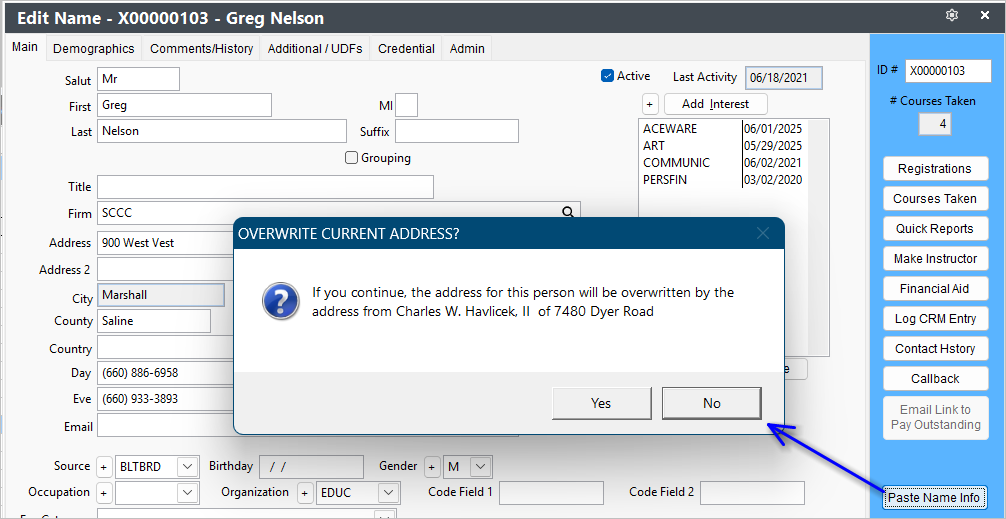
- Click the Save Changes button to save the changes to the Name record.
Speed Saving Tip
Name information is automatically copied when you save any name record, which can then be pasted using ALT+V to a new or existing (to overwrite) name record.
Information Pasted
The following information is pasted into the Name record:
- Last Name (NEW records only)
- Address Lines 1 and 2
- City
- State
- Zip Code
- Phone Numbers
- Email Address
- Fee Category
- Source Code
- Organization Code
Name Grouping
NEW and EXISTING records are added to the cloned name record's Name Group.
Name Grouping
With the Name Grouping feature, you can group a series of Name records together and set one member as primary contact for the group.
To group Name records:
- Open the individual's Name record.
- Check the Grouping field.
- The Name Grouping screen now opens with the individual's name added to the group.
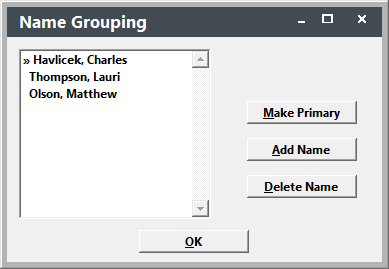
- To add new group members, click the Add Name button and select the new member from the Find window.
- After you’ve added all the members to the group, highlight the member who you want to set as primary contact, then click the Make Primary button. This will add the >> symbol next to the primary’s name denoting him as primary contact for the group (e.g. Havlicek, Charles in the above example).
- Click the OK button to save your Name Group and return to the Names screen.
Name Reports
Names module reports can be accessed in these reporting areas.
Quick Reports
The Quick Reports button on the Maintain Names screen allows you to quickly print a fax cover, transcript, or envelope for an individual.
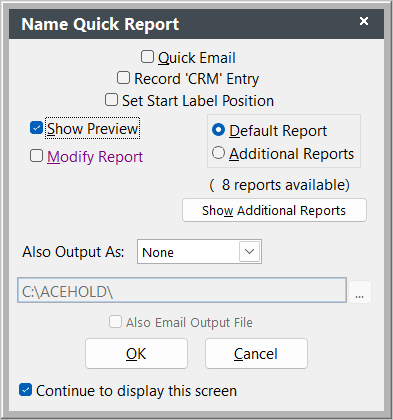
- Send a quick email to the individual.
- Log a CRM contact.
- If printing a label, set the Start Label Position.
You also have the option of automatically printing the default report when you click the Quick Reports button. To enable this option, un-check the box Continue to display this screen on the Quick Reports window. To disable the option, select .
*Printing a transcript from the Quick Reports area will show all courses the individual has taken. If you want to print a transcript for a subset of courses, you need to run it from the area where you can run a query to filter the courses listed.
Reports > Demographics
Quick Reports are individualized reports. To run reports on groups of individuals (e.g. all individuals with a specific subject code), select a report from the Demographic report area. The following list tells you what data is available and what tables you can query in each report area.
Names (with codes)
- Data: all Name record information, Firm name and address; Name UDFs
- Query Tables: Names, NameUDFs, Firms (name and address only)
Names (with registrations)
- Data: course name and begin date, CEUs, hours, grades, fee, money owed, codes, firm information, demographic data
- Query Tables: Course (name and begin date), Register (course name and dates, grade/credits awarded), Names (name and contact information)
Mailing Labels
- Data: name, address, title, firm, city, state, zip, email
- Query Tables: Names, Firm, Name UDFs, Register, Registration UFDs
CRM Info
Print CRM reports from this area:
- Data: name data, firm data, contact records data
- Query Tables: Names, CRM, Register
Credential
You can query and report from the credentials table now.
- Data: name, credentials, name UDFS
- Query Tables: Names, credentials
Statistics > Names
There are two Name statistical report areas:
Registrations
Topics covered in this section:
- F4 Find Registrations
- Registering an Individual in a Course
- Assess Additional Charges
- Print a Receipt
- Cancel Unpaid Registration
- Transferring Registrations
- Group Registrations
- View Roster
- Registration Reports
F4 Find Registrations
The F4 Find Registration tool allows you to find registrations meeting the entered criteria.
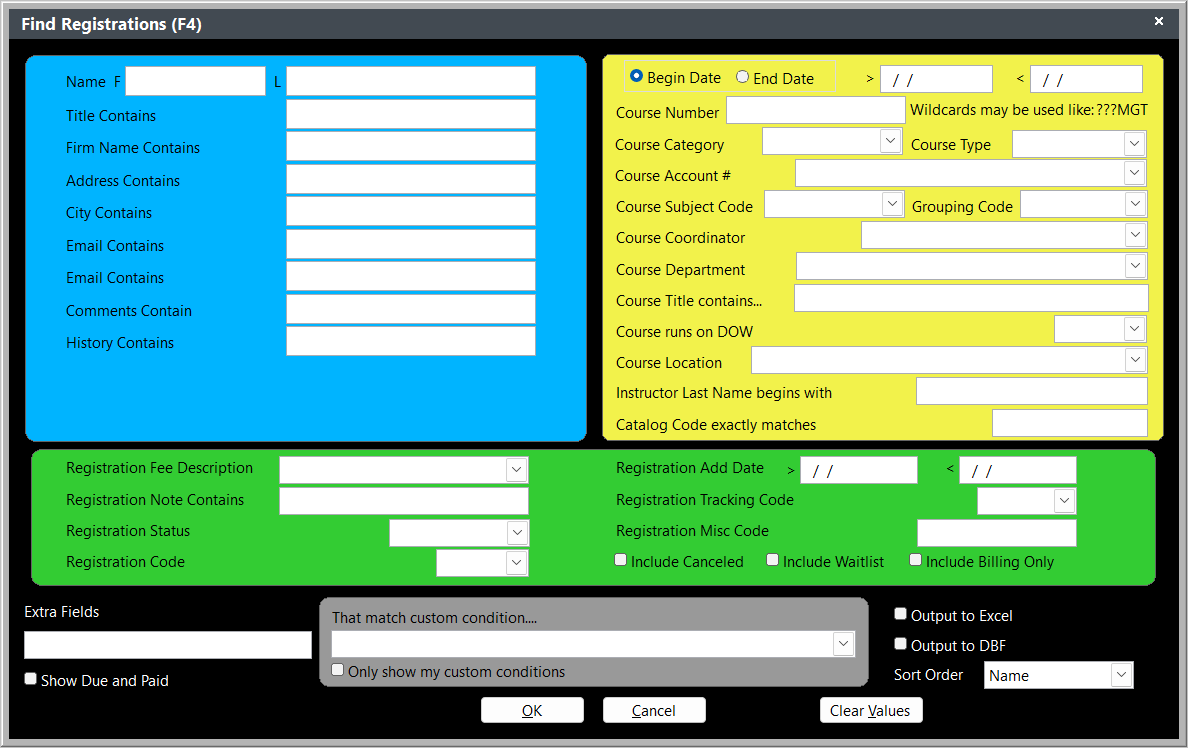
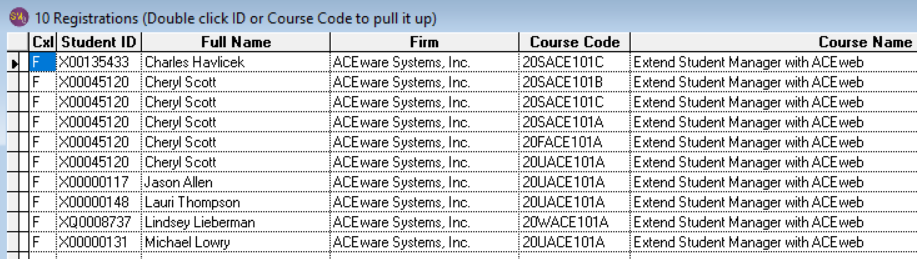
When you enter the search criteria and click the OK button, the results window opens.
You can double-click an ID to open the corresponding Name record, or on Course code to open the corresponding registration record.
Registering an Individual in a Course
The recommended method for registering individuals in Student Manager is through the Names module. This allows you to verify and make any necessary changes to the individuals’ contact information before enrolling them.
- Open the Name Explorer, and find the individual's Name record.
- With the name highlighted, select the Registrations tab.
- Click the Add button.
- Select the appropriate course.
- Select the registration options:
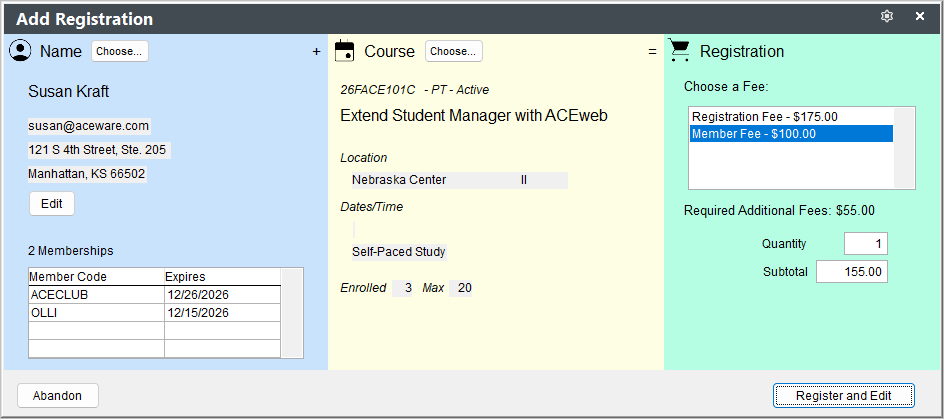
Mandatory Fees
A message about any mandatory fees is displayed on the Add Registration screen, and added to the Subtotal amount.
- Click the Register and Edit button.
- The Registration screen opens. You can now edit the registration, as needed (e.g. add Additional Charges, Fee adjustments, etc.).
- Click the Save Changes button.
Main Fee Assessed
The 1st Main Fee set up in Course Fees will be assessed to the registration unless:
- the individual has a fee rate specified in the individual’s Fee Category field--AND--that fee has been set up in the course record. If so, the individual will be assessed their qualifying fee instead.
- you have set up an Early Bird fee that is still available. If so, the individual will be assessed the early bird fee.
- the individual has an active membership. If so, they will be assessed the correct membership rate--IF--a membership rate has been set up in the course record.
Assess Different Main Fee
You can assess a different Main Fee by selecting the appropriate fee from the Fee list on the Add Registration screen:
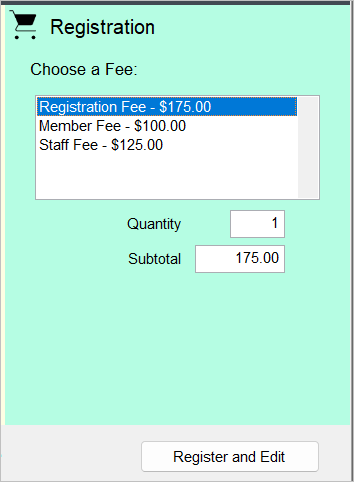
Or from the Fee drop down list, if editing the registration:

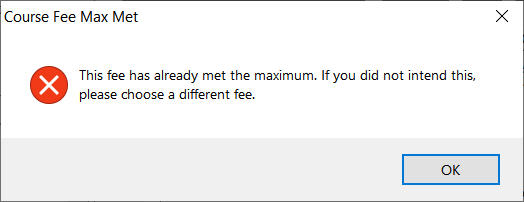
Maximum Met
If the max has been met on the fee you select, you will be warned:
Multiple Seats to a Registration
You can charge mulitpe seats to a registration by entering the number of fees to be charged in the Fee Number field (to the right of the X label):

When you tab out of the field, the Course Fee Amount will be multiplied by the Fee Number and the total will be entered in the Registration Fee Amount field:

Note
The is a way for someone to pay for multiple seats. However, there are no Names associated with those multiple seats. If you also need Names, you must register them in the course.
Assess Custom Fee Amount
For organizations using the Allow Edit of Fee Amount on Registration preference (on Register Preferences), you can assess a custom fee amount. Enabling this preference allows users to enter the custom amount in the Course Fee Amount field (to the right of the @ label):

When you tab out of the Course Fee Amount field, the Registration Fee Amount (and Total Due) will be updated:

Assess Additional Charges
You can assess Other fees set up on the course record to a registration.
Additional Charges
- Click the Additional Charges button.
- Select the appropriate charge then press the ENTER key.
- If you have the Use Optional Fee Quantity preference enabled (in Registration Preferences), the Quantity window opens next. Enter the quantity purchased in the Quantity window then click the OK button.
- The charge will be added to the Additional Charges window. Click the Save Changes button to update the Total Due:

Notes
- If you set up any Mandatory fees, they are shown when you add the registration, and are automatically assessed to the registration (added to the Additional Charges window).
- You can assess Coupon Discounts. The discount will be applied to the Main fee rate only.
Fee Adjustments
Assess fee adjustments to a registration such as special charges or discounts.
- Select the appropriate fee from the Fee Adjustment Description list.
TIP
This will be a drop down list if you have the Validate Reg Adjustment Fee Description preference enabled in Registration Preferences. If the preference is not enabled, the field is open for you to manually enter an adjustment description.
- Enter the fee amount in the Amount field. Note: if you are assessing a discount, you must enter the minus sign (-) as the first character of the amount, e.g. -25.00.

- When you type the last zero in the Amount field, the entry will automatically move into the Additional Charges window. Click the Save Changes button to update the Total Due.
Remove Charges/Adjustments
To remove an additional charge or fee adjustment from a registration:
- Double-click on the fee in the Additional Charges window that you want to remove.
- Confirm the action by clicking Yes on the Confirm Remove dialog.
- Click the Save Changes button to save your change.
Print a Receipt
This topic covers printing receipts. If you want to email a receipt, see the Emailing Receipts topic.
Print Registration Receipt
Any registrations grouped with the registration you opened will be included on the receipt.
- Open the Registration record.
- Click the Print Receipt button.
- Select Conventional Receipt from the drop down to print a receipt:
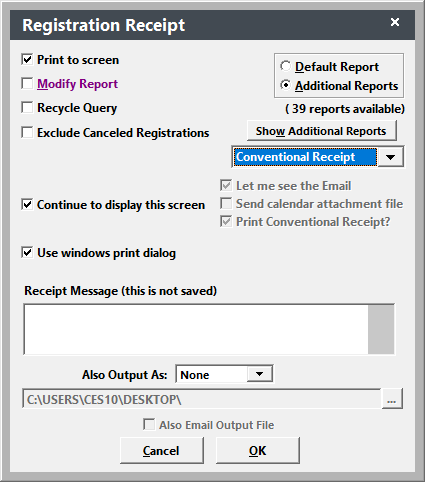
- Select any other appropriate options.
- Click the OK button.
- The Receipt report now opens for you to view/print.
Print a Series of Receipts
Note
Any grouped will be included on receipts, even if you are running receipts for one course only.
- Select .
- Select the appropriate options on the Report Options screen (e.g.include billing, etc.).
- Select Default or Additional report option.
- Click the OK button.
- Run the appropriate query.
- If you selected the Additional report option in step 3, select the report you want to run from the Select Additional Report listing.
- The Receipt report now opens for you to view/print.
Cancel Unpaid Registration
To cancel a registration that has not been paid:
- Check the Cancel box in the upper-right of the registration screen.
- Click the Save Changes button.
- The system will ask you if you want to clear items:
- Clear Attendance records for the registration.
- Clear CEU/Credit/Hours and Grade fields.
- If you've created billing records for this registration, the system will ask you if you want to void the billing records If you select Yes, it will also ask you for a reason for voiding.
Cancellation Fee
If you will be charging the registrant a cancellation fee, you can void the billing then create a new billing record with the cancellation fee amount.
- You must manually add a negative Fee Adjustment to zero out the total due if you don't have the Quick Cancel Registration option enabled (in Register Preferences).
Transferring Registrations
You may transfer an individual's registration to another course —or— transfer the registration to another individual.
IMPORTANT
Transfer Single Registration
- Open the individual’s registration record.
- Click the Transfer button.
- Select the appropriate option:
- Transferring individual to another class:
- Click the Class button.
- Select the class.
- The system will continue to step 4.
- Transferring registration to another individual:
- Click the Student button.
- Select the individual.
- The system will continue to step 4.
On the Add Registration screen, click the Transfer Registration button.
Select the appropriate options on the Transfer Wizard screen.
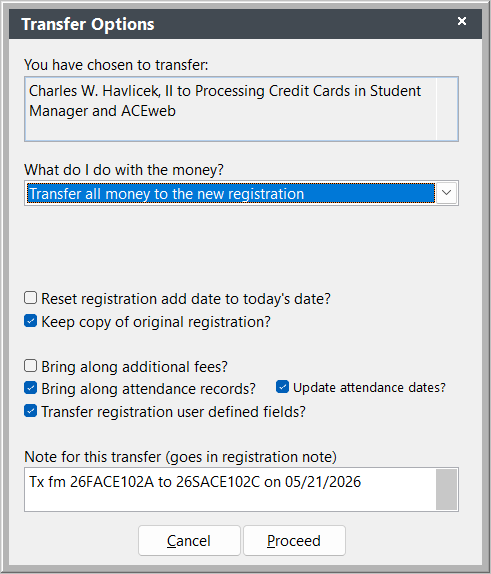
- Click the Proceed button to finish the transfer.
Notes
- If you choose the Keep copy of original registration? option, the system will keep a canceled copy of the original registration and enter a Transfer-Reverse Charge to zero out the Registration Fee amount.
- The system will NOT zero out the amount due for Additional Charges. If there are additional charges on the registration, we suggest you select the Bring along additional fees? option.
Mass Transfer Tool
The Mass Transfer option allows you to transfer individuals in one course into another course. For example, transfer everyone in 26FCOMP101A to 26FCOMP101B.
IMPORTANT
- The Mass Transfer tool MOVES registrations/payments from the 1st course to the 2nd course. If you want to register everyone who took the 1st course into the 2nd course, use the Mass Registration tool.
- You should make a backup before running the Mass Transfer tool.
- If individuals from the 1st course are already registered in the 2nd course, their registrations will be excluded from the Transfer process (so duplicate registrations will not be created).
To run the Mass Transfer option:
- Select .
- Enter the Starting Course # (course you are transferring individuals from).
- Enter the Target Course # (course you are transferring individuals to).
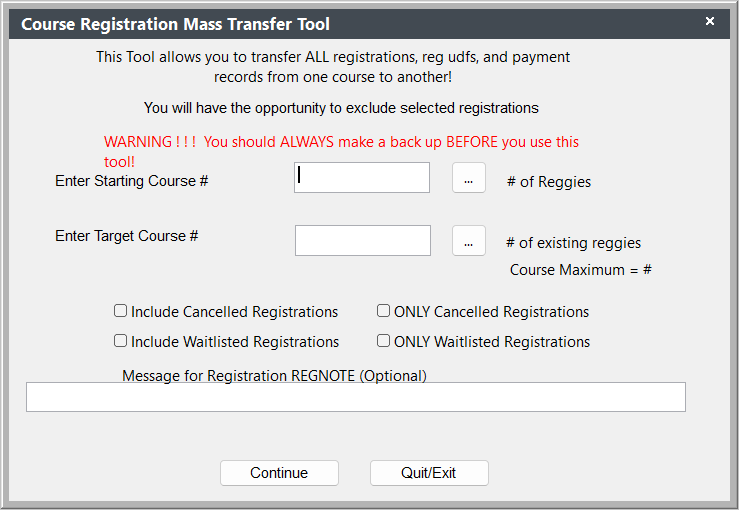
- Select the other appropriate options (Include canceled Registrations, Include Waitlisted Registrations, Reg Note Message).
- Click the Continue button.
- Click Yes on the Backup Confirmation window.
- Course Maximum: you will be notified if the transfer will cause you to exceed the Maximum enrollment for the course:
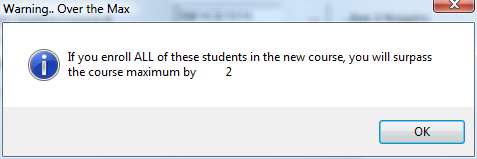
Click OK to continue.
The Student List will now open, showing you all the registrations that will be transferred.
If you don't want to transfer a registration, uncheck the appropriate box. Then click the Done button.
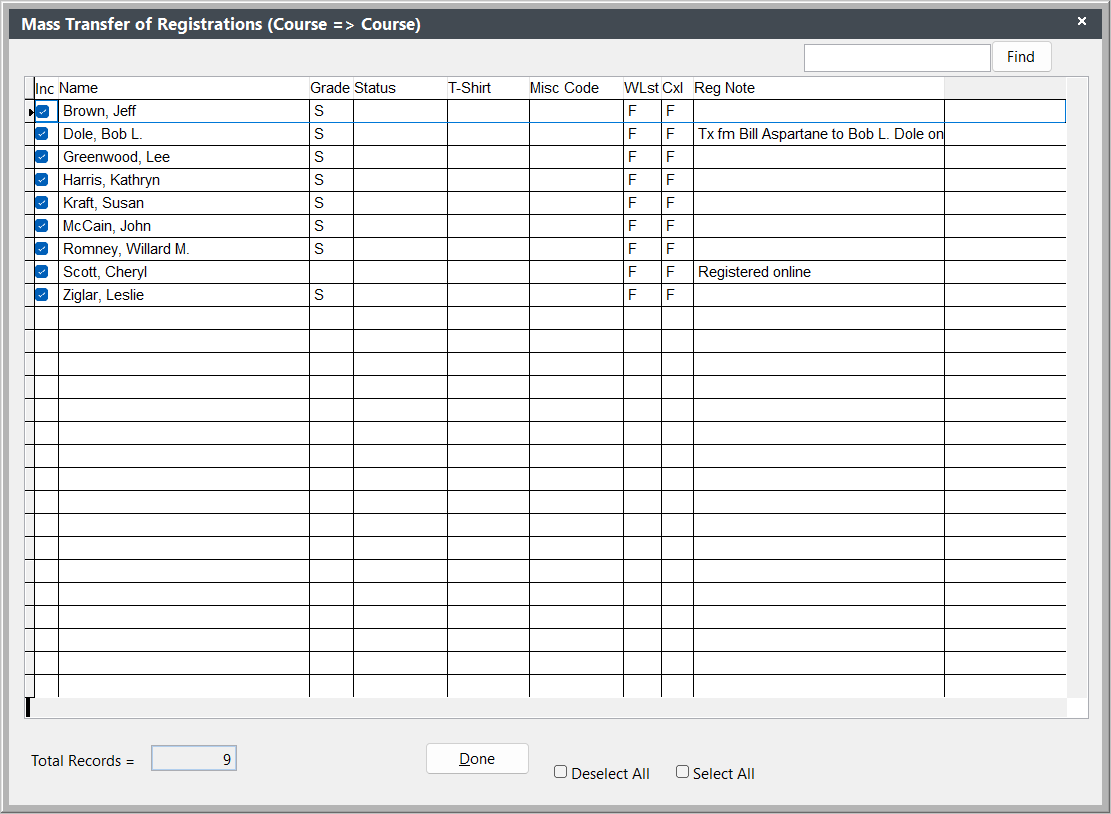
- Click Yes on the Continue Transfer window to complete the transfer.
- The system will ask if you want to transfer more registrations. Select the appropriate option.
Group Registrations
The Grouping feature allows you to group registrations together. You can then make a single payment that the system automatically distributes among the registrations in the group. You can also print a single receipt that will show the payment detail for the grouped registrations.
If you have the Prompt for Grouping feature enabled, you will have the option to group the new registration with the last one created:
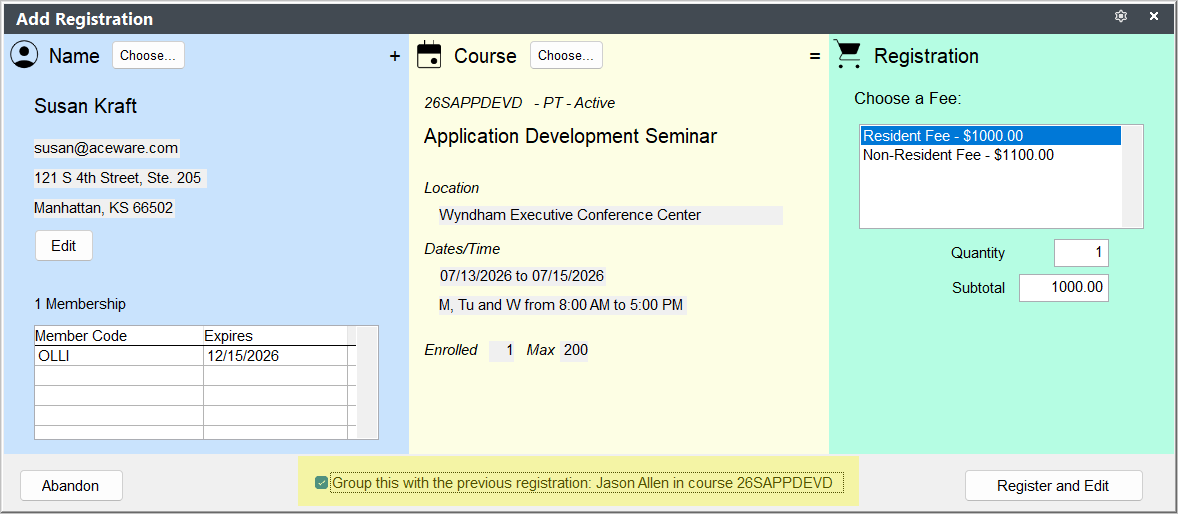
Check the Group this with the previous registration box to group the registration with the previous one created.
When you click the Register and Edit button, the Registration screen opens and the Group box is checked.

You'll also see new information in the Totals Box (Group Total Due, Group Total Paid, and Group Balance).
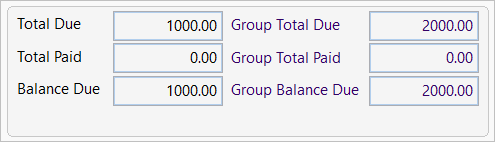
View Group Members
You can view the members of your group by clicking the Show Group button. This allows you to verify that you have grouped the correct records together before making a payment.

You may view the other member's registration records by selecting the appropriate individual from the list and pressing the ENTER key.
Group Existing Registrations
Group existing registration records together (e.g. employees of a company register in courses that will be paid by the company with one check).
- Find and select the first individual in the group.
- When the Registration screen opens, check the Group box.
- You’ll be asked if you want to link the registration with another group. Click the Yes button.
- *Select the registration you want to include in the group.
- After you select the course, you’ll be returned to the registration screen. Click the Save Changes button.
Lookup List
By default, the lookup list will only include registrations added in the time period you have set in the Show Groupings for the last days preference in Registration Preferences. You can override that by changing the Show groupings for the last days number on the Search window:

Mass Group Registrations
The Mass Group tool finds classifications of people and allows you to group registrations with balances.
- Run the Mass Group tool by selecting or pressing the F8 key.
- Select the registration classification group (Firm, Family, or Course) for finding registrations to group.
- Look up the classification. E.g. if you chose Firm in step 2, find and select the Firm.
- Select the Invoice option:
- Leave - All invoices are left alone.
- Void - Voids any invoice(s) attached to these registrations.
- Reinvigorate - Voids any invoice(s) attached to these registrations. Only creates a new billing record for those that already were being billed.
- New - Voids any invoice(s) attached to these registrations. Everyone gets a new bill!
- The system brings up a list of registrations within the classification group you selected in step 3. Check all you want to include in the group.
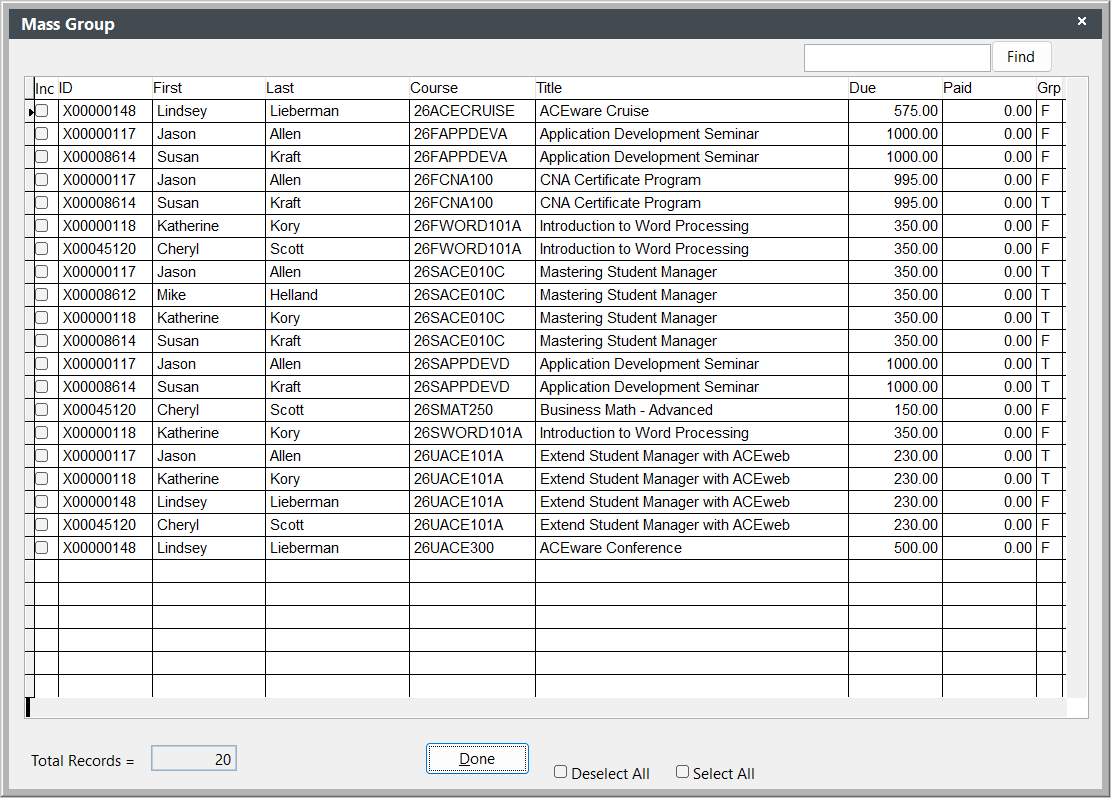
- Click the Done button to group the registrations.
- Click OK on the Process Complete notification window.
View Roster
View the roster for the course with the Roster button:

- Only show registrations from the registrant's firm by clicking Yes on the Fellow Students dialog.
- Include Billing Only Registrations by clicking Yes on the Billing Only dialog.
Registration Reports
Registration Module reports can be accessed in three reporting areas. Any of the Registration Module reports can be modified to meet your organization's needs.
Registration Receipts
The Print Receipt button on the Registration screen allows you to print or email receipts for the registration group (if grouped, otherwise prints for the single registration).
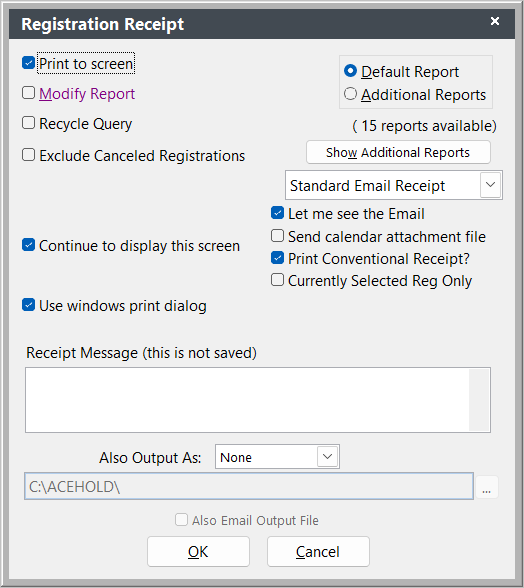
Reports > Registrations
Registration Receipts are individualized reports. To run reports on groups of registrants, select a report from the Registrations report area. The following list tells you what data is available and what tables you can query in each report area.
Registrations (with Fees and Payments)
- Data: all Name record information, Firm name and address; Name UDFs
- Query Tables: Names, NameUDFs, Firms (name and address only)
Counts of Optional Fees
- Data: course name and begin date, CEUs, hours, grades, fee, money owed, codes, firm information, demographic data
- Query Tables: Course (name and begin date), Register (course name and dates, grade/credits awarded), Names (name and contact information)
Income Detail by Registrant
- Data: name, address, title, firm, city, state, zip, email
- Query Tables: Names, Firm, Name UDFs, Register, Registration UDFs
Receipts
- Data: course name and begin date, CEUs, hours, grades, fee, money owed, codes, firm information, demographic data
- Query Tables: Course (name and begin date), Register (course name and dates, grade/credits awarded), Names (name and contact information)
Rosters
- Data: name, address, title, firm, city, state, zip, email
- Query Tables: Names, Firm, Name UDFs, Register, Registration UFDs
Transcripts
- Data: all Name record information, Firm name and address; Name UDFs
- Query Tables: Names, NameUDFs, Firms (name and address only)
Nametags
- Data: course name and begin date, CEUs, hours, grades, fee, money owed, codes, demographic data
- Query Tables: Course (name and begin date), Register (course name and dates, grade/credits awarded), Names (name and contact information)
Certificates
- Data: name, address, title, firm, city, state, zip, email
- Query Tables: Names, Firm, Name UDFs, Register, Registration UFDs
Tabletents
- Data: course name and begin date, CEUs, hours, grades, fee, money owed, codes, demographic data
- Query Tables: Course (name and begin date), Register (course name and dates, grade/credits awarded), Names (name and contact information)
Payments
Topics covered in this section:
- Make Payments
- Make Payments to Grouped Registrations
- Print Receipt Options
- Cancel Registration/Refund Payment
- Refund without Canceling Registration
- Refund to Escrow
- Void Receipt/Invoice Tool
- Payment Plan
- Transfer Payments
- Payment Mistakes
- NSF (Bad) Check
- Pay Grabber Tool
Make Payments
To add a payment to a registration:
- Select a registration in the Registrations Explorer tab.
- With the registration highlighted, select the Payments tab.
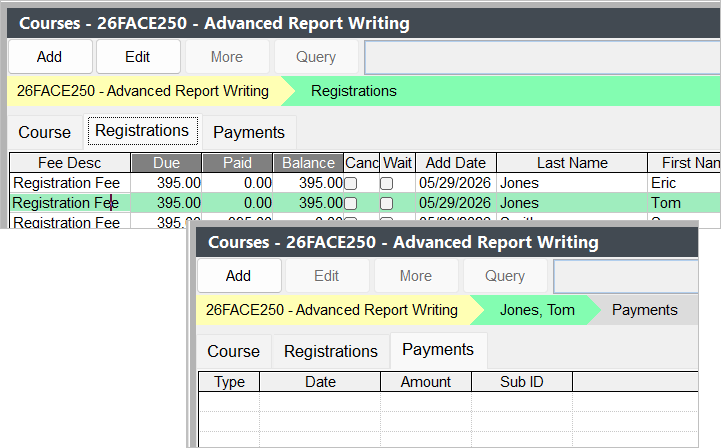
- The Payments tab shows any payments made to the registration. If there are no payments yet, click the Add button to add a payment.
Editing a Payment
If there are existing payments, for example a billing record, highlight the payment then click the Edit button to edit it.
- By default, the total amount due will be entered into the Payment Amount field. If necessary, adjust this amount (e.g. if the individual is only making a partial payment).
- Select the appropriate Payment type from the Payment Type drop down menu.
- When you select the payment type, the Payment Detail fields become available for you to enter payment details.
- Click the Save button to save the payment.
When you click this button, the payment record is created and the next available receipt number is assigned to it. You can now print a receipt by clicking the Print Receipt and Close button.
Charge to Different Firm/Person
You can set a different Payer on the payment with these buttons:
- Paid by Firm - replaces the Payor Name and contact information with the name and contact information of the Firm associated with the registrant.
- Find Firm - if another Firm is paying for the registration, click this button to the select the appropriate firm.
- Find Name - if another person is paying for the registration, click this button to select the appropriate Name.
- Bill to individual - if you clicked the Paid by Firm and need to switch the payor back to the registrant, click this button to change the Payor Name and contact information to the registrant.
If a 3rd party is paying for the registration, e.g. a person or firm that is not in your Names or Firms database, you can manually enter their information in the Payor details.
Clone Pay Detail
You can use the Clone Pay Detail button to paste the details of the last payment record you created into a new payment record. When you click the button, the P.O.#, Payor Name, etc. from the last payment record created will be pasted into the appropriate fields on the new Payment record.
Billings
If you selected the 'Billing' Payment type in step 5, the "Invoice" label appears on the screen and the P.O. # field becomes available.
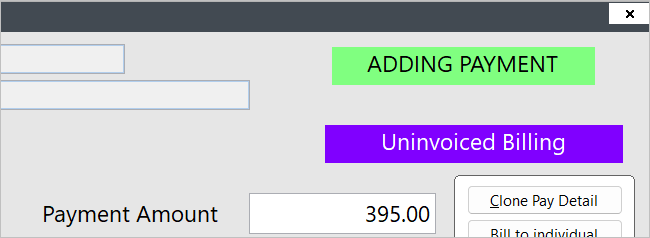
When you enter the appropriate billing information and click the Save button, the payment record is created but no Receipt Number is assigned. This is because billing records are not actually payments and should not receive Receipt numbers.
You can assign an invoice number by clicking the Assign Invoice Num button, or by running the Print New Invoices report.
Credit Cards
If you selected a credit card payment type in step 5 --and-- you have Credit Card Processing set up:
- Click the Payment Gateway button.
- Your preferred web browser (e.g. Chrome, Edge, or Firefox) will open and transfer you to the Payment Gateway's website to enter the credit card information.
- Once the card is validated, the ACEweb Payment Completed page opens with the status of the transaction. You can then close the browser window.
- If the credit card is valid, the Authorization # value is entered in the Auth Num field. If the credit card was declined, the payment is voided and the CC Declined notice is entered in the Pay Note field.
- Click the Save button to save the credit card payment.
Make Payments to Grouped Registrations
Grouping registrations allows you to make one payment for the group. The payment is then distributed among the registrations in the group. To make a payment to grouped registrations:
- Use the Explorer to find one of the grouped registrations.
- With it selected, click the Payments tab.
- Click the Add button.
- The total due for the group will be auto-entered into the Payment Amount field.
- Continue with step 5-7 of the regular payment process.
When you save the payment (step 7):
- The system will create a payment record for each member of the group and assign the same receipt number to all the payment records.
- The receipt will show registration and payment details for all group members.
Partial Payments to Group
There is an additional step when making partial payments to grouped registrations. To make a partial payment to grouped registrations:
- Complete steps 1-7 of the regular payment process entering in the partial amount in step 2.
- When you save the new payment, you'll now be asked how you want to distribute the partial payment. Make the appropriate selection.
- Proportional - applies percentage of payment to each registration (e.g. 40% of total due is assessed to one registration, so 40% of payment is applied to that registration).
- Equally - applies an equal amount to each registration.
- Specify - allows you to determine how much to apply to each registration. Enter the amount you want to apply to each registration in the To Pay field. Then click the Apply button to save the payments and return to the Payment screen.
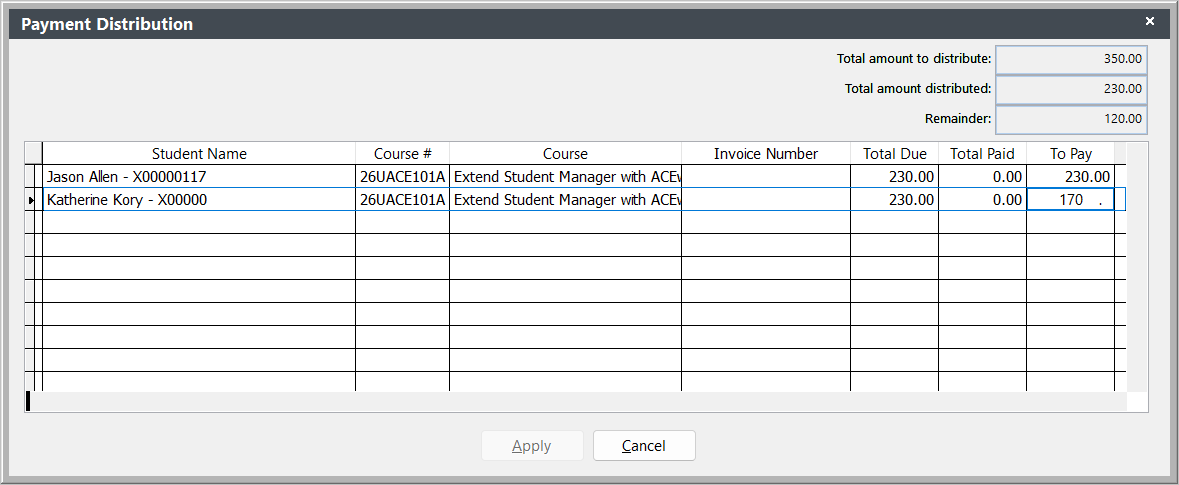
- Current Reg - applies entire payment to the current registration (i.e. the registration you opened to make the payment).
Print Receipt Options
You can print receipts from the Registration screen or the Payment screen. To do so:
- If you have the Registration screen open, click the Print Receipt button.
- If you have the Payment screen open, click Print Receipt and Close button.
Both options open the Receipt Options screen:
This screen offers many of the same options as other Report Options screens with these exceptions:
- By default, canceled registrations are excluded from the receipt. If you want to print a receipt for a canceled registration (e.g. print a receipt with the refund details), you must un-check the Exclude Canceled Registrations box.
- If you always print the same receipt, you can disable the Receipt Options screen. When you click the Print Receipt button, your predefined report will be automatically printed. To disable the screen, un-check the Continue to display this screen box. Note: to enable the screen again, select .
- To include a one-time message on the receipt, type in the message in the Receipt Message field.
This message is NOT saved for future use. If you want to print a message on all receipts, you must modify the report template and add the message.
- You can choose to print a Conventional receipt or Email a receipt. To email a receipt, select Standard Email Receipt or User Defined Email Receipt from the Receipt Type drop down menu. When emailing receipts, the user can also see the email before it's sent by checking the Let me see the email box.
- You can also attach a calendar attachment file (classcal.ics format) to email receipts with course sessions listed that the registrant can import into their Outlook calendar by checking the Send Calendar Attachment file box.
- If you have the Confirm Date field preference enabled, the Stamp Reg Confirmed Date option is available. If you check this box, the system date is stamped into the Confirmed field when you print the report and a P is displayed to the right of the Confirmed field. If you emailed a receipt, an E is displayed.
Cancel Registration/Refund Payment
To cancel a registration with payments:
- Select a registration in the Registrations Explorer tab.
- With the registration highlighted, select the Payments tab.
- Select the payment then click the Edit button.
- Click the Refund Wizard button to start the Refund Wizard.
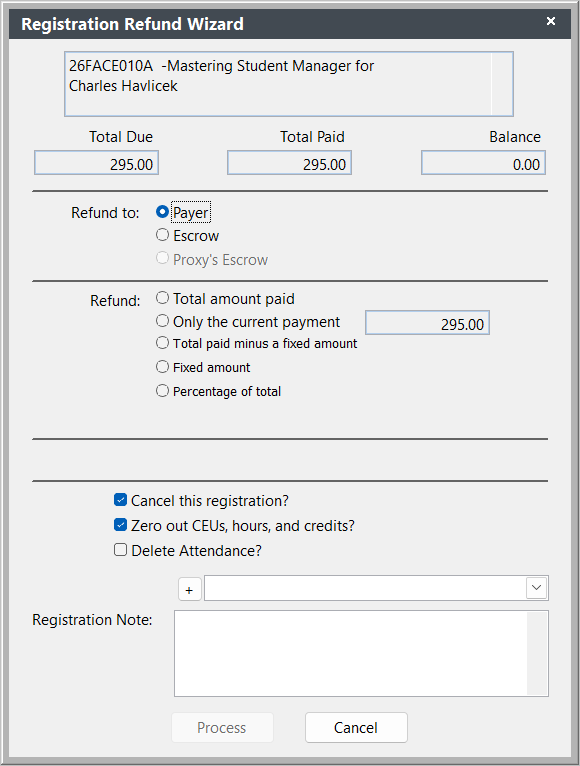
- Select the appropriate refund options:
- Refund to Student, Escrow, or Proxy's Escrow.
- Amount to Refund. Note: if you select Fixed Amount, Total Paid Minus a Fixed Amount, or Percentage of Total, you must also enter the additional information (e.g. fixed amount to keep, percentage to refund, etc.).
- Determine if you want to cancel the registration and zero out hours/ceus/credits.
- Select a Refund Description. This will be used as the Fee Adjustment Description.
- Enter a Registration Note if desired. This is stored in the Registration Note field on the registration record.
- Click the Process button.
- The system will ask you to confirm the refund. Click Yes if the information is correct.
- If you've created billing records for this registration, the system will ask you if you want to void the billing records. Select the appropriate option.
- The system will now do the following:
- Create a new payment record with the Pay type of 'Refund'.
- Assign the receipt number from the original payment, replacing the 'C' (Credit) with an 'R' (Refund). For instance, if the receipt number on the original payment was C0000121, the refund's receipt number will be R0000121.
- Add a fee adjustment to the Additional Charges window with the description you entered in Step 5, and update the Total Due.
- If you selected the option--the registration will be canceled and the CEUs/Hours/Credits will be zeroed out.
- If you want to print a receipt, click the Print Receipt and Close button. Note, once the receipt prints, the payment and registration screens close and you are returned to the Registration Search window.
Billings
If you will be charging the registrant a cancellation fee, after the refund procedure has been completed, you can create a new billing record with the cancellation fee amount.
Credit Card Refunds
At this time, the only payment services that accept refunds from Student Manager is PayPal. Please consult your ACEware technician and Payment Gateway documentation for implementation instructions if you are using this service.
For other payment services (e.g. Touchnet, Authorize.net, etc.), Student Manager will only create the refund record. You will need to go to the Payment Service to issue the refund to the user's credit card.
Gift Cards
If part or all of the registration was paid by a Gift Card, the amount will be refunded back to the gift card:
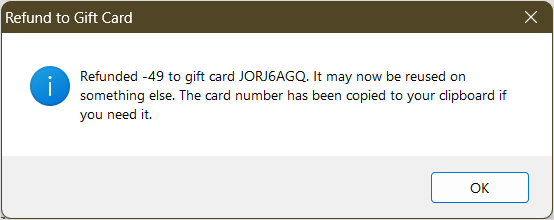
Refund to Escrow
Please see the Refund to Escrow topic for instructions.
Refund without Canceling Registration
At times you may need to refund money without canceling the registration. For example, refund a single payment or an overpayment.
To refund without canceling the registration:
- Select a registration in the Registrations Explorer tab.
- With the registration highlighted, select the Payments tab.
- Select the payment you want to refund then click the Edit button.
- Click the Refund Wizard button.
- Select the Refund to and Refund Amount options.
- Uncheck the Cancel this registration? and Zero out CEUs, hours, and credits? boxes.
- Select the appropriate Refund description from the drop down menu.
- Click the Process button.
- Click the Yes button on the Make Adjustment box if you want a fee adjustment entered to zero out the Amount Due.
Amount Overpaid
If you select the Amount overpaid option in step 5, steps 6-7 are not available.
Refund to Escrow
You can choose to refund the payment to an Escrow account.
Refund a Payment to Escrow
IMPORTANT
You must ungroup a registration BEFORE you proceed.
- Select a registration in the Registrations Explorer tab.
- With the registration highlighted, select the Payments tab.
- Select the payment you want to refund then click the Edit button.
- On the Payment screen, click the Refund Wizard button to start the Refund Wizard.
- Select one of the Refund to escrow options:
- Escrow - issues the refund to the registrant's Escrow account.
- Proxy's Escrow - issues the refund to the person who registered the registrant. For example, if Sharon enrolled Susan in the registrations, choosing this option will issue the refund to Sharon's Escrow account.
- Select the remaining options:
- Amount to Refund. Note: if you select Fixed Amount, Total Paid Minus a Fixed Amount, or Percentage of Total, you must also enter the additional information (e.g. fixed amount to keep, percentage to refund, etc.).
- Determine if you want to cancel the registration and zero out hours/ceus/credits.
- Select a Refund Description. This will be used as the Fee Adjustment Description.
- Click the Process button to issue the refund.
The system will now do the following:
- Create a course called **ESCROW** (if not already created).
- Register the individual in the **ESCROW** course (if the person is not already registered).
- Move the payment record from the original registration to the **ESCROW** registration.
- Enter the course number of the original registration in the Pay Note field (e.g. PF=24USTA401).
- Add a fee adjustment to the Additional Charges window of the original registration with the description you entered in Step 5.
- If you selected the option--the original registration will be canceled and the hours/ceus/credits will be zeroed out.
- If you set an Escrow Expiration Date option on Pay Preferences, the Escrow Expiration date is set on the payment.
Apply Escrow to Registration
When you register the individual, go to the Payments tab then click the Edit button, you’ll be notified that the person has a credit.
Once you click the OK button, the Payments screen will open. To apply the credit to the registration, click the Escrow Pay button. This will move the payment record from the Escrow registration to the current registration.
Note
If the Escrow credit is more than is owed for the registration, only the amount owed will be moved to the current registration. The remaining credit will remain in Escrow until you apply it to another registration.
Refund Escrow Payment
To refund an Escrow payment:
- Open the **ESCROW** class.
- Select the Registrations tab and highlight the correct registration.
- With the registration highlighted, select the Payments tab.
- Select the payment you want to refund then click the Edit button.
- Click the Refund Wizard button.
- Since you are refunding an **ESCROW** payment, all options but the Registration Note are disabled. Enter a registration note if desired.
- Click the Process button.
Firm Escrow
With the Use Firm Escrow option enabled (Pay Preferences), payments made by the firm (i.e. payor information is the firm's) are available to others in the firm.
Click the Firm Escrow button on the Payment to apply the escrow money to the registration.
Void Receipt/Invoice Tool
Void all payment records with a specified invoice or receipt number.
- Select to open the Void Receipt/Invoice screen.
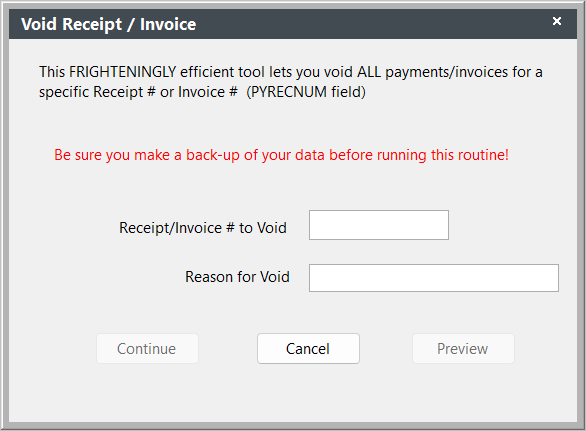
- Enter the receipt/invoice number in the Receipt/Invoice # to Void field.
- Enter the reason for voiding in the Reason for Void field.
- Click the Preview button to see the payment records that will be voided.
- Press the ESC key to close the Preview window and return to the Void Receipt/Invoice screen.
- Click the Continue button to void the payment records.
Payment Plan
Bill the amount due for a registration over a period of months with the Payment Plan option. For example, registrants enrolled in a course will pay a set amount each month until the registration is paid off.
IMPORTANT
This option is ONLY available on single registrations. It is NOT available on grouped registrations (the Payment Plan button will be grayed out if the registration is grouped).
To use this feature:
- Enroll the person in the course.
- On the Registrations tab, highlight the new registration.
- Select the Payments tab, then click the Click the aDD button.
- Select Billing from the Payment Type list.
- Edit the Billing Information, if necessary (e.g. switch to the Firm if the firm is paying for the registration).
- Click the Payment Plan button.
- Enter the number of installments (e.g. how many months).
- By default, the system will split the total amount due over the number of installments you entered, and set the due date for each installment in 30 day increments. If desired, you can edit the due dates and amounts. You can also print the plan, if desired.
- Click the OK button to create the billing records.
You can print invoices for the current billing payment from .
Transfer Payments
You can transfer a single payment to another registration or to Escrow.
If the registration is grouped with others, you must ungroup the registration BEFORE you proceed.
- Select a registration in the Registrations Explorer tab.
- With the registration highlighted, select the Payments tab.
- Select the payment you want to transfer then click the Edit button.
- Click the Transfer Payment (Escrow) button to start the Transfer Payment Wizard.
- Select the appropriate Transfer option (Transfer Entire Payment to Escrow, Transfer Entire Payment to Another Registration, etc.).
Note
If you are transferring a partial payment amount, you must also enter the amount to be transferred.
- Click the Process button.
- If you are transferring the payment to another registration, you must select the appropriate registration from the list. If you are transferring to Escrow, this step will be skipped.
- You will be asked to confirm the procedure. Click the OK button to complete the transfer.
- Click the OK/Close button to save your change and exit the screen.
Payment Mistakes
Occasionally, you may find that there is an error on a payment record that cannot be corrected (e.g. a payment with the wrong amount).
In these cases, you have two options:
- Delete the payment - you may delete a payment--IF--it has not been assigned a receipt or invoice number yet (i.e. the Receipt Number field is blank).
- Void the payment - if the payment has been assigned a receipt or invoice number, you must void the payment instead. To void a payment:
- Select VOID from the Payment Type drop down menu.
- Confirm that you want to change the payment type by clicking the Yes button on the Change Payment Type pop up window.
- Enter a reason for voiding in the Reason for VOID field.
- Click the Save button to save your changes.
If you need to void all payments with a specific receipt or invoice number, you can run the Void Receipt/Invoice tool.
NSF (Bad) Check
You can quickly void a check payment returned for Non-sufficient funds, and add an NSF charge to the registration, with the Bad Check button on the Payment screen.
NSF Charge Preference
If you apply an NSF charge to the registration, you can set up the fee and amount on Pay Preferences.
Select a fee description and enter the amount:
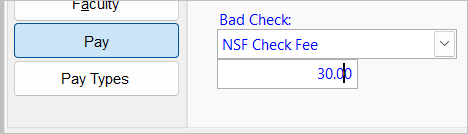
Voiding Check Payment
To void the check, and apply the NSF charge if set up in preference:
- Open the Payment record.
- Click the Bad Check button.
- If desired, enter a Reason for VOID.
- Save the payment.
The payment is now voided and the NSF charge is applied (if enabled).
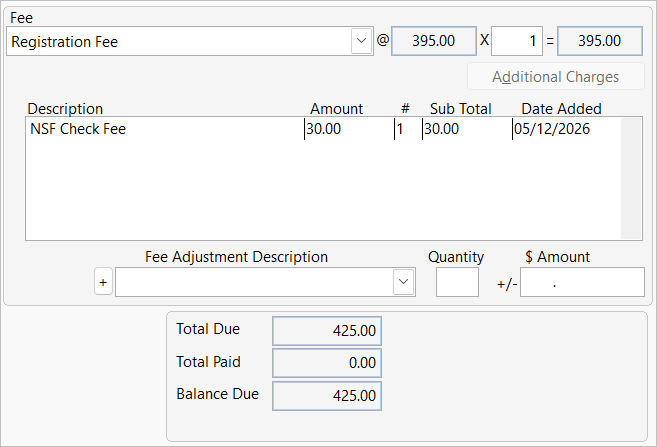
Pay Grabber Tool
The Pay Grabber tool allows you to view/edit/print a list of payments matching your search criteria. This tool is especially useful to view unauthorized payments received via ACEweb (i.e. aw-pending payments).
Running the Pay Grabber Tool
- Press the F7 key to open the Pay Grabber screen.
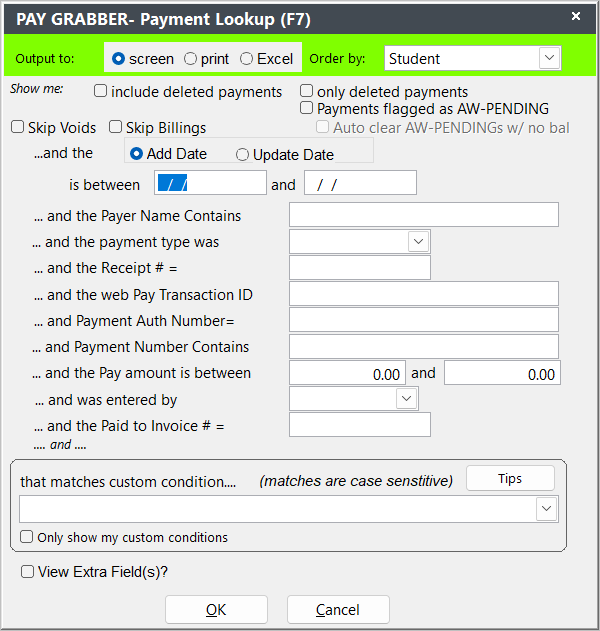
- Select your options (e.g. check Payments Flagged as AW-PENDING, enter dates, etc.).
- Click the OK button.
- The Payments list opens with all payments that met your criteria:
To view the student's Name record, double-click the Student's name.
To go directly to the Payment record, double-click the Payer's name. Note if there is more than 1 payment for the registration, you will need to double-click the correct payment to open it.
To print the list, press the CTRL+F4 shortcut.

View Deleted Payments (VFP)
To view and undelete registration records, check the include deleted payments or the only deleted payments box. The system will show you a list of deleted registrations:

Press the ESC key to close the window. The system will then open the Which records would you like to undelete? window. Check all you want to undelete then press the Done button.
Once the system undeletes the payment and associated registration, you can look up the registration.
Revoked Payments (SQL)
If you have VoidPendingPmts INI setting set to option #3, they will be marked as revoked instead of deleted. To generate a list of revoked payments check the Payments Flagged as Revoked box.
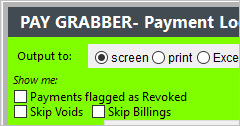
- The system will show you a list of revoked registrations.
- Press the ESC key to close the window. The system will then open the Which records would you like to unrevoke? window. Check all you want to unrevoke then press the Done button.
- Once the system unrevokes the payment and associated registration, you can look up the registration.
The system will ask if you want to delete all revoked registrations. Select the appropriate option.
View/Delete AW-Pending Payments
To delete AW-Pending records on registrations that have been paid (in another transaction), check the Auto Clear AW-PENDINGS w/no bal box.
- If the payments are deleted, you will be given the opportunity to select records to undelete.
- Next you will be given the opportunity to unmark Pending records.
- Next you will be given the opportunity to remove any remaining AW-Pending records.
Custom Conditions
You can search for payments based on Pay or Register fields with the Custom Condition option.

- If searching by a payment field, just enter the field name in your condition, e.g. pytransid="A1".
- If searching by a Register field, enter the table.field name, e.g. Register.rgcreator="WWWEB".
Save/Show Custom Conditions
After your custom conditions runs, you'll be asked if you want to save it. If you save it, the next time you run the Search Tool, you can click the drop down to see saved custom conditions.
Only Show My Custom Conditions - if you check this box, when you click the drop down you will only see the custom conditions you have created.
Running Reports
Topics covered in this section:
- Finding the Right Report
- Reporting Areas
- Report Options Screen
- Selecting/Running a Query
- Default vs Additional Report
- Previewing/Printing the Report
- Searching for Reports
- Output Reports in Other Formats
- Report Favorites
- Creating a Query
- Editing Queries
- Query List Manager
- Query Creation Guidelines
Finding the Right Report
How to find the report you need.
How do I start?
You must first determine what you want contained in your report. If you can put into words what the desired output will be, you are half way there.
For instance, “I want to generate letters for all individuals who currently have a credit balance, informing them of the dollar amount of that balance and proposing that they use it for an upcoming class.”
Where do I go?
Once you’ve decided what information you want on your report, you must determine which report to use. Begin by determining what reporting area accesses that information. For example, to get information on registrants, you would choose the Registration reporting area, not the Faculty reporting area.
Default vs Additional reports?
Every report area provides one Default report that displays the most common elements for the particular report area. For example, the default Name Roster report may list registrant data in a columnar format.
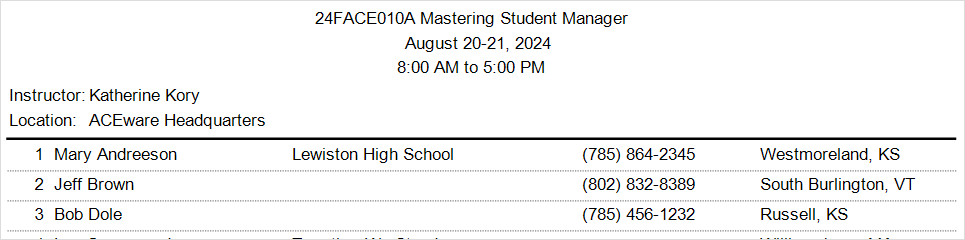
Most report areas also provide Additional reports. These are report templates that display the same data in a different format. Or they are report templates designed for specific purposes.
For example, this is a Name Roster that sorts registrants by Firm assigned.
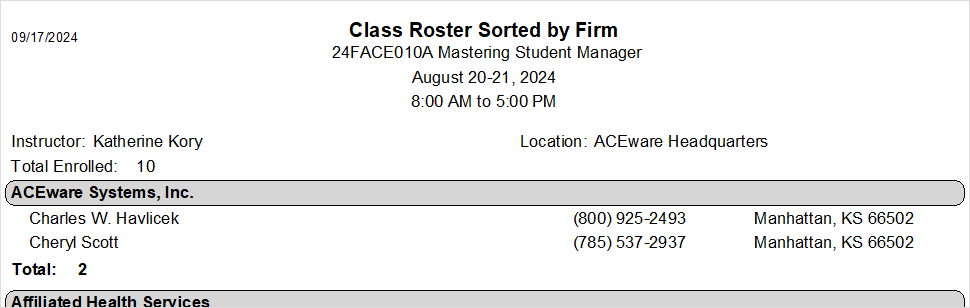
Report vs Query?
Query - a query is a request for information. You request specific information from the data tables to be displayed on the report. E.g. return all people which took courses starting between 2 dates.
Report - a report is a template which displays the information you've requested in a certain manner. For instance, a mailing label template displays information from the Name record in a block form for printing mailing labels.
Reporting Areas
Run reports from these areas:
Module Reports (Quick Reports and Receipts)
Quick reports give you data for a specific record.
- Course Quick Report button – print rosters, name tags, mailing labels, certificates, course description, or faculty contracts for particular course.
- Names Quick Report button– print fax cover, envelope, transcript, or letter for particular individual.
- Registration Print Receipt button – print receipts for particular individual or for the registration group.
- Payment Print Receipt and Close button - print receipts for particular individual or for the registration group.
- Budget Quick Reports button - print budget reports for the course.
- Faculty Manager Reports button - run faculty reports. Note: you can only run reports from the Reports > Faculty > Faculty Only Reports report area. If you want to run other faculty reports (e.g. contract agreements, instructor lists), you must run them from the Reports > Faculty menu.
- Pocket Ledger Print Requisition button (requires Pocket Ledger)- print requisition orders for a particular expense record.
Student Manager Report Menu (Main Menu Item)
This is the main reporting area in Student Manager. Reports are grouped according to the type of information contained in the report:
- Accounting – Income, Cash Box, Financial
- Demographics – Name information, Firm information, Mailing Labels, and Transcripts
- Courses – Details, CEU Reporting, Course Income/Enrollment Summary, and Catalog
- Registrations – Registration Details, Deadbeat, Receipts, Rosters, Transcripts, Name Tags, Table tents, and Certificates
- Faculty – Agreements, Instructor Lists, Performance Data, Check Requests, Faculty Reports
- Invoices – Invoices, Aging Reports
- Pocket Ledger – Income/Expense Listings, Balances, Budgets and Snapshot
- Workshops – Rosters/Certificates, Enrollment Summary
- Statistics – Names Demographic Sorting and Performance Summary, Tracking Codes, Course Data Summary and Performance Review.
- Codes – Student Manager Codes Listings
When running reports from the Report Menu, you must also run an appropriate query to get the data you want displayed on the report.
Special Reports
These reports are run from the main screen with the specified keyboard shortcut:
- F2 Quick Counts Report - view or print enrollment counts for upcoming courses.
- CTRL+F2 Quick Room Use Report - view or print enrollment counts for upcoming courses from 2 to 90 days out.
- F3 Faculty Talent Search - Search for instructors by several criteria.
- F4 Registration Search - search for registration records.
- F5 Search Names - search for name records.
- F7 Pay Grabber - search for payments.
- F9 Dashboard Report - quick look at courses with low enrollment, courses full or nearly full, summary of enrollments and income.
- F10 Membership Retention Wizard - returns students' retention status, courses they have taken, or a list of students meeting the criteria
- F11 Attendance Tracker - view/print/export attendance tracking information for a specific student.
- F12 Financial Aid Reporter - returns information about student awards/draws.
Report Options Screen
Many report areas will display the Report Options screen for you to select your report options. For example, this is the Mailing Labels Report Options screen:
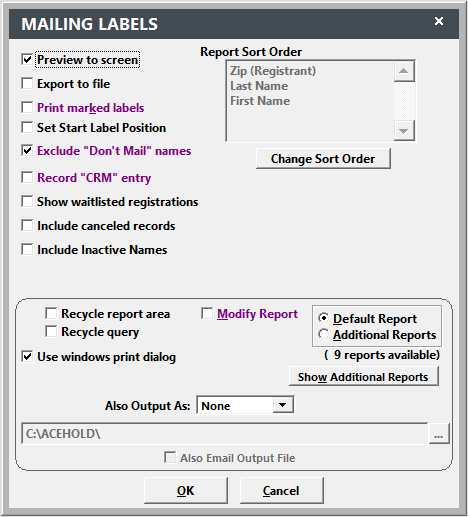
Several report options are available in all report areas, such as Print to screen and Modify report. Some are only available in certain report areas. For example, Show Waitlisted Registrations is only available in report areas accessing registration information.
To run the report, select the appropriate options then click the OK button.
Option Descriptions
Here a brief description of the available options:
- Print to screen – check to see an on-screen preview of the report before sending it to the printer.
- Export to file – check to export the data in the report to an external file (i.e. Microsoft Excel, Text file, etc.).
- Print New Invoices – if checked, will print invoices for all billing records which have not yet been assigned an invoice number.
- Print Marked Labels – if checked, all Name records which have the Print Label checked are included in your report.
- Set Start Label Position - allows you to print on a partially used label/name tag sheet.
- Exclude "Don't Mail" Names – if checked, will not include any Name record which has the Don't Mail box checked.
- Record "CRM" Entry – if checked, after the report runs, you'll be given the opportunity to create a CRM entry for all Name records in the report.
- Report Sort Order – allows you to change the sort order for records included in report. CAUTION: you may receive unexpected results because report grouping and justdoit functions will override your sort order options.
- Show Waitlisted Registrations – check to include waitlisted registrations in your report.
- Include canceled records – check to include canceled records in your report (i.e. canceled courses, registrations, etc.).
- Include Inactive Records - in Mailing Labels and Names w/Codes, check to include inactive Name records.
- E-mail Separately? - if checked, the system will create individual pdf files and email them to the individuals in the report.
- Include Third Party Billing Reggies – check to include registrations marked as billing records in your report.
- Generate Individual PDFs - if checked, will generate individual PDF transcripts for all users in the report.
- Clear Selected Fields from cursor - if checked, adds an additional step to select fields you want to keep in the report cursor.
- Recycle Report Area – if checked, you’ll be returned to the Report Options screen after running the report to run another report.
- Recycle Query – if checked, you’ll be able to run reports in this report area with the same query.
- Also Output As (PDF) – export the report as a PDF file.
- Modify Report – check to modify the report. For more information, see next section.
- Default Report/Additional Reports – select the report you want to run.
- Show User Reports – click this button to see the list of additional reports in this reporting area.
- Use Windows Print Dialog – this option opens the standard Windows Print Dialog box when you print the report.
Selecting/Running a Query
A query is a request for specific information to display on the report template. For example, to print rosters for all courses which begin between two dates, you would select a query that asked for a date range.
To select a query, highlight it then click the Select button.
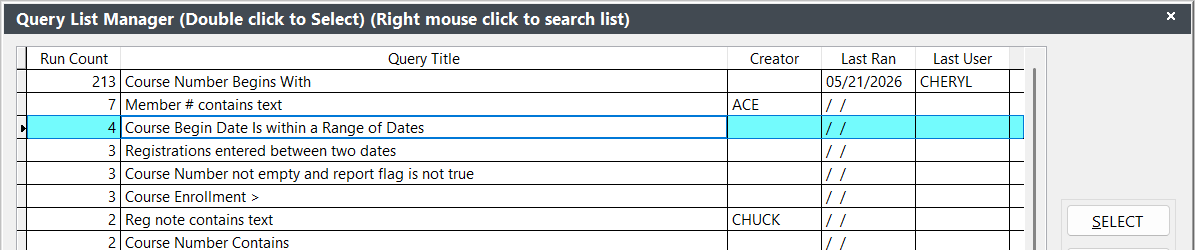
You’ll be asked to enter the dates next. Enter the appropriate dates, or select dates using the Date Picker icon, then press the OK button.
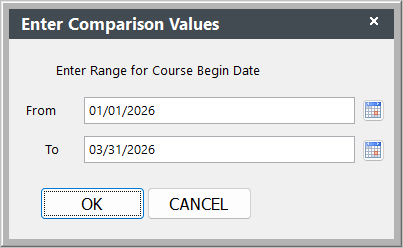
Other queries might ask for something like the Course Code Begins with:
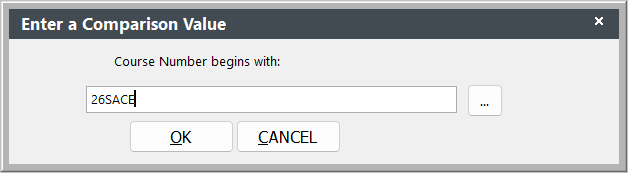
You select the query that gets you the data you want to see on your report.
Default vs Additional Report
Every report area provides one Default report that displays the most common elements for the report area. For example, the default Name Roster report may list registrant data in a columnar format.
Most report areas also provide Additional reports. These are report templates that display the same data in a different format. Or they are report templates designed for specific purposes.
For example, this is a Name Roster that sorts registrants by Firm assigned.
After running your query
If you selected the Default report and Print Preview options, the Print Preview opens.
If you selected the Addtional Report option, the Additional Report list opens for you to select the Additional Report you want to run.
!(../images/additionalreports.png)
Select the report you want to run by highlighting it and pressing the Enter key.
Previewing/Printing the Report
If you selected the Print to Screen Report Option screen, the Print Preview window opens. From here you can preview and print the report.
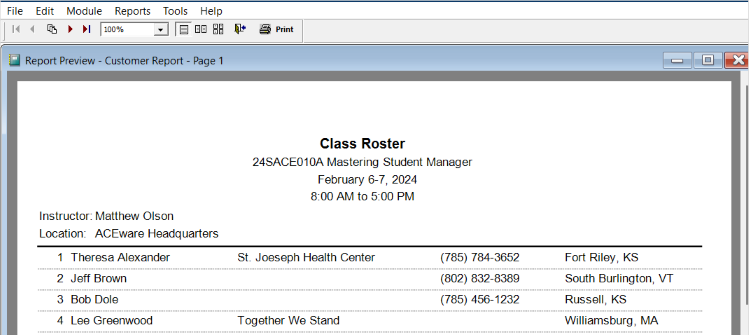
Use the Print Preview Tool Bar to view pages of the report, zoom in or out, print, or close the Report Preview Window.
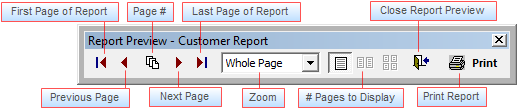
Preview One Report at a Time
Only one report can be previewed at a time. If you try to run another report while a Print Preview window is still open, you'll be prompted to close the open one first.
Searching for Reports
To search for a report, select . This feature allows you to search reports by report title, field/variable name, function or character string.
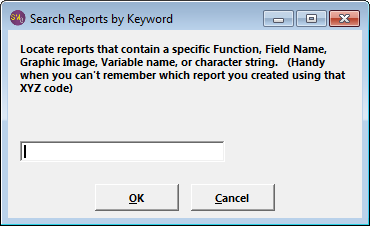
Enter your search string then press the ENTER key. Student Manager will search all reports and give you a list of Default and Additional Reports (separate lists) that contain the search string.

To run a report click the appropriate Description value.
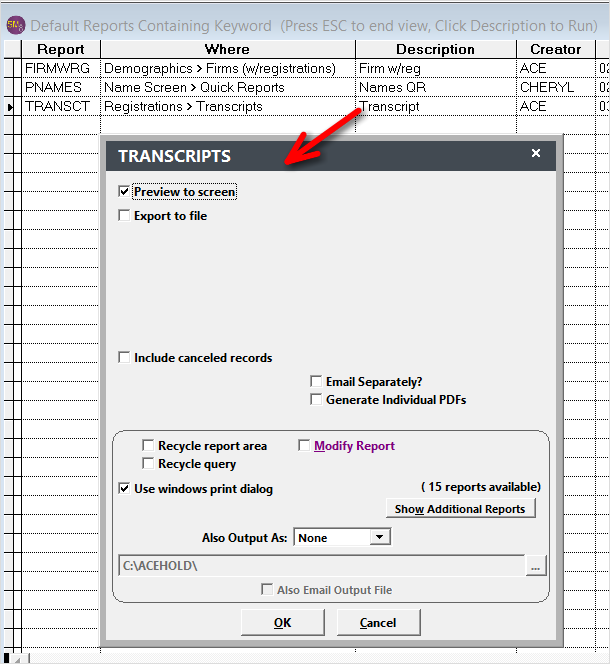
Output Reports in Other Formats
You can choose to print a report, or you can output the report in other formats.
IMPORTANT
Microsoft Office must be installed on the user's computer to output in Excel or Word formats. If using Remote Desktop to access Student Manager on the server, it must be installed on the server.
To output a report in another format:
- Select the appropriate Report area.
- On the Report Options screen in the Also Output As drop down list, select the desired output format:

- Enter the path (location for the saved file)* and name for the file. You can enter it directly into the path field (C:\ACEHOLD\13SACE010A.PDF in this example),

or you may click the ... button to the right of the Path field to open the standard Windows Save screen (i.e. select the location, enter the file name, then click the OK button).
*We STRONGLY discourage saving files into your Student Manager directory. Instead, create a folder on your C:\ drive called ACEHOLD and save the Output files to this location.
- Select any other appropriate options (e.g. Additional Report, Include Canceled, etc.), then click the OK button.
- If you are running a report from the Reports Menu, select and run the appropriate query. If you are running a Quick Report, this step will be skipped.
- If you selected the Additional Report option, select the appropriate report.
- The Report Preview opens (if you have the Preview option enabled). When you close the Report Preview window, the output file is created in the location you specified in step 3.
Also Email Output File
If you would also like to email your output file, in step 4 above, check the Also Email Output File. After the system saves you file, the Student Manager Quick Email screen opens with your output file attached.
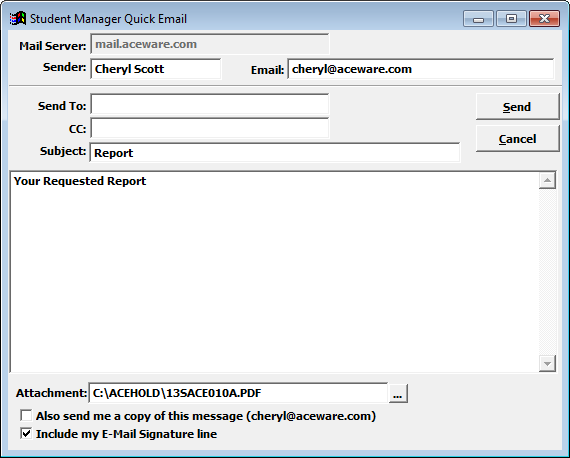
HTML Output
If you select the HTML format, the system will create an HTML page of the report for web viewing. If the report is more than one page, the system will also create navigation icons for the web page.
You must copy the HTML page AND all associated graphics to you Web page folder or users will not be able to move from page to page.
Report Favorites
Student Manager users can identify up to 10 reports as personal favorites so they can be easily found and run. Student Manager administrators can also identify up to 10 Global Favorites available to all users.
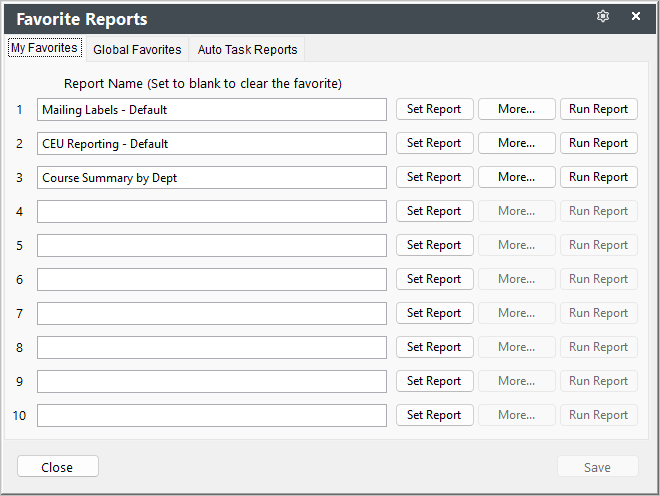
Favorite Reports tabs:
- My Favorites - user reports--each user can set their own favorite reports.
- Global Favorites - reports available to all users. Student Manager administrators set these report favorites.
- Auto Task Reports - status of any report favorites set up as Auto Tasks.
Open Favorite Reports
Access the Favorite Reports screen:
- Click the icon on the Quick Launch toolbar.
- Select or
- Use the CTRL+F1 keyboard shortcut
Favorite Reports Tab Preselected (Step 2 of Instructions)
- When selecting an item from the Reports menu, the correct tab will be preselected for you when the screen opens.
- If you right-click the icon and choose My Favorites or Global Favorites, the correct tab will be preselected for you when the screen opens.
Set Favorite Report
- Open the Favorite Reports screen.
- Select the appropriate tab: My Favorites or Global Favorites.
- Click the Set Report button.
Global Favorites
Only Student Manager administrators can set Global Favorites. The Set Report button is not available for other users.
- On the Favorite Report Chooser window, select the report area, sub area, name and query. In this example, we are choosing the JUSTDO - Deadbeats report with a Course Number Begins with query:
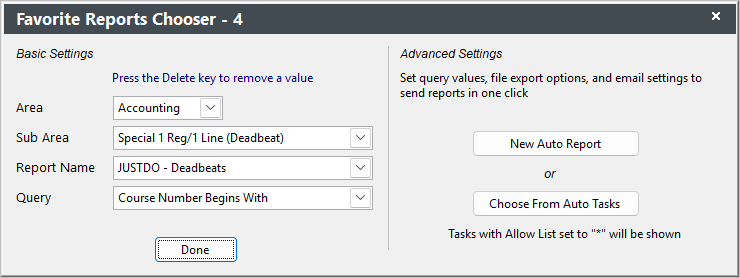
Notes
- Cashbox, Invoice, and most Statistical reports cannot be set as a favorite report.
- You can set a Statistics > Course Data Summary report as a favorite report.
- Click the Done button.
- The report is added to the list.
- Repeat steps 2-5 to set more report favorites.
- Click the Save button to save your report favorites.
New Auto Report
You can set up a favorite report to create a file and email it when you click the Run Report button.
- Click the New Auto Report button on the Favorite Reports Chooser screen.
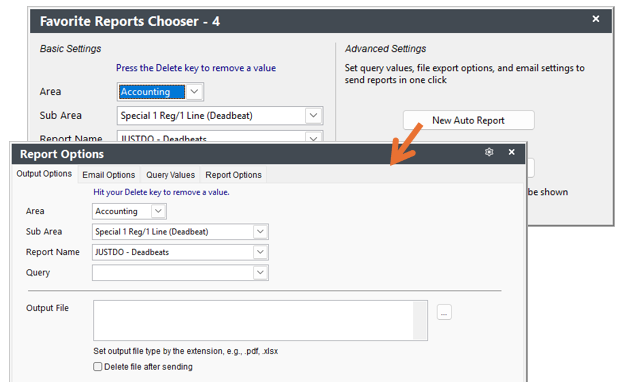
- The Area, Sub Area, and Report Name values are copied over from the Favorite Reports Chooser screen. You will need to choose the Query and enter the query value (e.g. Course Number Begins query and enter 26F).
- Set the Output File value: location and name. You can use template expressions in the path. For example this expression will save a file named yourfile.pdf to c:\acehold[current year][current month] folder:
c:\acehold\##year(date())##\##cmonth(date())##\yourfile.pdf
- Select the Email Options tab and enter the information:
- Select the Sender.
- Enter the email address(es) the email will be sent to in the Sent To field. Multiple email addresses must be separated with a comma.
- Enter the Subject.
- Enter the Message.
Template Expressions
- You can use template expressions in the Subject and Message fields. For example ##date()## will enter the current date in the fields.
- Template expressions must be enclosed in the ## delimiters.
- Click the Ok/Close button to save your changes and return to the Favorite Reports Chooser screen.
Relative Date Queries
You can use relative date queries, if desired. For example, always run the report for the previous month.
- Use a date query, for example a course begin date within a range of dates query.
- When you click the New Auto Report button, enter a basic date range. You will change this later.
- When the Report Options window opens, select the Query Values tab.
- Select the appropriate option:
- Make dates relative to day of running - will create a expression that sets the dates relative to the day you set up the report. The system will ask you to set both dates:
When you click Yes on both date questions, it will reset the query's Where clause:
- Edit Manually - allows you to manually edit the Where clause. This is useful if you want to reset the dbDate() values. Or if you want to use a function such as FirstofMonth() or FirstofQuarter().

Examples
- This Where clause uses the FirstofMonth() function to always run the report for courses beginning in the previous month:
( COURSE.COBEGDATE >= ##dbDate(firstofmonth(-1))## .AND. COURSE.COBEGDATE <= ##dbDate(firstofmonth(0)-1)## )
- This Where clause uses the FirstofQuarter() function to always run the report for courses beginning in the previous quarter (based on calendar year):
( COURSE.COBEGDATE >= ##dbDate(firstofquarter(-3))## .AND. COURSE.COBEGDATE <= ##dbDate(firstofquarter(0)-1)## )
Auto Task
Student Manager administrators can share a user report as an Auto Task so other users can add it to their own My Favorites list.
- Select .
- In the list, highlight the user that made the report.
- Click the More button and select Report Favorites.
- Click the More button on the report you want to share.
- Select Share as Auto Task.
User-Add Auto Task
Once the administrator has shared the report, other users can add it to their My Favorites list.
- Open the Favorite Reports screen.
- Select the My Favorites tab.
- Click the Set Report button on a blank favorite report.
- Click the Choose from Auto Task button.
- Select the auto task to add.
- Click the OK button to add the report.
Run Favorite Report
- Open the Favorite Reports screen.
- Select the appropriate tab: My Favorites or Global Favorites.
- Click the appropriate Run Report button.
- Select any other report options on the Report Options screen (e.g. Include Canceled records, also output as, etc.), then click the OK button.
- Enter the query value(s) then click the OK button.
- The report now runs.
Run Favorite Report from Quick Launch
A new feature in version 9.0.264.0 is the ability to right-click the icon and select My Favorites, Global Favorites, or a specific favorite report to run. E.g.
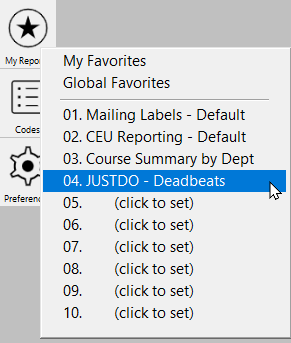
Change Favorite Report
You can make changes to a favorite report. For example, you need to update the query values.
- Open the Favorite Reports screen.
- Select the appropriate tab: My Favorites or Global Favorites.
- Click the appropriate Set Report button.
- Make the appropriate changes (e.g. change the report area, sub area, name and/or query).
- Click the Done button.
- Click the Save button to save your changes.
Delete Favorite Report
- Open the Favorite Reports screen.
- Select the appropriate tab: My Favorites or Global Favorites.
- Click the appropriate Set Report button.
- The Area value should be highlighted for you. Press the DELETE key to clear the value. Clearing the Area value will also clear the other fields.
- Click the Done button.
- Click the Save button on the Favorite Reports screen to save your changes.
Creating a Query
To create a new query:
- On the Query List Manager window, click the Add button.
- The Query Editor window opens for you to add query elements.
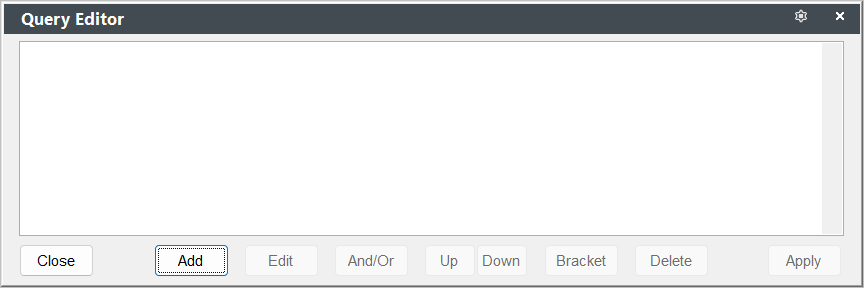
- Click the Add button to add a query element.
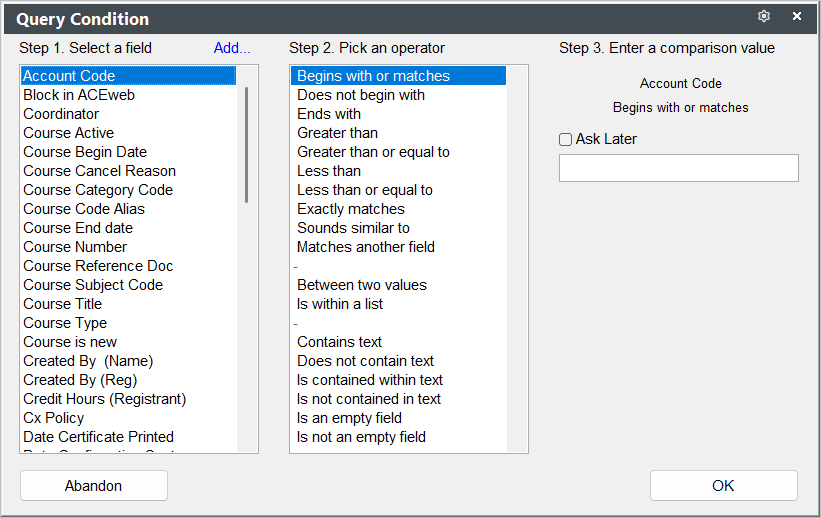
- In Step 1: Select a field, the available query fields for this report area are listed. Select the appropriate field from the list (e.g. for courses between two dates, select Course Begin Date).
Field Not Listed?
If the field you want is not listed, you may be able to add it with the Add option.
- In Step 2: Pick an operator, the operators for the field you selected in Step 1 are listed. Select the appropriate operator (e.g. for a courses between two dates query, you would pick 'Between two dates').
- In Step 3: Enter a comparison values*, the values you are searching for are entered.
Most of the time you should select Ask Later. This keeps the query as generic as possible so that it can be used over the long term (e.g. if you enter dates instead of selecting Ask Later, every time you run the query it will only report courses which begin between those two dates).
- You're returned to the Query Editor window.
- If you are finished adding query elements, click the Apply button.
- If you need to add more query elements, click the Add... link to add another element.
For more information about adding multiple query elements, see the Editing a Query topic.
- When you click the Apply button, you will be asked to enter a title and save your query. Enter the title then click the OK button.
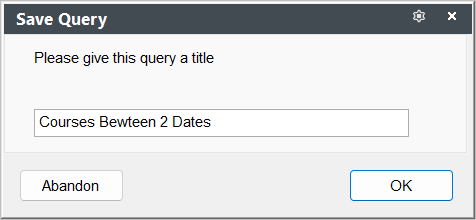
Editing Queries
You can edit, copy, and rename queries.
Edit Query
- Highlight the query you want to edit.
- Click the Edit button.
- The Query Editor window opens.
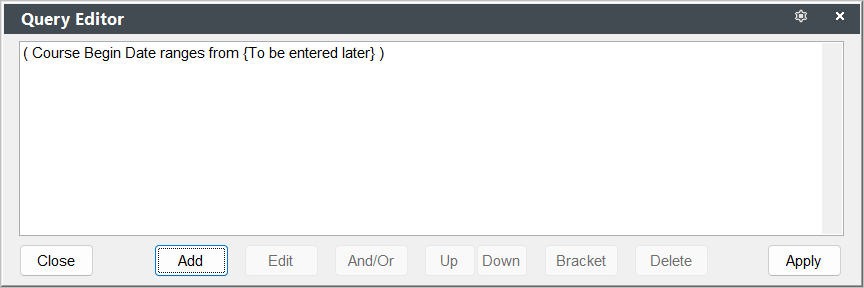
You can now edit the query elements.
Add Additional Elements
To add another element to a query:
- Click the Add button.
- Continue with steps 4-6 of the query process.
- When you are returned to the Query Editor window, you may need to switch the connector using the And/Or button. The default connector is And.
- And - means that BOTH items must be true for a record to be included in the result.
- Or - means that if ‘EITHER ONE’ of the items is true it will be included.
Edit Query Elements
To edit a query element:
- Click the element you want to edit to highlight it.
- Click the Edit button.
- The Query Condition window opens for you to edit the element (steps 4-6 of the query process.
- Once you are returned to the Query Editor window, click the Apply button to save your query changes.
Delete Query Element
To delete a query element:
- Click the element you want to delete to highlight it.
- Click the Delete button.
- Click the Apply button to save your query changes.
Move Query Elements
To move a query element:
- Click the query element you want to move up or down to highlight it.
- Click the Up or Down button to move the element up or down.
Connector or Brackets
When moving queries, you may also need to change the connector (And/Or) or re-bracket elements.
Multiple Element Connectors
You may occasionally need to create a query with a combination of elements. For example, you need courses between two dates except for courses which have "MGT" in the course code AND are offered by a specific department.
The most important thing to keep in mind is whether you want one, some, or all the conditions to be true:
All conditions must be true - make certain you use the AND connector. This means that if any single condition is not met, the record is not included (e.g. the course must begin between the two dates, AND not include "MGT" in the course code, AND have a specific coordinator).
One of the conditions must be true - use the OR connector. This means that if the record meets one of the conditions, it will be included (e.g. the course must begin between two dates, OR must not contain "MGT" in the course code, OR must have a specific coordinator).
Combination of conditions must be true - you may need to use a combination of connectors along with the bracketing feature to govern how the query is analyzed.
Bracket Query Elements
Some queries cannot be reliably used unless elements are bracketed to determine the order of execution of the elements. Conditions inside the brackets will always be evaluated before any conditions outside of the brackets. If you are using a combination of ANDs and ORs you should ALWAYS use brackets!
To insert brackets:
- Click the first query element you want to bracket to highlight it.
- Click the Bracket button.
- Enter a parenthesis in the first field:
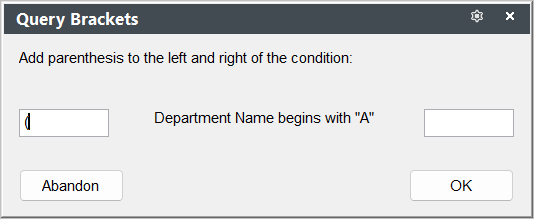
- Click the OK button.
- Click the last query element you want to bracket to highlight it.
- Click the Bracket button.
- Enter a parenthesis in the last field:
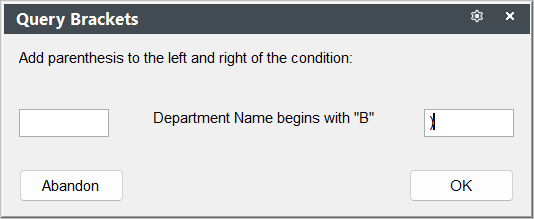
- Click the OK button.
You're conditions will now be bracketed (i.e. parenthesis are placed around the conditions):
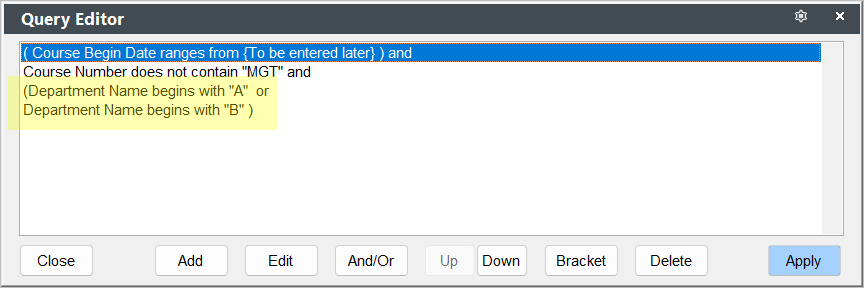
Query List Manager
The Query List Manager has several features to help you manage your queries.
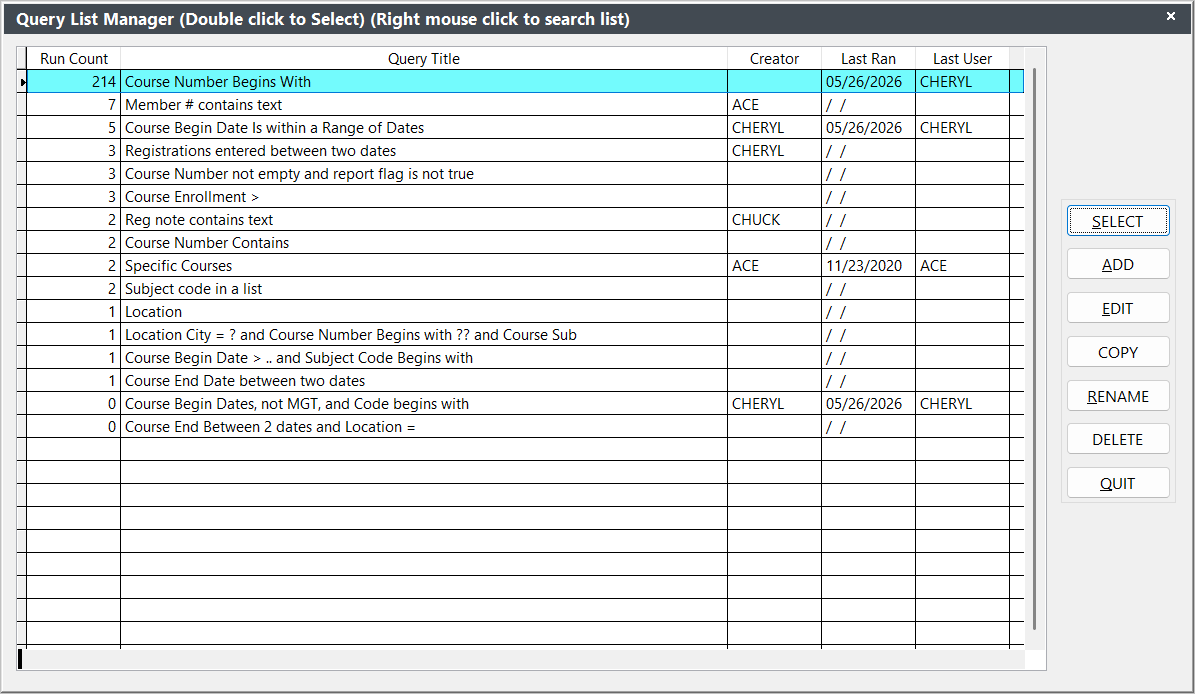
- Run Count - the number to the left of the Query Title indicates the number of times the particular query has been run. This helps you determine which queries in a given area are useful and which can be deleted.
- Query Title - tells the user what the query does. This should be as descriptive as possible so that all users know what information the query will request from the data tables.
- Creator - the user who created the query.
- Last Ran - date the query was last ran.
- Last User - user name of person who last ran the query.
- Query Highlight - when a query in the list is highlighted (clicked on once), a message appears in the upper right of the Student Manager screen telling the user what query elements are in the query.
Search Queries
You can search query titles and fields by right-clicking on the query window and selecting the appropriate option:
- Title - search query titles, e.g. search for all queries which have "Course" in the title.
- Field - search query fields, e.g. search for all queries which reference the cocrse field (course code field from the Course table).
Sort Queries
By default, queries are sorted by the Run Count.
- To sort queries by Query Title, click on the Query Title Column Header. This will sort your queries in A-Z order.
- To sort queries in Z-A order, click the Query Title Column Header again.
- To sort queries by Run Count again, click the Run Count Column Header.
Character Type Queries
Queries that have Character type elements (e.g. Course Number begins, Subject Code is, etc.) offer users the ability to select a query item from the list of available field values. For instance, a Course Number Begins query allows you to select the course number from a list of all course records in your system.
The query item is selected by clicking the ... button to the right of the Query field. This opens the list of available values for the query element:
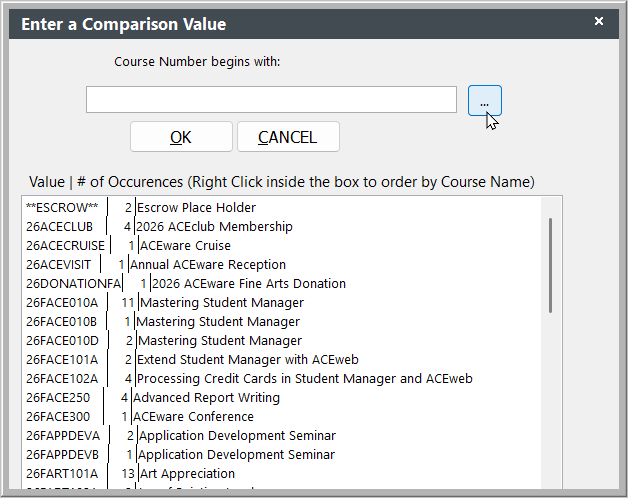
The list shows the number of Occurrences for the particular value (e.g. how many are enrolled in the course, how many names have the particular subject code assigned, etc.).
Double-click a value in the list to select it and add it to the Query field.
Copy Query
If you need a query that is similar to one already created, you can copy the existing query then edit it to include/remove query elements.
- Highlight the query you want to copy in the Query List Manager.
- Click the Copy button.
- Enter a title for the new query then click the OK button.
The new query is added to the Query List Manager window and you can now edit it.
Rename Query
Query Names should be as descriptive as possible so that all users know what information the query will request from the data tables. If you edit a query, then you may also need to rename it.
To rename a query:
- Highlight the query in the Query List Manager window.
- Click the Rename button.
- Make the appropriate changes to the name.
- Click the OK button to save the new name and return to the Query List Manager.
Delete Query
To delete a query:
- Highlight the query you want to delete.
- Click the Delete button.
- Confirm the delete procedure by clicking Yes on the Confirmation dialog box.
You can also use the Delete Queries tool to clean up queries.
Query Creation Guidelines
Although the most common queries are already created in Student Manager, most organizations will need to create or modify queries to meet their specific needs. Here are some general rules to follow when creating queries:
- The field you want to use in your query must be available in the report area.
- You may create an unlimited amount of queries in each report area. Although, it is best to only maintain those queries that you most commonly use.
- Queries can only be used in the particular report area in which they are created.
- Some report areas have options that can affect your query. For example, if you want canceled records in your report, you must select the Include Canceled Records option or canceled records will not be included in the report, no matter what you put in your query (e.g. a query that only selects canceled records will return 'No Matching Records Found' if you haven't selected the Include Canceled Records option).
Report Areas with No Queries
In some report areas, it's not necessary to use a query. Those are:
- Codes Section ()
- Cash-Box ()
- New Invoices ()
- Quick Reports (Name, Course, Faculty Manager)
- Receipts (Registration and Payments)