

Assigning Instructors to Course
Some things to note before assigning instructors to a course:
- Faculty records must be exist before you can assign the instructor to a course.
- Only Active Instructors are listed in the Search window (i.e. the Active box must be checked on the Faculty record).
- If you hit the ESC key to close the Search window, the Faculty record will open in Add mode, for you to add a new faculty record if desired. Click the Abandon button if you don't want to add a new faculty record and you will be returned to the Course Instructor tab.
- The Pay Date will default to the Course End Date. The Account and Sessions will default to the Course Account and # of Sessions. Any of this information can be changed after assigning the instructor.
- If you set the default Expense Class for Teacher Pay on Faculty Preferences, the default Expense Classification will be entered for you. This can be changed after assigning the instructor.
Assign Instructor
- Select the Instructors tab.
- Click the Add Instructor button.
- Select the appropriate instructor from the list.
- You'll be returned to the Instructors tab and the Instructor's name will appear in the Current Instructor field.
- Enter/edit the desired Instructor Pay information (e.g. pay type, amount, pay date, etc.).
- The Presentation Information will default to corresponding course entries. You can edit this information if desired.
- You can create an instructor pay record in Pocket Ledger by clicking the Post to Ledger button after pay details are entered.
- Click the Save Changes button.
Assign Additional Instructor
To assign another instructor to the course, click the Add Additional Instructor button then complete steps 3-8 above.
Each instructor will have his/her own payment/presentation record. To view a specific instructor’s information, select the appropriate instructor from the Current Instructor list.
Scoping Instructor List
You can scope your list of instructors by Subject. If you have this feature enabled, only instructors who have a Subject Code that matches the Subject Code entered on the course record will appear in the Select Instructor window. For example, instructors with a subject code of MATH will appear in the Select Instructor window for courses whose subject code is also MATH, but not in courses whose subject code is ENGLISH.
To enable Subject Scoping, open the Course Preferences screen and check the Subject Scoping (Viewing Instructors) option.
Check Schedule Conflicts
If you have the Check Instructor Schedule Conflict preference enabled on Faculty Preferences, the system will check for instructor scheduling conflicts after you select the instructor (step 3 of the Assign Instructor section above).
You will be notified if it finds a conflict.
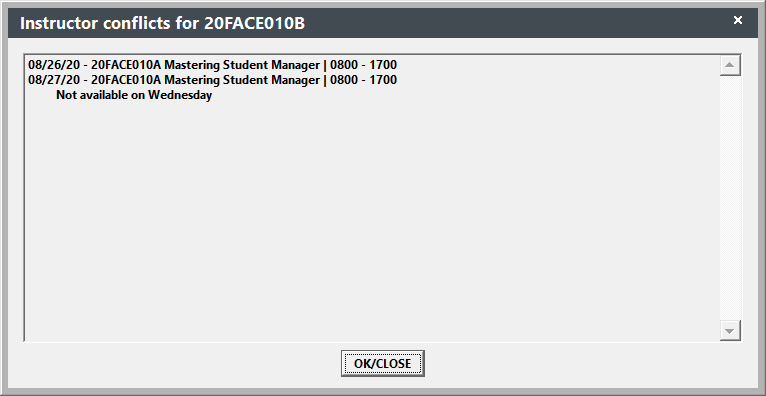
You will also be notified if the instructor is not available on the day(s) the course meets, as set on their Faculty record.

Click the OK/Close button to close the Instructor Conflict window. You'll be returned to the Instructors tab and the Instructor's name will appear in the Current Instructor. You can then remove the instructor if desired.
View Faculty Manager Record
You can view the instructor's Faculty record by selecting the appropriate instructor in the Current Instructor list, then clicking the Edit Instructor Record button. This button opens the Faculty screen to the selected instructor's record.
Remove Instructor
To remove an instructor from a course, select the appropriate instructor from the Current Instructor list, then click the Remove Instructor button. You'll be asked to confirm the removal. Click the Yes button.
The instructor will be removed from the course. Note: this does not remove the instructor's Pocket Ledger record. You must delete it manually.
Register Instructor in Course
If you also need to register the instructor in the course:
- Click the Reg Inst in this Course button.
- A Name record must be created for the instructor, if they don't already have one. Choose the appropriate option:
- Make new student record - a new Name record is created for the instructor and the registration process begins.
- Link to existing student record - the Name Lookup window opens for you to select the Name record. After selecting the Name record, the registration process begins.