

Finding Records
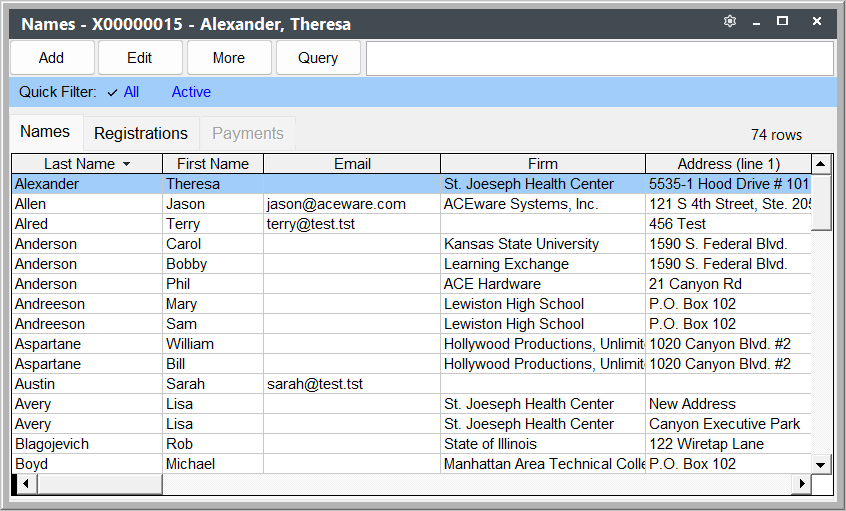
When you select a find routine (e.g. icon on Quick Launch Toolbar or look up option in Main Menu, the Explorer window opens with the list of records in that table so you can search for the record you want to open.
Searching for a Record
- Type a search term and the system will return records containing your search term
Disable 1st Word Auto Search
By default, the Explorer searches as you type. If the Disable 1st Word Auto Search system preference is enabled, the search will wait until you finish the first word — either by typing a space to start a second word or pressing ENTER — before it searches.
Name Search: Student Manager supports partial name searches. You can enter 2 or 3 characters of the last name, a space, then 2 or 3 characters of the first name (e.g. hav ch).
Date Search: enter the date in mm/dd/yy format. You can also enter a partial date, e.g. 06/02 (June 2nd).
Quick Filter
The Explorer window offers quick filters you can choose.
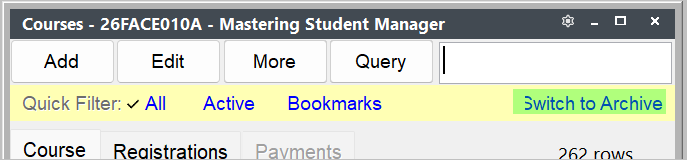
For example, on the Course Explorer, you can filter All courses, Active courses, courses you have bookmarked, or courses matching your query.
You can also click the Switch to Archive link to switch to Archived courses (highlighted in green):
Inactive Courses
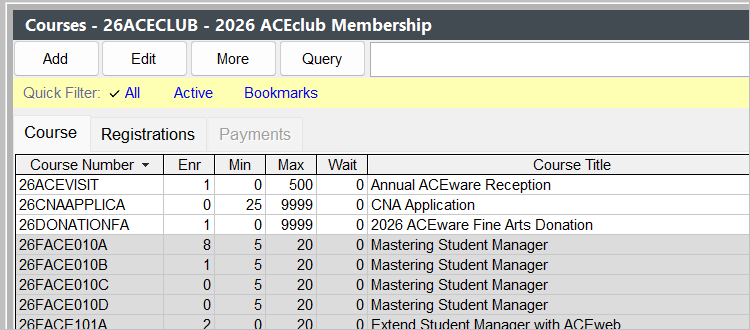
If you have the All quick filter selected in courses, inactive courses will be grey:
Search Keys
You will have several search keys depending on what Explorer you are accessing. For instance, in the Names Explorer, you can search for records by Name, ID, Firm, Zip Code, Day Phone, Evening Phone, Email, Birthdate.
The Explorer will return records that have your search value in any of the searchable fields.
Queries
If you need to search for records that are not in the Search keys, you can use the Query option. See the Search Queries topic for more information.
Adding Columns
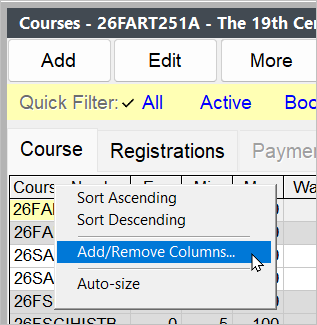
Each Explorer window has a default set of columns it displays. You can add columns by right-clicking a column header (e.g. on the Course Explorer, right-click the Course Number header) then selecting Add/Remove Columns.
On the Add/Remove Columns window, click the Add or Remove buttons to add or remove columns from the Selected Columns list.
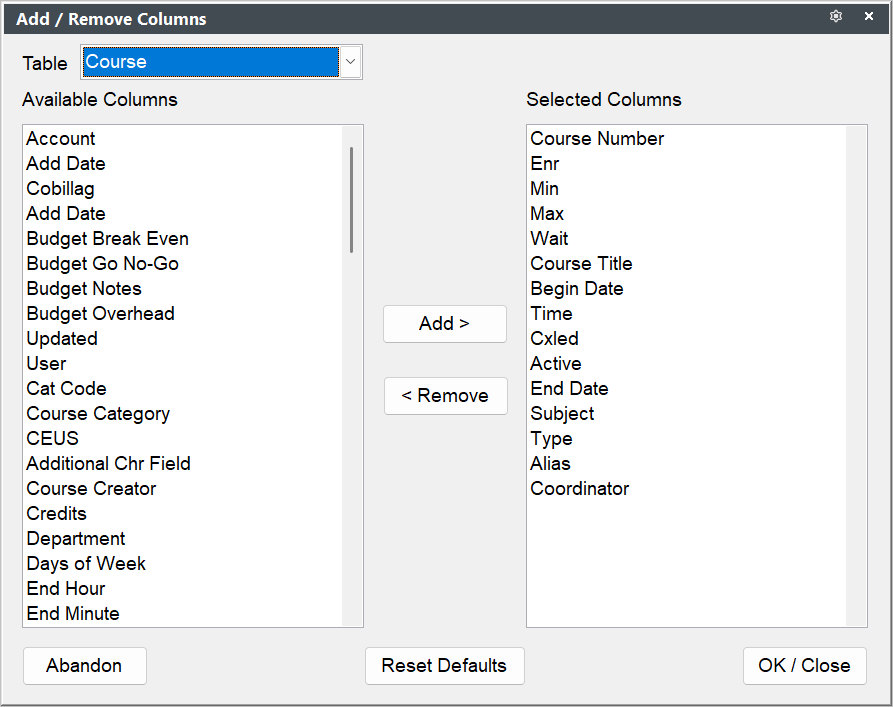
Student Manager will remember your column selection.
Adding UDFs
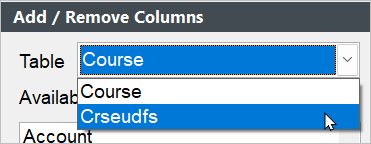
You can also add UDF columns by selecting the UDF option from the Table drop down. For example, select Crseudfs for course UDFs.
Column Sorting
If you have a set of records showing and you want to sort that list, click on the column Header (e.g. Firm, Begin Date) to order the list by the column you clicked.
Clicking it again will reverse the search (e.g. A-Z, Z-A, oldest to newest dates or newest to oldest dates).
Rearranging Columns
You can also rearrange columns by dragging each column to where you want it to display. For example, in this screenshot, the Email field is moved from after the Evening Phone column to after the First Name column:
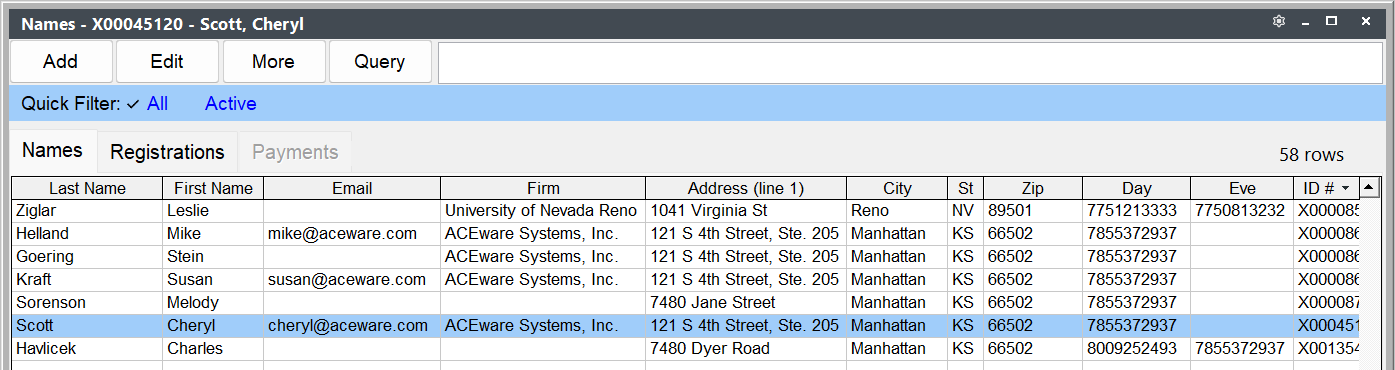
Student Manager will remember you column placement.
Resizing the Explorer Window
You can resize the Explorer window to your desired preferences. Just drag the margins to where you want. Student Manager will remember your customized window width.
Open Record
- Press the TAB or ENTER key to move from the Search field to the list of records.
- If more than 1 record meets your search term, scroll to the record then press the ENTER key, or click the Edit button to open the record.
Viewing Child Records
Names, Course, and Registration Explorers include the ability to view child records of the table.
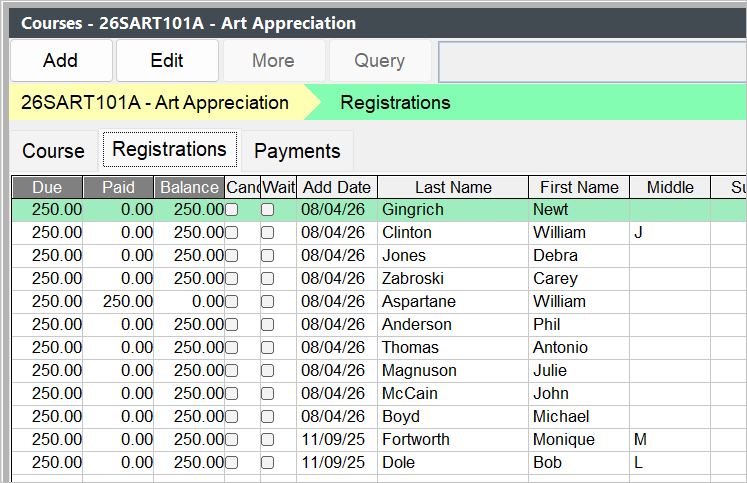
For example, if you click a course record in the Course Explorer, you can see registrations and payments for that course:
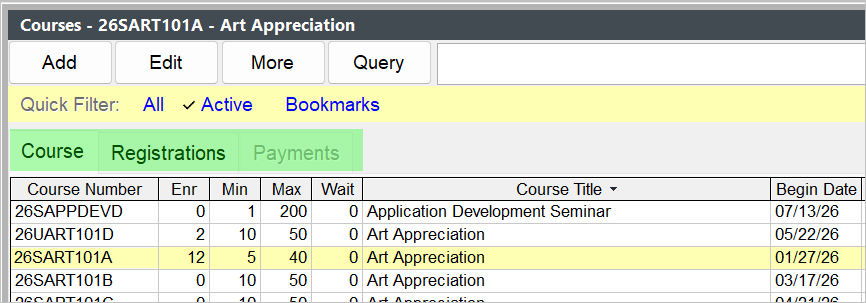
To see registrations, select the Registrations tab:
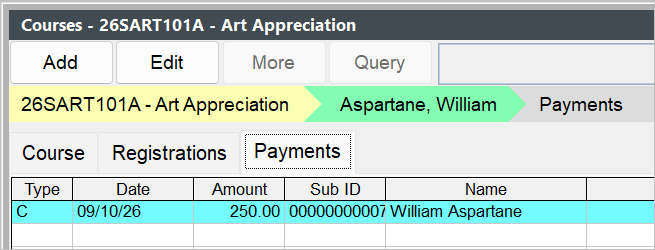
Select a registration then the Payments tab to see payments for the selected registration:
Add Record
You can click the Add button to add a new record to the table (e.g. if in the Course Explorer, click it to add a new course record).
More Menu
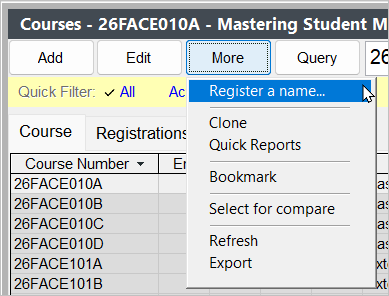
Click the More button to see the menu of additional options for the selected table. For example, in the Course Explorer:
Right-Click to Access Menu
You can also access this menu by right-clicking the Explorer window.