

Registration Import Wizard
The Registration Import Wizard imports name records and registers each person in the course specified on their row of the spreadsheet. The wizard walks you through six steps — selecting your file, mapping columns, choosing dedupe options, and (optionally) saving the import as an Auto Task to run later or on a recurring schedule.
The Registration Import Wizard is the same wizard as the Name Import Wizard running in Registration mode. In this mode it imports both the Name and the Register records, and adds an extra option for handling matched registrations.
IMPORTANT NOTICES
- By default, the import only adds new Name and Registration records. Existing names and registrations are skipped — to update them instead, choose the Update option on the Name Matching step (see Step 5).
- Each row must include a Course Code (e.g.
26FACE010A). Courses must already exist in the Course table before you run the wizard. Rows with a missing or invalid course code are skipped and written tologs\importregbaddies.log. - Registration information must match what is set up on the course record. For example, if the registration fee in the import file is not an amount set up in course Fees, the registration will be skipped.
- If all records are being imported into the same course, you can use the Speed Registration Entry instead of the Registration Import Wizard which can be used to register people in different courses.
Requirements
- An Excel spreadsheet (
.xlsor.xlsx) with the registrations to import. - We recommend the spreadsheet has a Header row that identifies the data in each column. E.g. course code, title, begin date, etc.:

TIP
If you use the Student Manager native field names in the column headers (e.g.
NMNAME1for first name,RGCRSEfor course code,RGCRSEFEEfor fee amount), the wizard will automatically map those columns to their fields and skip the manual mapping step for them.
- Each row must have a Course Code column (or
RGCRSEif using field names) with the exact course code, e.g.26FACE010A. - Date Format: in your Excel file, use the ShortDate format for dates.
- These fields must be set to Text format even if the value is only numbers:
colocid,liinstid, all phone number fields, all zip code fields.

You can download a sample registration import file.
What Can You Import?
You can import:
- All fields from the Names table
- All fields from Name User Defined Fields table
- All fields from the Register table
- All fields from Register User Defined Fields table
- Fields from the Name or Register Unlimited User Defined Fields tables
Importing Registrations
To start the wizard:
- Select .
- Right-click the Registrations icon in the Quick Launch toolbar and select Registration Import Wizard.
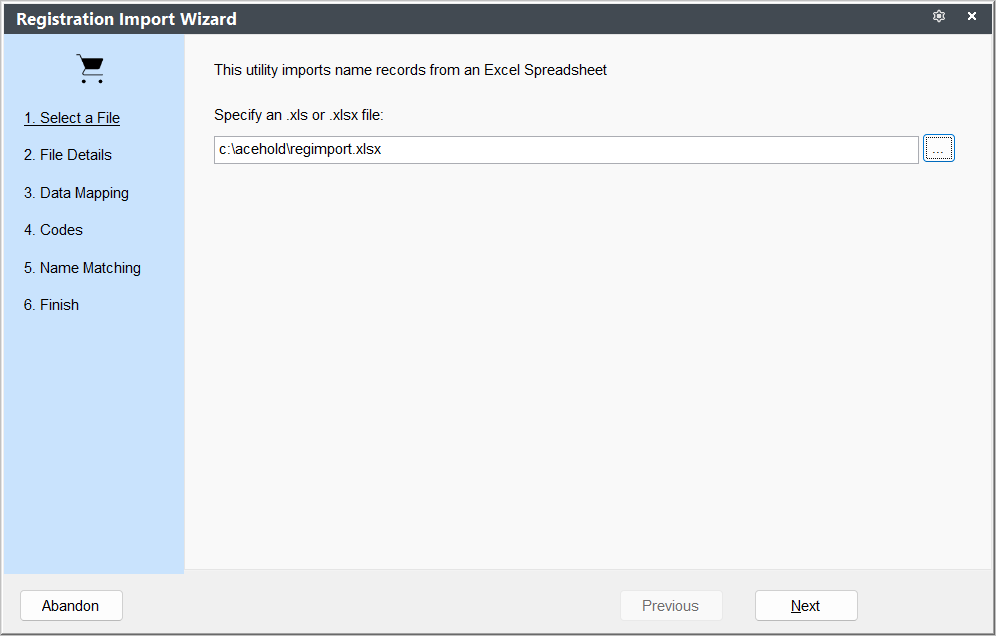
- Select a File: click the ... button to browse for your Excel file, or type/paste the path into the textbox. The Next button is enabled once a valid file is selected.
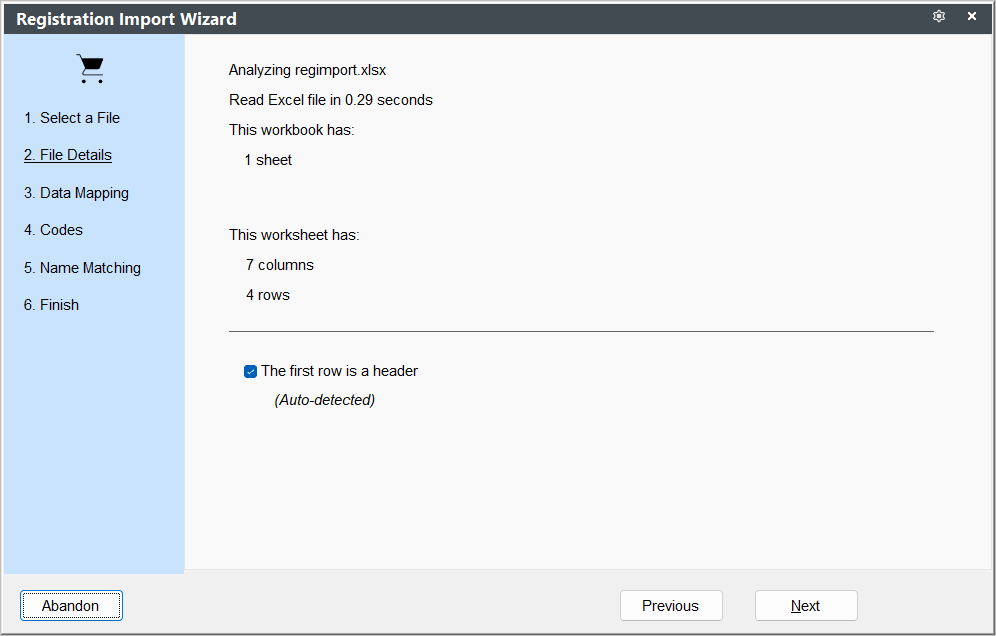
- File Details: the wizard analyzes your spreadsheet and reports how many sheets, columns, and rows it found.
- If the workbook has multiple sheets, choose the one you want to import from the dropdown.
- If the workbook has only one sheet, it is selected automatically.
- The The first row is a header checkbox is auto-detected and checked by default. Uncheck it if your file has no header row.
- Data Mapping: the wizard automatically maps any columns whose headers match a Student Manager field name (e.g. if the column header is
RGCRSE, it maps automatically to the Course Code field).
Above the grid you'll see how many of your columns were mapped automatically — for example, "6 of 7 columns automapped".
The grid lists only the unmapped columns. To map one:
- Double-click the row, or click the Pick button.
- Select the Student Manager field for that column from the picker.
- Click OK.
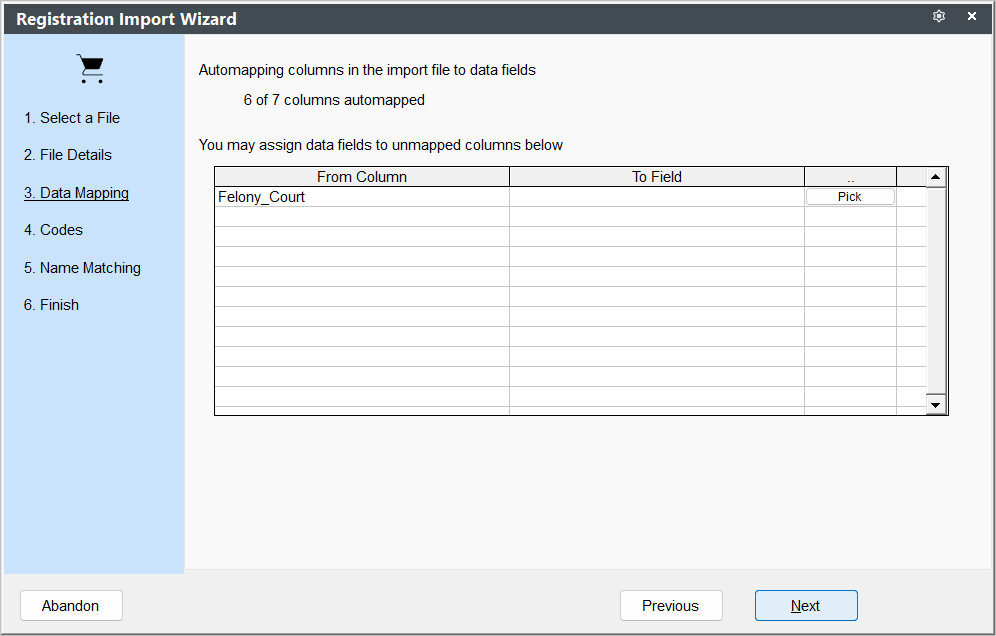
You can leave columns unmapped — those columns will be ignored during the import.
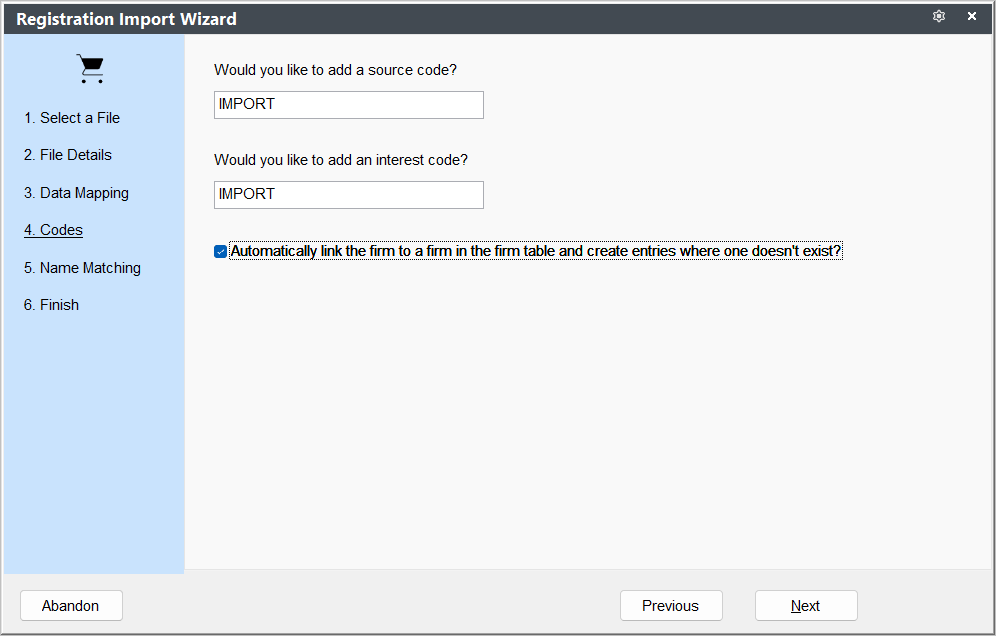
- Select Codes: optionally assign a Source code and/or Interest code to every record being imported, and link to a firm record if desired.
- Leave either field blank to skip it.
- Source codes that don't already exist will be created automatically.
- If you've mapped one of your spreadsheet columns to
NMSOURCE, the Source Code field on this step is disabled (the per-row value from your file is used instead).- The Automatically link the firm to a firm in the firm table and create entries where one doesn't exist? checkbox controls firm linking. When checked, the wizard looks up each imported firm name in the Firm table; if no match is found, a new Firm record is created and linked to the Name record.
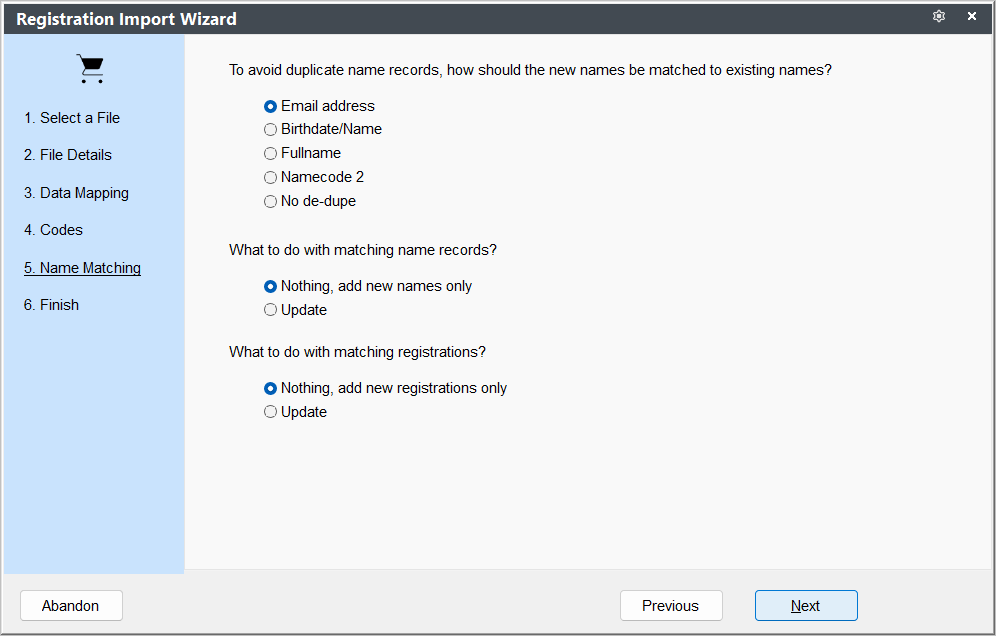
- Name Matching: choose how the wizard checks for duplicates against existing Name records, and what to do when matches are found. In Registration mode, this step has an extra option for matched registrations.
To avoid duplicate name records, how should the new names be matched to existing names?
Option Match rule Email address (default) NMEMAILBirthdate/Name NMNAME1+NMNAME3+NMBIRTHFullname NMNAME1+NMNAME3Namecode 2 Encrypted NMCODE2valueNo de-dupe Every row is added as a new name
If a row is missing the field(s) needed for the chosen match rule, the row is treated as new and added.
What to do with matching name records?
- Nothing, add new names only (default) — existing matched names are skipped (but their registrations may still be added — see below).
- Update — existing names are updated with the values from your spreadsheet.
What to do with matching registrations?
- Nothing, add new registrations only (default) — if the person is already registered in the course on that row, the registration is skipped and logged to
logs\importregdups.log.- Update — existing registrations are updated with the values from your spreadsheet.
- Finish: choose how to run the import.
- Run the import (checked by default) — runs the import immediately when you click Finish.
- Show the log when finished — opens an HTML summary log in your default browser when the import completes (recommended). The log lists row counts, skipped/matched rows, registration problems, and any errors.
- Create an auto task for this import — saves the import settings as an Auto Task you can run later or on a recurring schedule via Windows Task Scheduler. When checked, you'll be prompted for a Task ID and Description.
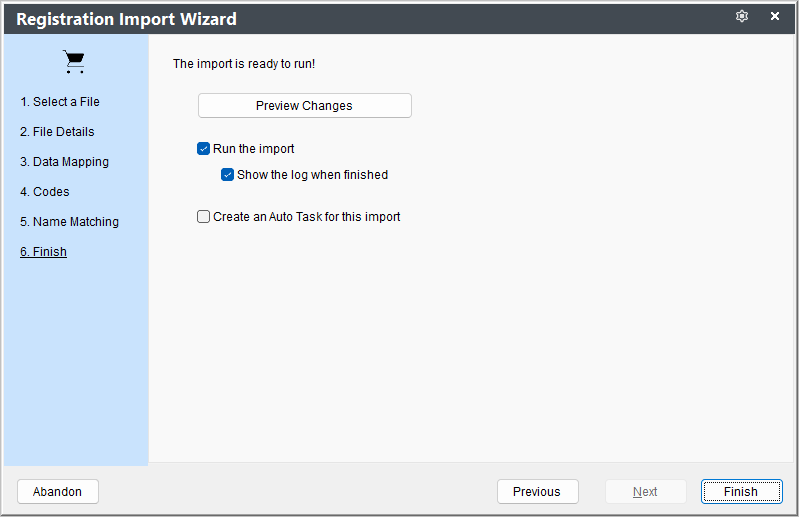
- Click Finish to run the import (and/or save the task).
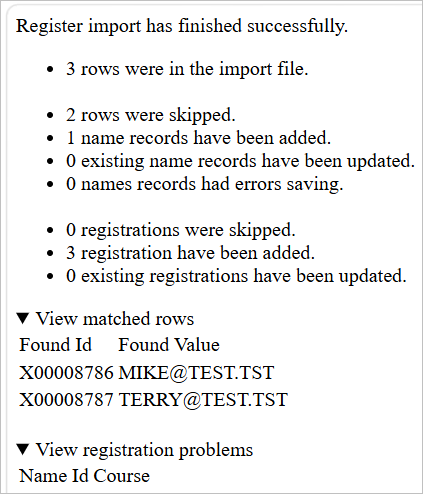
Import Results
When the import finishes, the wizard either:
- Opens an HTML log in your browser (if Show the log when finished was checked), or
- Displays a summary message box with row counts.
The HTML log includes:
- Total rows in the file, and counts of names added/updated/skipped.
- Counts of registrations added/updated/skipped.
- A collapsible Matched rows section listing duplicates that were found.
- A collapsible Registration problems section listing rows with missing or invalid course codes, fee mismatches, or other registration errors.
Detailed results are also written to:
logs\importnames.log— name import detailslogs\importregdups.log— duplicate registrationslogs\importregbaddies.log— registration errors (bad/missing course codes)
Automatic Behavior
A few things the wizard handles for you during a registration import:
- Fee selection — if the row has a
RGFEEDESCvalue, the wizard uses that fee description to look up the amount on the course Fees record. If no fee description is supplied, the wizard picks the appropriate fee based on the name's fee category and the course's fee setup. - Membership namecodes — when registering into a course of type Membership, the corresponding
Mnamecode record is automatically added or updated. - Course-default values —
RGCEUS,RGHOURS,RGCREDIT, andRGNUMBare populated from the course record when blank in the spreadsheet. - Phone numbers — formatting characters
( ) - / \ . spaceare stripped automatically. - Zip codes — short zips are padded to 5 digits;
00000is blanked out. - City and State — when a new name has a Zip code but no City or State, the wizard fills them in from the Zip Code table.