

Setting Up an Auto Tasks User in Windows and Student Manager
Before Auto Tasks can run unattended from Windows Task Scheduler, it's best practice to create a dedicated Windows user account and a matching Student Manager login just for running tasks. This keeps scheduled tasks independent of any individual employee's account, and avoids problems if that person's password changes or their account is disabled.
TIP
This is a one-time setup performed by an administrator on the computer that will run the scheduled tasks. See Auto Tasks for day-to-day creation and management of tasks themselves.
Step 1. Create a Windows User for Auto Tasks
Open Windows Settings > Accounts > Other Users
Click Add Someone Else to this PC
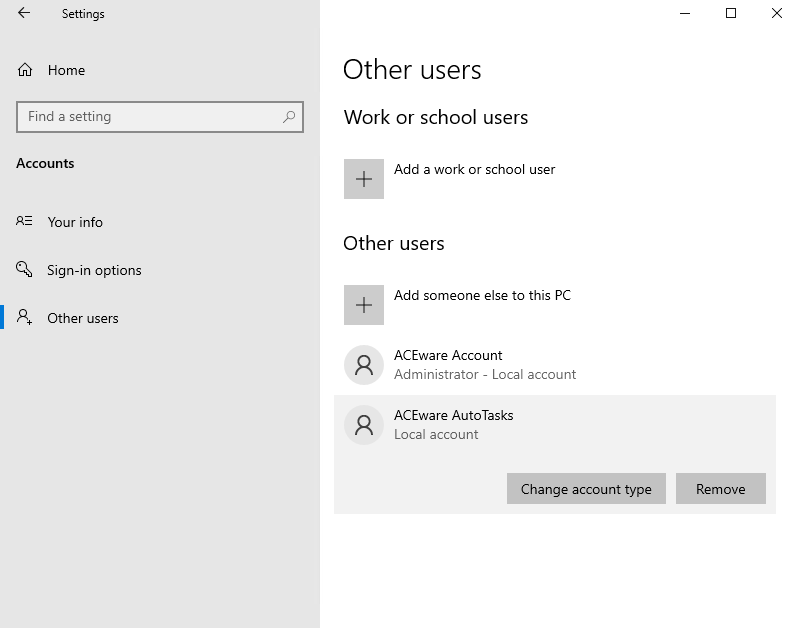
Click I don't have this person's sign-in information
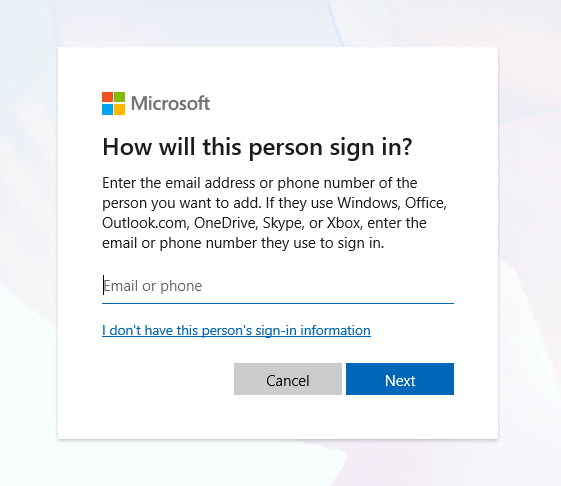
Click Add a user without a Microsoft account
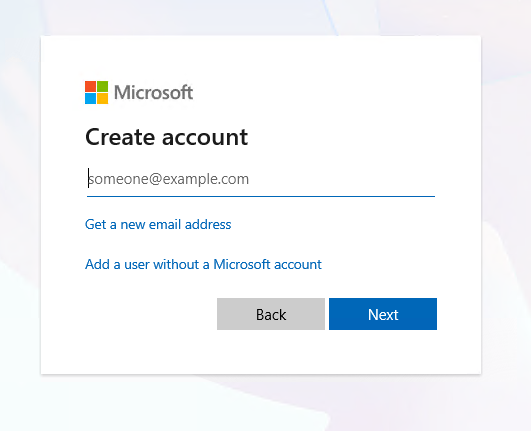
Give the account a username such as
ACEware AutoTasksand set a password
Step 2. Give the User Batch Job Rights
The Windows account needs the Log on as a batch job right so Task Scheduler can run it without anyone logged in.
Search for Local Security Policy in the Windows search box and open it
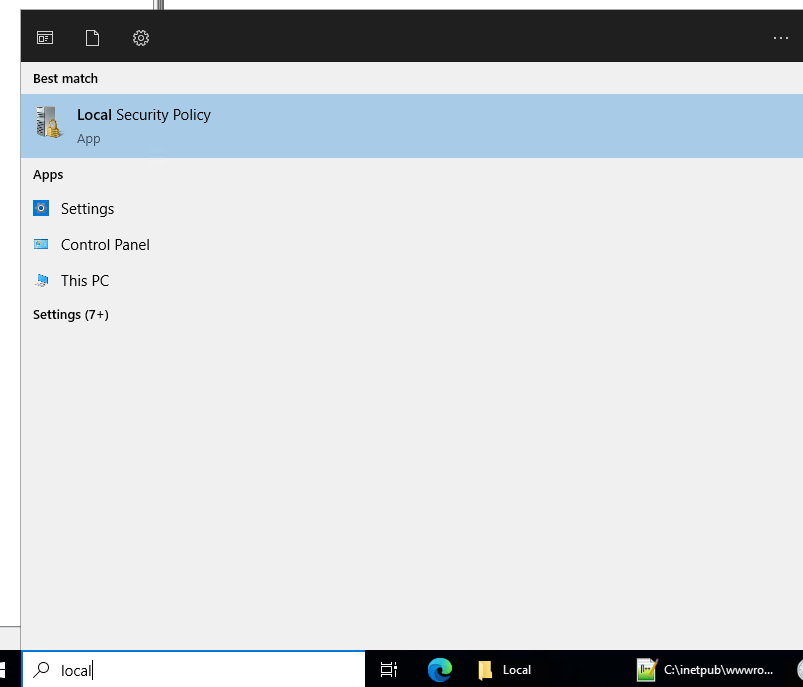
Go to Local Policies > User Rights Assignment > Log on as a batch job
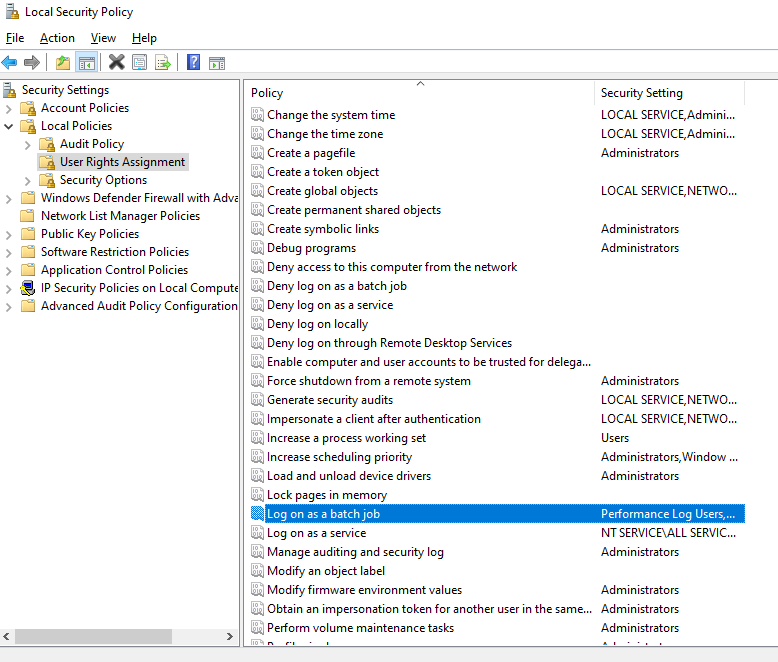
Add the user, using the format
COMPUTERNAME\ACEware AutoTasks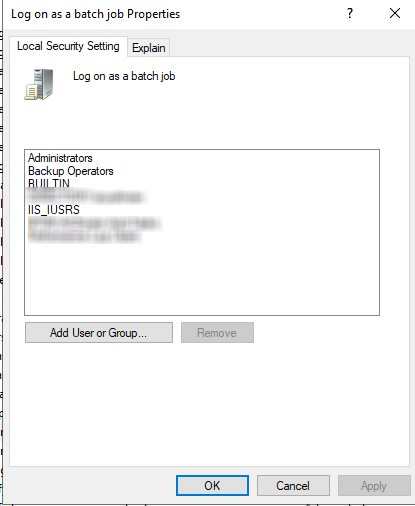
Step 3. Create the Matching Student Manager User
Shift+Right-click the Student Manager shortcut and select Run as different user
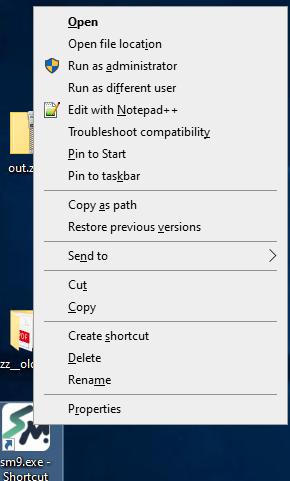
Enter
COMPUTERNAME\ACEware AutoTasks— be sure to include theCOMPUTERNAME\prefix so Windows doesn't look for the user in a network domain — and enter the password from Step 1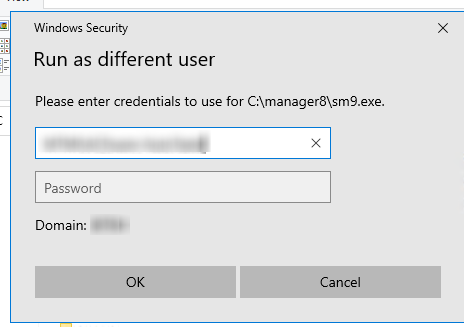
Student Manager now launches as the ACEware AutoTasks Windows user. Log in with
ACE_LOG.Important
If you see unusual messages or errors launching Student Manager this way, make sure the new Windows user has read/write rights to the Manager folder.
Go to Password Maintenance and create a Student Manager user, e.g.
AUTOTASK, with a password and whatever access level the tasks require (typically ADMIN if the tasks include System Maintenance)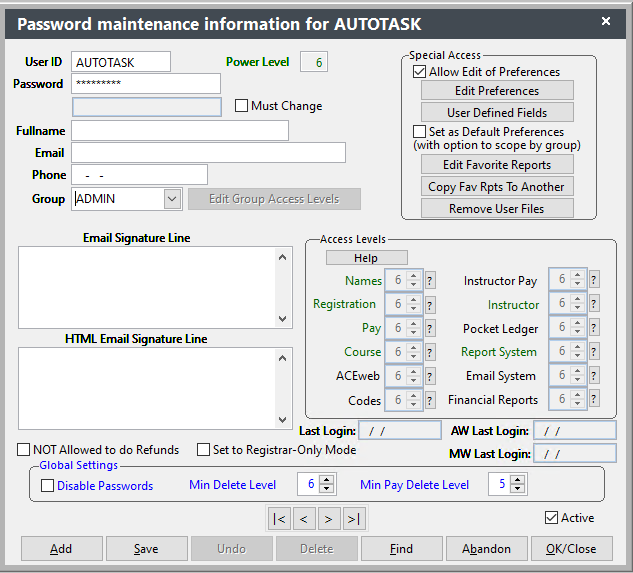
Step 4. Set AUTOTASK as the Auto Tasks User
Go to and click More
Click Set user for Auto Tasks on this computer

Enter the Student Manager username and password you created in Step 3
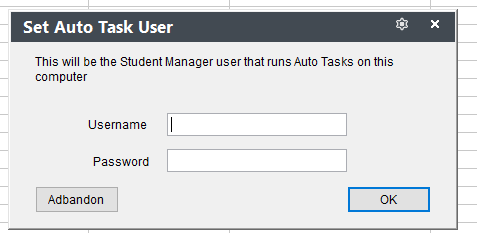
Verify that a
taskloginfile has been created at:C:\Users\ACEware AutoTasks\AppData\Local\Student_Manager\
Step 5. Configure the Task Scheduler
In the Windows Task Scheduler task's General tab, set the user to COMPUTERNAME\ACEware AutoTasks.
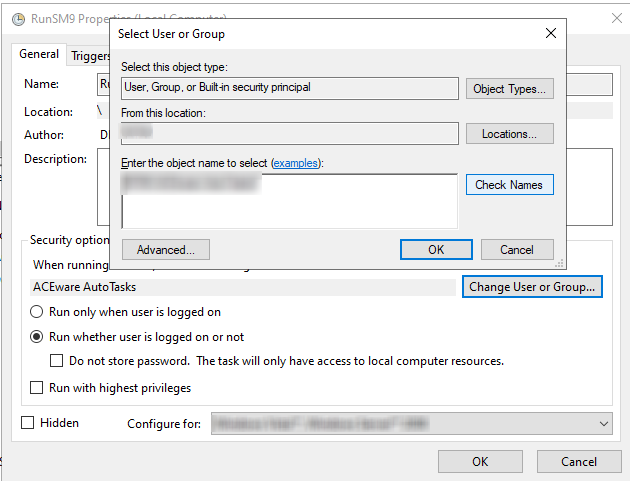
Leave Do not store password unchecked, and enter the password from Step 1 when prompted. The task will now run as the Windows user ACEware AutoTasks, which is configured to use the Student Manager user AUTOTASK to run the Auto Task.
Important
Because the task runs as a different user, no Student Manager window will appear while it runs. If you click Run in Task Scheduler and nothing seems to happen, check the Event Log in Student Manager.
Step 6. Store the Passwords
Save the Windows and Student Manager passwords you created in Steps 1 and 3 somewhere other technicians can find them, along with any other relevant setup details — for example:
C:\Users\ACEware AutoTasks\AppData\Local\Student_Manager\taskuserinfo.txt
Important
Restrict access to this file to the ACEware AutoTasks user and administrators only.