Emergency Emails
Staff can send Emergency Emails to registrants in courses meeting on the specified date.
Install Emergency Email Feature
- Requires ACEweb version .072 or later.
- Requires the Emergency Email Templates, located in the ACEweb update zips.
- Emergency Email settings are located in the EmergencyEmailINI.txt. See next section for more information.
- The message text comes from the EmergencyMsg.txt file. The text can be edited on the file or when sending the message. Do not edit the <<>> variables.
- The Emergency Email feature requires the Organization name be entered into the CustomerName INI setting.
EmergencyEmailINI.txt
The EmergencyEmailINI.txt has 3 INI settings:
- HTML - is set to ON by default. Will send the email as HTML format.
- Timeout - time to wait between emails, in milliseconds. Set longer if you have a slow system.
- extraKeys - can sent extra variables to be used in the message text. Contact your ACEware technician before adding extra Keys.
EmergencyMsg.txt
The message body comes from the EmergencyMsg.txt file. The file contains text and variables that pull in data.
You can edit the text of the email if desired. Variables cannot be edited.
Variables:
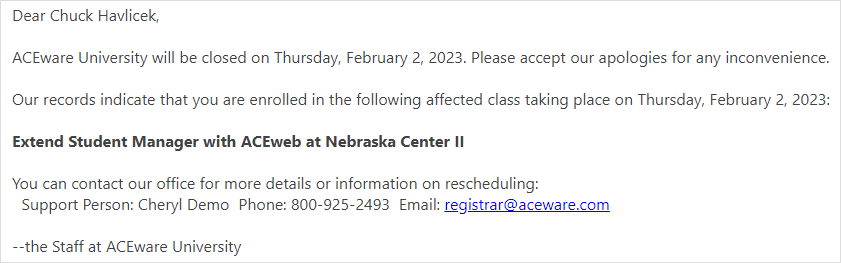
<<cFullName>>- registrant's first and last name.<<cCustomerName>>- Organization name as entered in the CustomerName INI setting in the ACEweb.ini.<<cTargetDate>>- the selected target date (e.g. Thursday, February 2, 2022).<<cCourseName>>- the course title.<<cLocation>>- the course location.<<cHelpDesk>>- the Support Person information taken from the HelpPerson, HelpPhone, and HelpEmail INI settings in the ACEweb.ini.
Other variables can be added. For example, you can include the course Department. Contact your ACEware technician for help adding other variables.
Sending Emergency Emails
- Open the Staff Web Access page.
- Click the Send Emergency Email Alerts link to open the Emergency Email Alert page.
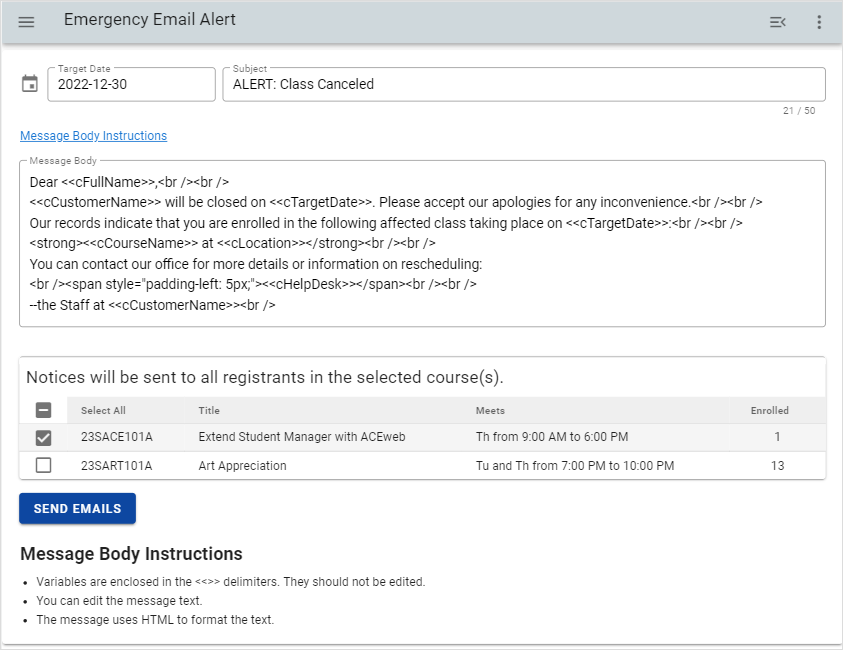
- Select the Target Date. This is the meeting date you intend to cancel. The current date is selected by default.
- If desired, you can edit the text of the message. For example, enter a reason the meeting date has been canceled (e.g.
<<cCustomerName>>will be closed on<<cTargetDate>>due to inclement weather.). - Select the courses to include in the Notices will be sent to all registrants in the selected course(s) section.
- Click the Send Emails button.
The email is sent to registrants of the selected courses.