

Add a Name Record
You can add a new Name record in the following ways:
- Click the Add New Name button on the Main Toolbar
- Select or
- If you have the Names screen open, click the Add button on the Module Toolbar
- Press ALT+A
Enter the name information in the appropriate fields. Note: the system will check for possible duplicate records when adding a new name record.
Click the Save button to save your new name record.
When you save the record, the other Name tabs will become available.
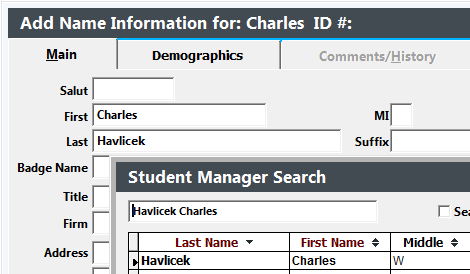
Duplicate Name Check
When adding a new Name record, the system will check for and display any possible duplicate records. The system will consider a record a possible duplicate if:
- the Last Name entered on the new record matches any existing records;
AND
- the number of characters set in the First Name Match setting on Name Preferences matches any existing records.
At this point, you have two options:
- If a record for the person already exists, you can select it from the list. The new record you started will not be saved when you select an existing record.
- If there is no match for the new person, you can press the ESC key to close the Find window. You'll be returned to the new name record so you can continue with the adding record process.
Entering Special Characters
By using the Windows Character Map tool, you can copy a special character then paste it into your field.
NOTE: Names which contain these letters are sorted AFTER the standard alphabet (e.g. Ranáe would be sorted after Ranae).
Last Name Starts with Lowercase Letter
When in the last name field, press the spacebar BEFORE typing the name (e.g.: leMoine), then move the cursor in front of the beginning letter and backspace once to remove the space. This fools the auto-upper case routine, and the first letter will be saved in lower case.
NOTE: when the record is accessed, the first letter appears to be uppercase but it is not!
Zip Code Entry
When you enter the person's address then press the TAB key, the cursor will skip the City and State fields and move directly into the Zip Code field.
Enter the zip code (or select it if the Zip Code list pops up) then press the TAB key to move out of the Zip Code field. The system will automatically enter the City, State, and Area Codes. If you have county and country data entered in the zip code record, it will also complete those fields.
Note: if you don't enter the phone number in a phone field, the system will delete the area code from the field when you save the name record.
Duplicate Zip Code Records
If you have a zip code that spans two cities, counties, or area codes, when you enter that zip code in the Name record, the Search list will pop up with all the matching zip codes for you to select the correct zip code record.

Editing City and State
The default behavior for Student Manager is for you to only enter the zip code and the system will enter the city, state, county and area code for that zip. The system does not allow you to enter the city or state and, normally, this is fine. However, if occasionally you have a person with a foreign address (i.e. you need to enter 02145 Paris in the City field), you have the ability to override this behavior by pressing Alt+0. Student Manager will now allow you to edit the City and State fields.