

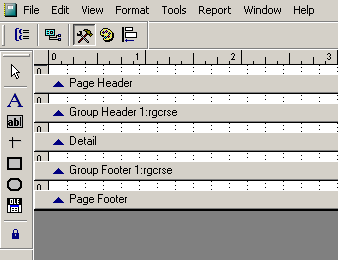
Report Banding
Report bands have two purposes:
- Some bands differentiate areas of the page layout (e.g Title, Page Header, Summary, etc.).
- Other bands are created to display information for a group of records (e.g. rgcrse, nmid).

The following lists types of bands and their uses:
- Title - information that appears at the beginning of the report (e.g. title, introduction, cover page).
- *Page Header - information that is printed at the top of each page in the report (e.g. date, report title, logo).
- Group Header - information that is printed at the beginning of each data group (e.g. course number and title, individual's name and address).
- *Detail - data and text printed once for each record generated by the query (e.g. individuals registered in class, all individual's optional fees).
- Group Footer - information printed at the end of each data group (e.g. total enrolled in course, total amount due for each individual).
- *Page Footer - information printed at the bottom of each page in the report (e.g. special notes or instructions, signature lines).
- Summary - information printed at the end of the report (e.g. summaries, conclusions, final totals).
*Default bands which are part of every report and cannot be removed.
Add Group Bands
To add a Group Band to a report:
- Click the Data Grouping icon on the Report Designer toolbar. This opens the Data Grouping window.

- Click into the Group box and enter the field/expression on which to group (e.g. rgcrse, nmname3+nmname1+nmid, etc.).

- Select the appropriate Group properties (e.g. start each group on a new page, reprint group header on each page, etc.).
- Click the OK button to save the Group band and close the Data Grouping window. The group header and footer will be added to the report template.
- You can now resize (if necessary) and add elements to the band.
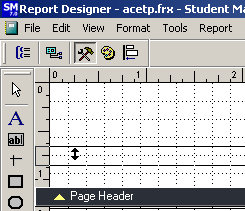
Resize Report Bands
Report elements are placed into the white space above the particular report band. You may need to adjust the amount of white space to place all the desired elements into it. To adjust a report band:
- 'Pick up' the band with your mouse and drag it where you want it.
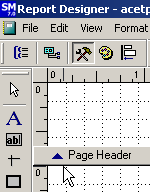
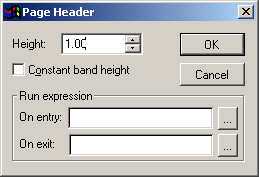
- Double-click the blue triangle to the left of the Band name to open the band's properties window.
Enter the size (in inches) in the Height field.
Add Title/Summary Bands
The Title and Summary Bands are optional bands that can be added to your report. To add the Title/Summary bands:
- Select .
- Check the band you want to add to the report.
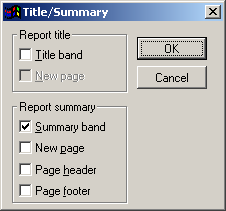
- Select the paging option (i.e. if you want the title or summary band information to be displayed on it's own page, select New Page).