

Cashbox Report
View payment details for a given period, assign deposit numbers to a batch of payments, and reconcile cash boxes (per user).
To run the Cash Box:
- Select to open the Cash Box window.
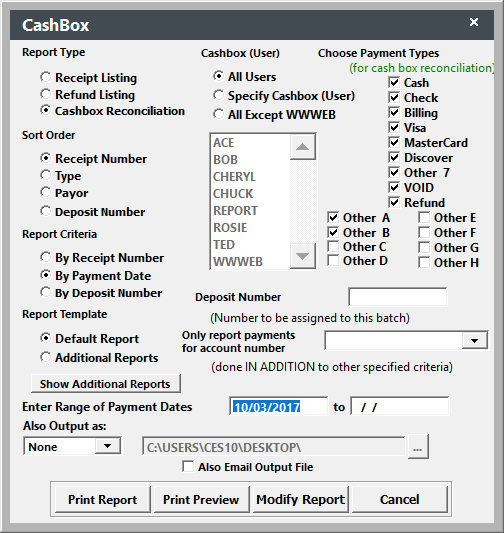
- Select the appropriate Cash Box criteria:
- Report Type - select the appropriate report type:
- Receipt Listing will list all payments for the given period
- Refund Listing will list all refunds for the given period, with the option to choose what original payment types you want to run it for (i.e. run a Check refund report or a Credit Card one)
- Cashbox Reconciliation will list all payments grouped by user who made the payment record
- Sort Order - specify the sort order for records in the report.
- Report Criteria - Determines the criteria used to include records:
- By Receipt Number: you must enter the receipt number range for the payment records you want included.
- By Payment Dates: you must enter the range of Payment dates for payment records.
- By Deposit Number: will either include all records that have not yet been assigned a deposit number (see Assigning Deposit Numbers below), or you can enter an existing deposit number to print a list of payments on the deposit.
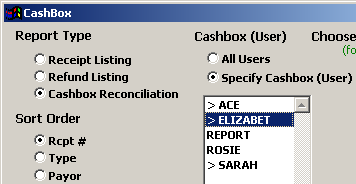
- Cashbox User - if you want to run a report for selected users, select Specify Cashbox (User), then double click the Users you want included in the report (selected users have the > next to their name).
- Choose Payment Type - select the payment types that you want included in the report.
Assign Deposit Numbers
You may assign deposit numbers to a group of payments by entering the deposit number that should be assigned in the Enter Deposit Number field. After you print the report, the system will ask if you're ready to assign the deposit number to this group of payments.
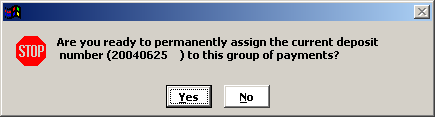
Click the Yes button to assign the Deposit number. The number is saved on the payment record.
