

GeoSpatial (Zip Radius) Report
Available with the ZipRadius() function to specify the zip code and radius for your report.
This feature requires additional Student Manager files. Contact your ACEware technician for more information.
GeoSpatial Report Setup
- Obtain the ziplatlong.dbf from your ACEware technician. Or download ↗️ it from our website.
- Unzip the ziplatlong.dbf file into your Student Manager folder.
- Add the ZipRadius() function to your report, leaving parameters 1 and 2 blank. E.g.
JUSTDOIT('=ZIPRADIUS()')
Note: see the ZipRadius() function topic if you need to run more JUSTDOITs in your report.
- Save your new report.
Running GeoSpatial Report
When you run your GeoSpatial report, the GeoSpatial Selector window opens:
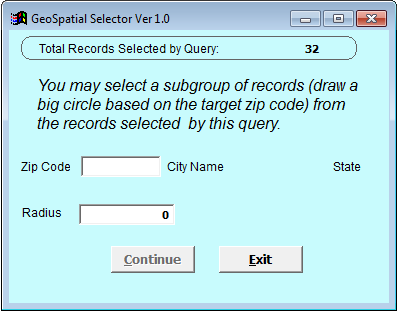
- Enter the zip code in the Zip Code field.
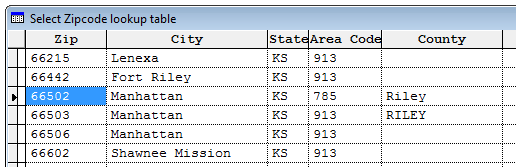
To look up a zip code, leave the field blank and tab out. The system will ask if you want to look up a zip code. Click the Yes button. (Click the No button to return to the GeoSpatial Selector window).
The Zip Code Selector opens for you to select a zip code:
- Enter the radius in miles. E.g. enter 25 to return all names within 25 miles of the zip code entered in step 1. Then tab out of the Radius field.
- Click the Continue button.
- The report now runs, returning all people in the radius of the entered zip code.