

Roster Options
When the instructor clicks the List button in the course listing, the course roster page opens:
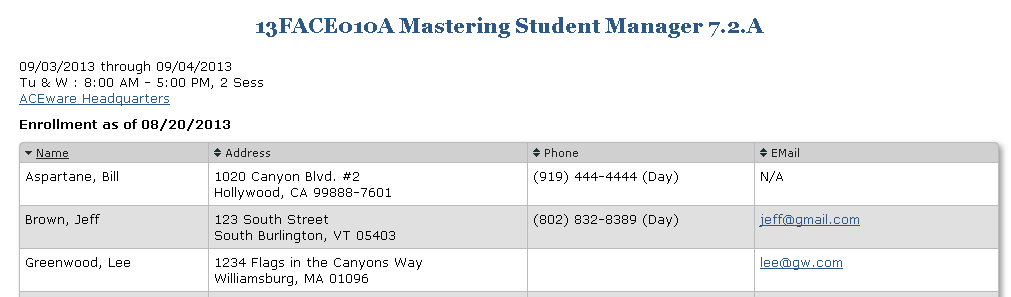
Instructors can print the roster, save roster information to an Excel spreadsheet, print an Attendance sheet, and email class members.
Workshop Rosters
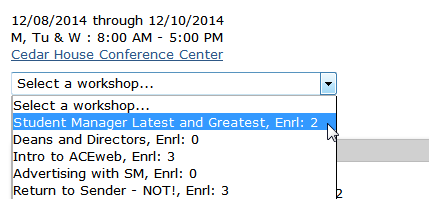
If the course is a workshop, instructors can view workshop rosters from the course roster page and print an attendance sheet for the workshop.
IMPORTANT: an instructor must be added to the course record (Instructors tab) to be able to view workshop rosters.
To view a workshop roster:
- Select the workshop from the drop down list.
- After selecting the workshop, the Show Roster for Above Workshop button will become visible. Click it to view the roster:
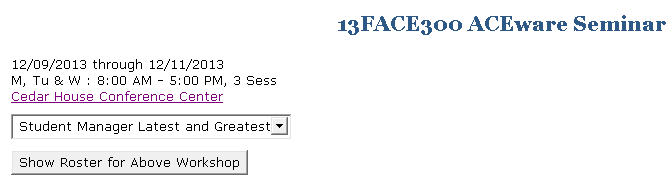
Repeat steps 1-2 to show a different workshop a roster.
Print Attendance Sheet
Once you have the workshop roster open, click the Attendance Sheet button to print an attendance sheet for the selected workshop.
Waitlisted Students
By default, waitlisted students are shown on the course roster. Fields in the waitlist table are determined by the WaitFields setting in the Config section of the ClassRoster.htm template. E.g. this example includes registration add date and time followed by the fields listed in the RosterFields INI setting:
<WaitFields>Rgaddate:Date;Rgaddtime:Time;:ROSTERFIELDS</WaitFields>
Disable Waitlist
To disable the waitlist, remove these lines from the ClassRoster.htm template:
##iif(!empty(pcWaitlist),[<h2 id="wlTitle">Waitlist as of ]+DTOC(DATE())+[</h2>],[])##<br>
##pcWaitlist##<br>
<WaitFields>Rgaddate:Date;Rgaddtime:Time;:ROSTERFIELDS</WaitFields>
Show Location in Course Section
To show the location of the course in the Course Information section, you must:
- Add a Config section to the bottom of the ClassRoster.htm template with the Location tag set to SHOW:
txt##-Config-## <Location>SHOW</Location> ##-EndConfig-##
This will create a cursor named tLoc with all fields from the Location table for the associated course location.
- Add the tLoc.locfield template tag to the Course Information section, replacing locfield with the location field you want to show. Available fields are:
Building/Room: loclocat
City: loccity
County: loccounty
State: locstate
Location Information: locinfo
HTML Formatted Location Information: lochtml
Location Notes: locnote
Courses with No Enrollment
You can add a NoEnroll section to the ClassRoster.htm template to customize the information for courses with no enrollments. The ##-NoEnroll-## should be added to the template, after the closing </html> tag. Sample section:
##-NoEnroll-##
<h1>##pcClassID## ##pcTitle##</h1>
<p>##pcPeriod##<br />
##pcMeets##<br />
<a href="LocationInfo.awp?&course=##pcClassID##">##alltrim(substr(tLoc.locLocat,1,80))+iif(!empty(alltrim(substr(tLoc.loclocat,81))),", Room: "+substr(tLoc.loclocat,41),"")##</a></p>
<p class="awImportant">No enrollment at this time</p>
##-EndNoEnroll-##
If the NoEnroll section does not exist, ACEweb will merely show a "Roster Not Available" message:
!No Roster](../../images/noroster.png)
Save Rosters to Excel
You can allow instructors to save their rosters to an Excel spreadsheet.
- Create a folder called "Temp" in the Templates folder (e.g. ...\wconnect\ace\temp).
- Add the ##pcExcelLink## tag to the ClassRoster.htm template where you want the "Save Roster as Excel Worksheet" link to be displayed.
When instructors click the link, they will be given the opportunity to open the roster as a worksheet or save it to disk (with the default name of Roster-XXXXXX.xlsx where XXXXXX is the course code).
Note: any HTML markup in the table fields will show up in the spreadsheet cells.
Custom Rosters
You can customize the roster for specific courses. For example, registrants receive a free T-Shirt which are handed out by the instructor on the first day of class, so you want to show the size selected on the roster.
You have two options to customize a course roster:
Replace Default Roster Fields - you can replace the default fields (from the RosterFields INI setting) with a different set of fields by adding a RosterFields setting to the Configuration Notes for ACEweb Special Functions field on the ACEweb Info tab, replacing the Field list statement in the example below with the fields you want to show on the roster. The field format must follow the same format as the RosterFields INI setting with fields delimited with semicolons:
txt<rosterfields> Field List (e.g. name:Name;phone:Phones;email:Email;rgcode:T-Shirt Size) </rosterfields>Add Additional Fields to Default Roster Fields - you can show the default fields (from the RosterFields INI setting) and just add additional fields by adding the following setting to the Configuration Notes for ACEweb Special Functions field on the ACEweb Info tab, replacing the Field list statement in the example below with the additional fields you want to show on the roster. The field format must follow the same format as the RosterFields INI setting with fields delimited with semicolons:
txt<rosterfields> :ROSTERFIELDS;Field List (e.g. :ROSTERFIELDS;rgcode:T-shirt) </rosterfields>
Export Custom Roster
You can set specific fields to be exported for a course with the excelfields setting. The setting is added to the Configuration Notes for ACEweb Special Functions field on the ACEweb Info tab.
IMPORTANT
The ExcelFields definitions should follow these rules:
- Use only alphanumeric characters and spaces in the titles
- Do not use the pipe delimiter to specify field widths
- Do not include embedded links or expressions using the oUtil.href() function.
Example:
<excelfields>
name:Name;nmsex:Gender;rgfeedesc:Fee;nmbirth:Date of Birth;nudfn2:Current Grade;email:Parent/Guardian Email Address;nudfc1:Shirt Size;rudfc1:Roommate Request;nmspec:Special Needs;address:Address
</excelfields>