

Script-Based Express Registration Templates
There are 2 sample script-based templates available:
- Xreg-logon.wcs - the logon page opens first. This template is used for existing and new users.
- Existing users can log in--the personal data fields are automatically filled in for them when the registration page opens. The registration is added to their existing name record.
- New users leave the logon fields blank then continue to the registration page where they will enter their personal information. A new name record is created when they submit the registration.
- Xreg-new.wcs - users are taken directly to the registration page. This template is used for new users only (no one who will take this course is currently in your system so there is no need to display the login page).
You should have copies in your Custom folder (i.e. wconnect/ace/custom).
Using the Sample Templates
We suggest you open the appropriate sample template and save it as a new copy with a relevant name so you don't lose your original sample templates. For example, MasterSM.wcs.
Set the Course Code
You must associate the template with the appropriate course record. You have 2 options to do that:
- If you want to place a link to the page on your web site or send the URL to the specific customers (e.g. a specific firm taking a contract course), you include the file name and the course number in the &course parameter of the URL. E.g.
<a href="/wconnect/ace/custom/MasterSM.wcs?&course=24FACE010">Mastering Student Manager</a>
- If you want the template to open when a user opens the course status page, enter the name of the file into the Information Page field on the course ACEweb Info tab.
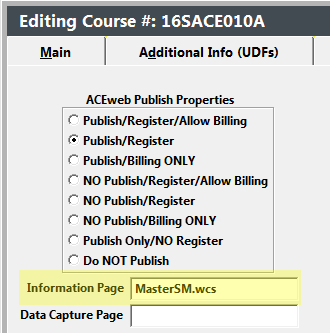
ACEweb Publish Properties
If you are using option #2 in the Setting Course Code section above, the ACEweb Publish Property setting will determine if the course is in the course listings AND if express registration opens when the user selects the course from the list.
Publish/Register Options - the course will display in listings and when the user clicks the link to the course status page, the express registration page will open.
No Publish Options - the course is not in the listing and users will not be able to open the page unless they have a direct link to the course status page.
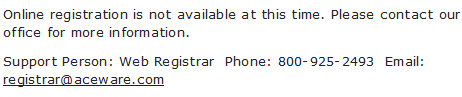
Publish Only/NO Register - the course will display in listings but will NOT display the express registration page when the user clicks the course status page link. Users will see the regular course status page with the Online Registration not allowed message.
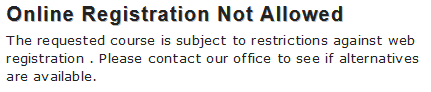
- Do Not Publish - the course is not in the listings. If a user has a direct link to the course status page, the user will get the Online Registration Not Allowed message:
Add Name/Name UDF Fields
Edit the template to include the appropriate Personal Data fields. The Input field names must conform to the following naming conventions:
Example: name="txtnmname1"
Characters 1-3 - HTML field type:
txt – open box for entry of text, numbers or dates-
lst (letter L, not number 1) – drop down selection list
chk – check box or radio button
Remaining Characters - the full field name.
Commonly used fields include: nmid (Name ID)**, nmName1 (First name), nmName2 (Middle), nmName3 (Last name), nmAddr1 (First address line), nmCity (City), nmState (State), nmZip (Zip code), nmDPhone (Day Phone), nmEmail, and any Name UDF (e.g. nudfc1, nudfl1, nudfd1, nudfn1).
If adding Name UDFs, you must also add the following hidden field inside the form tag:
<input type="hidden" name="NameUDFlag" value="">
If adding Name and/or Name UDF Logical type fields, you must add the following hidden fields inside the form tag, with the logical fields you are using entered in the Value attribute. If using multiple fields, separate names with a comma. E.g.
Name Logical Fields: <input type="hidden" name="NAMECHECKS" value="nmelist">
Name UDF Logical Fields: <input type="hidden" name="NUDFCHECKS" value="nudfl1,nudfl2">
*Date fields: ACEweb expects dates entered in the mm/dd/yyyy or mm-dd-yyyy formats. If the user only enters the numbers (e.g. 01012010), ACEweb will not recognize it as a date and will not enter the date in the specified field.
Append Data to Name Comments
You can append several values to the Name Comments field on the Comments tab. For example, you can save several essay answers to the field.
To do so,
- Name the first field txtnmcomm. E.g.:
Question 1:
<textarea name="txtnmcomm" rows="2" cols="60" value="" tabindex="161"></textarea>
- Name each subsequent field appendnmcomm. E.g.
Question 2:
<textarea name="appendnmcomm" rows="2" cols="60" value="" tabindex="162"></textarea>Question 3:
<textarea name="appendnmcomm" rows="2" cols="60" value="" tabindex="163"></textarea>
The information entered in the fields will be appended to the Name Comments field--with line breaks between the field entries, in the order in which they appear on your template:

Add Registration/Registration UDF Fields
You can also use the Express Registration option to submit data to Registration and Registration UDF fields. The Input field names must follow the standard naming technique:
Example: name="txtrgstatus"
Characters 1-3 - HTML field type:
txt – open box for entry of text, numbers or dates-
lst (letter L, not number 1) – drop down selection list
chk – check box or radio button
Field Name - the full field name. Available fields are: rgcode, rgmisc, rgregnote, rgstatus, rgcnfirm, rgptcert; and any Register UDF (e.g. rudfc1, rudfd1, rudfn1, rudfl1)
If adding Registration UDFs, you must also add the following hidden field inside the form tag:
<input type="hidden" name="RegUDFlag" value="ON">
*Date fields: ACEweb expects dates entered in the mm/dd/yyyy or mm-dd-yyyy formats. If the user only enters the numbers (e.g. 01012010), ACEweb will not recognize it as a date and will not enter the date in the specified field.
Adding Unlimited UDFs
You can use Unlimited UDFs on the Express Registration page.
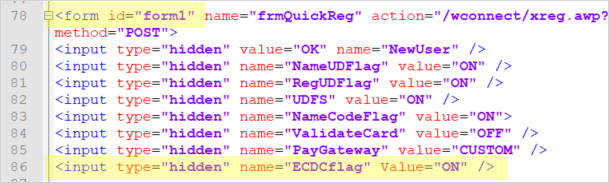
- Add the ECDCFlag hidden field inside the form on your Express Registration page.
<input type="hidden" name="ECDCflag" Value="ON" />
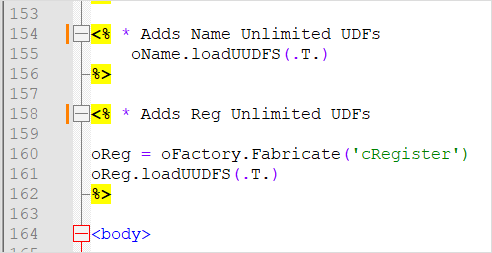
- Add the LoadUUDFs expressions to the template. These can be added above the
<body>tag.
csharp<% * Adds Name Unlimited UDFs > oName.loadUUDFS(.T.) %> <% * Adds Reg Unlimited UDFs > oReg = oFactory.Fabricate('cRegister') > oReg.loadUUDFS(.T.) %>
- Add your Unlimited UDFs fields to the template. The Name attribute must use the "txt" prefix, followed by "nudfu_" if a Name Unlimited UDF, or "rudfu_" if a Registration Unlimited UDF, followed by the UU field name.
Example character type field (used for character, date, and numeric values).
<input name="txtrudfu_dance_partner" id="rudfu_dance_partner" value="" maxlength="20" />
Example checkbox. Note the value must be set to ON for checkboxes.
<input type="checkbox" name="txtnudfu_Hispanic" id="nudfu_Hispanic" value="ON" />
Example memo type field.
<textarea rows="2" cols="40" name="txtnudfu_explanation" id="nudfu_explanation" value=""></textarea>
Example drop down type field. Use the SessionGetSessionVar() function for drop down fields. The Name attribute must use the NUDFUDrop_or RUDFUDrop_, followed by the UU field name.
<%=Session.GetSessionVar([NUDFUDrop_Contact_Relationship])%><%=Session.GetSessionVar([RUDFUDrop_Hotel])%>
You cannot require drop down type fields when using the Session.GetSessionVar() function. If you need to require a selection, you must instead hard code the field using a <select> so you can add the required class.
Requiring Fields
Requiring a field means the user must select a valid, non-blank, option. Here are specific rules when creating required fields:
- You CANNOT require a checkbox or radio button type field with Yes/No options. The No option is the logical equivalent of a blank value.
- Selection Drop Down Lists - there are 2 rules that apply to select tags:
- You must add a "Select [something]" option to your select tag with a blank value. This "Select.." option must be the first one in your list. The blank option will be displayed in the drop down and the system will not allow the user to continue until they select a valid option from the list. E.g.:
> <select size="1" name="lstc1RgCode" value="">
> <option value="">Select T-shirt Size</option>
> <option value="Small">Small</option>
> <option value="Medium">Medium</option>
> <option value="Large">Large</option>
> </select>
produces this selection drop down box. The user cannot continue until they select a size from the drop down because the value of the Select -T-shirt size option is blank.

- If using a numeric field, all options must be valid values that are greater than 0.00 because 0.00 is the numeric equivalent of a blank value.
Express Registration pages do NOT support the regular options to require fields (i.e. RequiredFields INI setting or Supplemental Data Capture naming conventions).
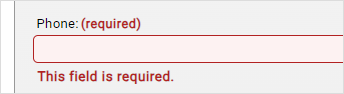
You will need to use javascript to require fields on any express registration template. We recommend using the Jquery Validate plug-in to require fields. If using it, you add the required class to all fields that are required. For example, the required class has been added to this phone field.
<input type="text" size="40" name="txtnmDphone" id="txtnmDphone" value="" class="required" />
Users cannot submit without entering a phone number:
SQL Users - MaxLength
If you are using an SQL database, all the text fields must have a maxlength value set to the length of the field. E.g. first name has a length of 30 characters so you need to have maxlength="30" set on the field.
<input type="text" name="txtnmName1" id="txtnmName1" value="" class="required" maxlength="30" />
Note: you do not need to set a maxlength on drop down fields, checkboxes, radio buttons, textarea fields, or date fields.
Free Courses
If this course is free, you must do the following:
- Set up a "No Charge" fee on the course with the amount set to 0.00.
- Add the following hidden fields to the form:
<input type="hidden" name="lstRegFee" value="1">
<input type="hidden" name="ValidateCard" value="OFF">
Note: the value for the ValidateCard field is case-sensitive and must be entered as OFF.
- Remove the Registration Options section from the template.
Payment Information
The sample express registration template contains the standard payment information fields (i.e. payment type, address, etc.). However, you may need to edit the Payment Type list to remove any credit cards you don't accept. If you will not allow the Invoice option, you will also need to remove it from the Payment Type list.
Paying by Credit Card
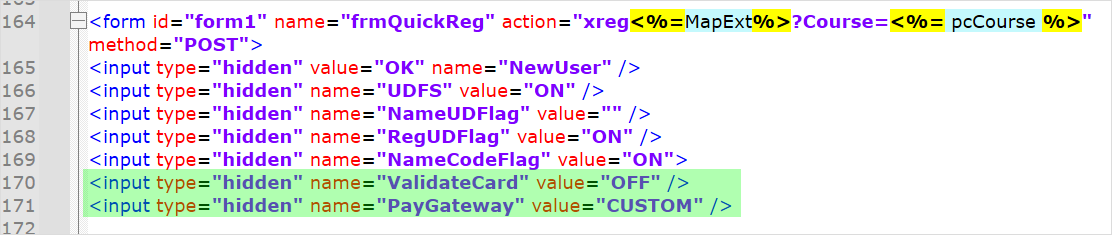
To direct the user to your payment service when they click the Submit button, these hidden fields must be added inside the <form> tag:
<input type="hidden" name="ValidateCard" value="OFF" />
<input type="hidden" name="PayGateway" value="CUSTOM" />
Example:
Workshops
If your course has workshops, you can display them on the template using one of these functions:
- oCourse.HTMLWKshoplist() - returns workshops for course. For general use.
- oCourse.HTMLWksItem() - returns specified workshop. For use in special circumstances where you need more control of workshop display.
IMPORTANT: the express registration submission looks at the WksCodeMatch INI setting when determining workshop conflicts.
To set a custom WksCodeMatch behavior, you must add the hidden WksCodeMatch field with the value attribute set.
E.g. if you don't want to apply any time slot matching, set the value to 0:
<input type="hidden" name="WksCodeMatch" value="0" />
Note: if using the oCourse.HTMLWKshoplist() function on your template, you must also set parameter 2 to the same number you entered in the above value attribute.
Workshop Descriptions
You can also show workshop descriptions on your express registration page.
::: This option requires links to jquery.js, ww.jquery.js, and awjq.js on your express registration template. If you don't already have links to them on your express registration template, edit your copy of the standard.htm template and copy the links from it. :::
Add the following javascript code to the
<head>of your .wcs, under the links to the above listed javascript files:javascript<script type="text/javascript"> $("document").ready(function () { var hasWks = <%=IIF(oCourse.lHasWks,[true],[false])%> ; var crseCode = "<%= pcCourse %>"; var targetQuery = "awJSON<%=MapExt%>?target=GY0AOx9dBsyev7fRp0TsZrEiR9tm2WabAq5sVyUmwNvFpVC4qFa+H6koUlQ3CSMg1MvIEgDBivkRp9KDteopIb/DhJASKKYbjwLUEVBRhsSAjWbIE+5xzjIwSiXkL5Ppq6S0eeJzr/LNX3dwVDZS3KLc0T0EOZ7v0qsnr232amzTNZg=" if (hasWks) { $.getJSON(targetQuery+'&NParams='+crseCode, function(wksData) { $("#wksDetails").empty().append("Workshop descriptions:<br/>"); $.each(wksData.Rows, function(index,aWks) { var html = '<b><i>'+aWks['wmtitle']+'</i></b><br/>'; html += aWks['cadesc']+'<br/>' $("#wksDetails").append(html); }); }); }; }); </script>Add the following
<div>box where you want the descriptions to show:
<div id="wksDetails" style="font-size:small"></div>
Waitlisting
To enable waitlisting on express registration templates, make the following changes to your template:
Add the bolded code to the Document.ready function:
javascript<script language="javascript" type="text/javascript"> $('document').ready(function () { . . . var waitList = <%= IIF((Config.lAllowWaitList OR oCourse.oData.cowebwait) AND (oCourse.oData.comax-oCourse.oData.cowaitnum-oCourse.oData.coenrolled<=0),\[true\],\[false\]) %>; if (waitList) { $("#regOptions").hide(); $("#waitOptions").show(); }; $('#form1').submit(function() { // if waitlist div is hidden, disable its child fields if ($('#waitOptions').is(':hidden')) $('#waitOptions').children(":input").prop("disabled", true); }); }) </script>Place the fee, information, payment information and submit registration button inside the following div tag:
html<div id="regOptions" > <!-- Existing payment fields --> <table width="100%"> <tr> td colspan="2"><h3>Registration Options</h3></td></tr> <tr> ….. <input type="submit" value="Submit Registration" name="btnSubmit" class="awButtons"/> **</div>**Add this code immediately following the above regOptions div, and before the closing
</form>tag:html<div id="waitOptions" style="display:none"> <input type="hidden" name="WaitListFlag" value="ON" /> <input type="hidden" name="Wait-<%=ALLTRIM(oCourse.oData.cocrse)%>" value="ON" /> <input type="hidden" name="PrecheckName" value="ON" /> <input type="hidden" name="WaitConfirm" value="ON" /> <input type="submit" value="Add to Wait List" name="B1" class="awButtons"> </div>
Verifying Registrations
Spam Bots that submit bogus registrations, usually via express registration pages, tend to enter values in hidden fields too. To attempt to disallow these bogus registrations, ACEweb will check the form for a hidden variable called “CUEFlag” (Check Unauthorized Enrollment Flag).
To use, add this hidden field to your express registration template, inside the <form> with a blank value:
<input type="hidden" name="CUEFlag" value="" />
When 'real' users submit a registration, the value will be blank so the registration will be allowed.
If a Spam Bot enters a value in the field when submitting the bogus registration, registration will be disallowed. ACEweb will generate an Unauthorized Registration Attempted error in these cases and send it to the email account listed in the AdminEmail INI setting.