

Registration History
Students can view information about their current and completed courses, and pay balances from the Registration History page. They can also view registration history of registrations they have completed for others.
Course Breakdown
Registration History courses are broke down into these categories.
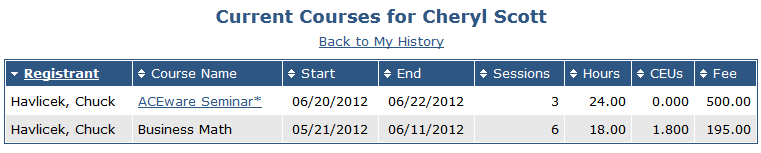
- Current Courses - upcoming and currently in session courses. Table contents is controlled by the RegStatusFields INI setting.
- Completed Courses - courses that have ended. Table contents is controlled by the TranscriptFields INI setting.
- Other Courses - courses not tied to a date schedule (e.g. Online, Donation, Membership, Ind Study courses). Table contents is controlled by the Async.ini if exists in the Templates folder (e.g. wconnect/ace). If not, table contents is controlled by the TranscriptFields INI setting. Requires the Async.htm template.
Active Courses Option
You can separate current courses into Upcoming and Active lists. To do so:
- Add the following input tags (and separator span) to **showtranstatus.htm template:
<input type="submit" name="btnActive" value="Current Courses" title="courses that are currently in session"><span class="separator"></span>
<input type="hidden" name="activeCourses" value="ONLY" />
- Change the value and title of the btnCurrent button. E.g.
<input type="submit" name="btnCurrent" value="Upcoming Courses" title="courses that have not yet started" />
Other Registration History Options
- Payment Status - pay outstanding balances online.
- Pay Invoices - Pay Invoices option.
- My Certificates - allows them to print certificates.
- My Transcript - allows them to print an unofficial transcript.
Proxy History
If you are using the Proxy Registration feature, the logged on user can also view any proxy registrations they have created via ACEweb in their Registration History.
Note: staff members can also assign a proxy to registrations created in Student Manager. Once the proxy has been assigned, that user can log in and see those registrations in their Proxy History.
When viewing proxy registrations, a column is added to the listing with the registrant's name:
You can customize the column label by editing the 5th parameter of the FullName() function in the ProxyFlds field on ShowTranStatus.htm:
Scoping Completed Courses
You can scope the list of completed courses in two ways:
- Add parameters to a regstatus.awp?&ReqType=:COMP URL:
GROUP - set to one or more course grouping codes, with multiple codes should be delimited with commas. The completed courses list will be restricted to courses in the specified group(s).
CUTOFF - set to a numeric value equal to the time span you want the course history to cover.
- If the value is less than 10, the unit will be assumed to be in years and a cutoff year will be determined by subtracting that value from the current year. The completed course list will be restricted to courses whose beginning date was in or since the year specified.
- If set to 10 or more, the begin date must be within the specified number of days. (e.g. if set to 90, only courses that began in the past 90 days will be shown.)
Example:
/RegStatus.awp?&ReqType=:COMP&GROUP=ACE&CUTOFF=2
The above URL would display all completed courses the user took over the past 2 years in the ACE group.
- Add a form tag with the GROUP and CUTOFF parameters set in hidden fields:
html<form method="POST" action="/regstatus.awp"> <input type="hidden" name="Group" value="ACE" /> <input type="hidden" name="Cutoff" value="2" /> <input type="SUBMIT" NAME="btnComplete" value="Completed ACE Courses" /> </form>This will place a button on the page for the user to click:

Cancelling Registrations
If allowed, students and staff can cancel courses.